

X
Click here to view all steps
Don't show me again

Steps
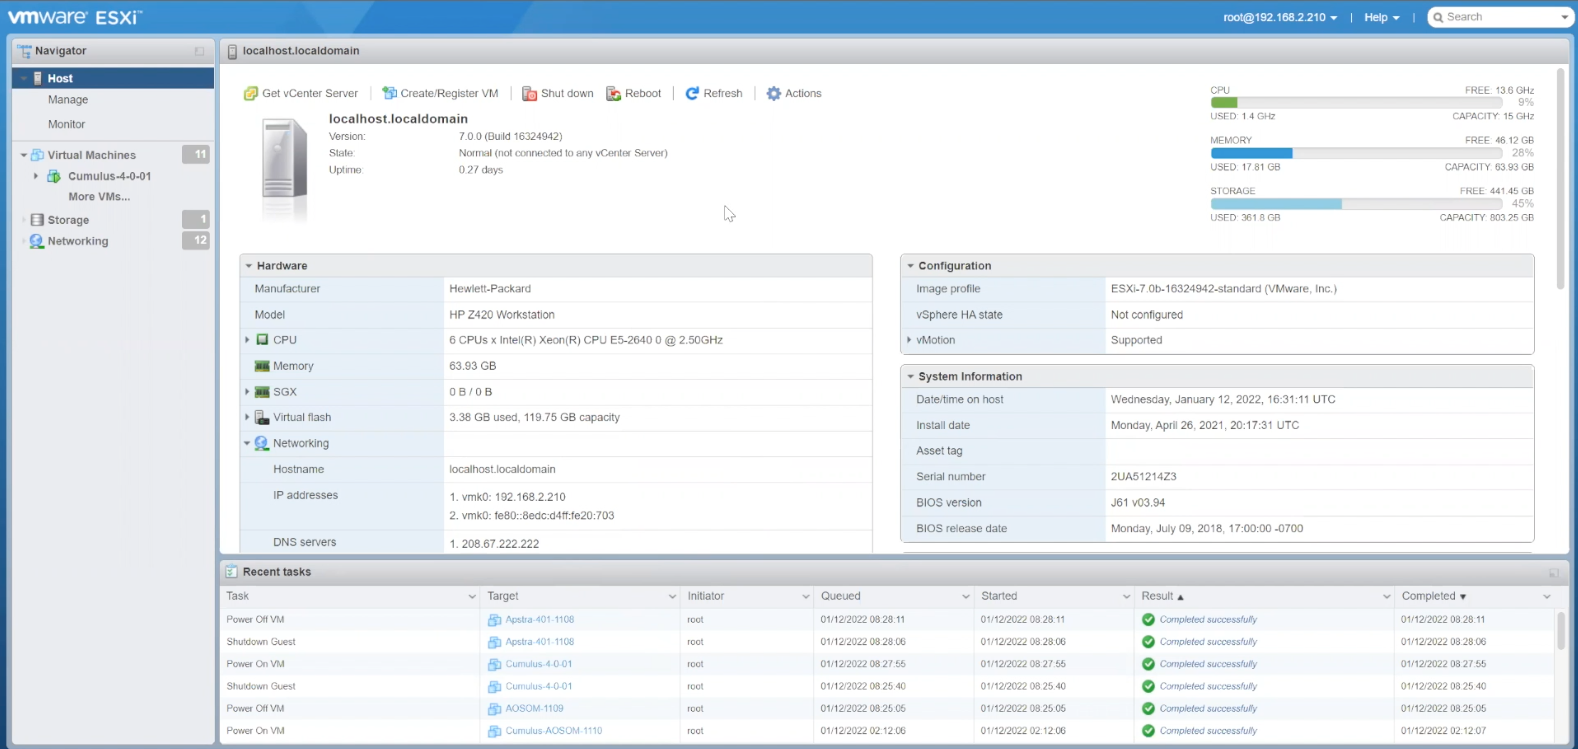
- %3Cp%3EIn%20this%20short%20walkthrough%2C%20we%5C%27re%20going%20to%20deploy%20Apstra%20starting%20with%20a%20VMware%20image%20or%20OVA%20.%20Here%20we%20have%20our%20VMware%20environment%20and%20we%5C%27re%20going%20to%20deploy%20a%20virtual%20machine%20from%20an%20OVA.%3C/p%3E
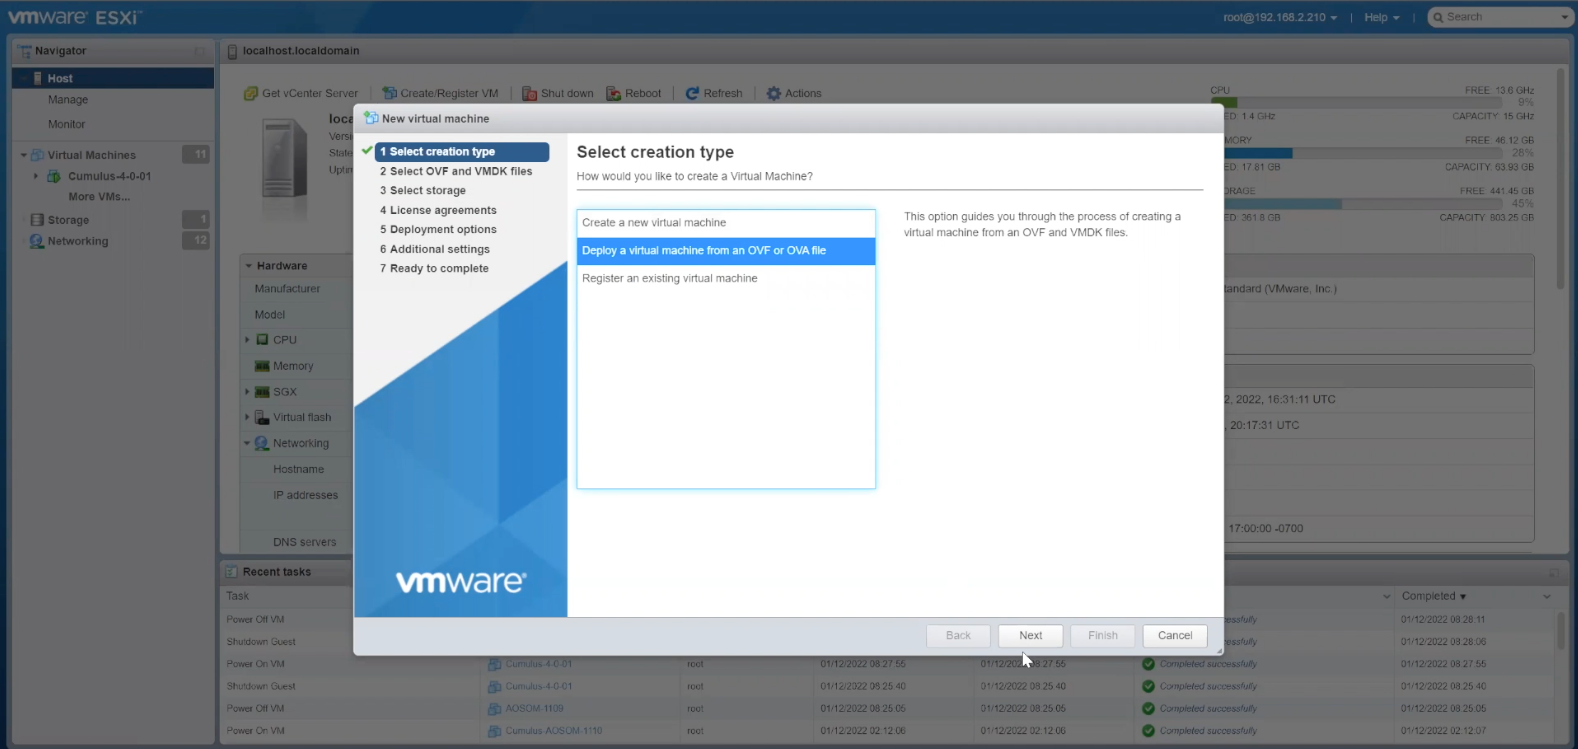
- Click%20the%20option%20to%20deploy%20a%20VM%20from%20an%20OVA%20file
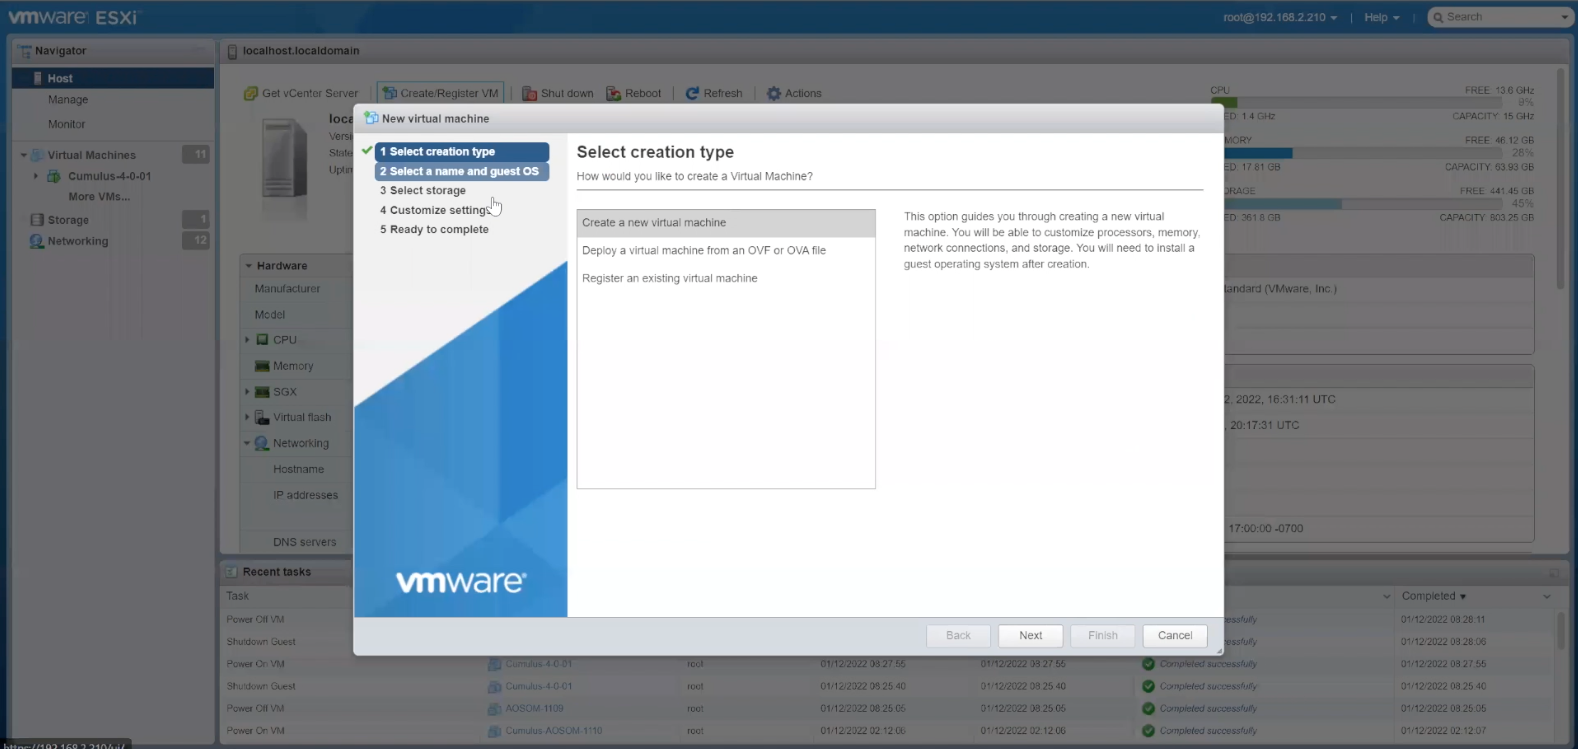
- Click next to deploy the VM
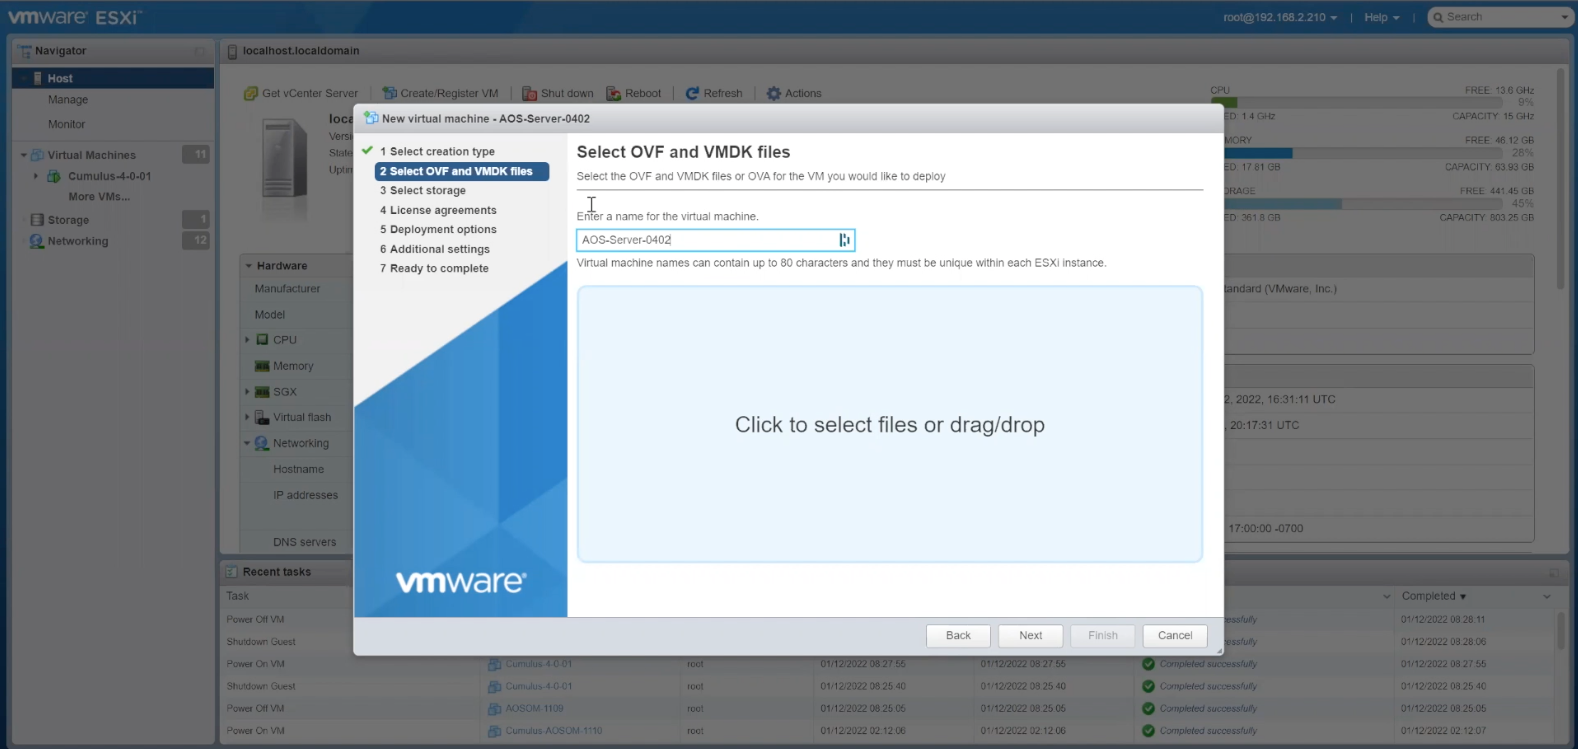
- Enter a name for the Virtual machine
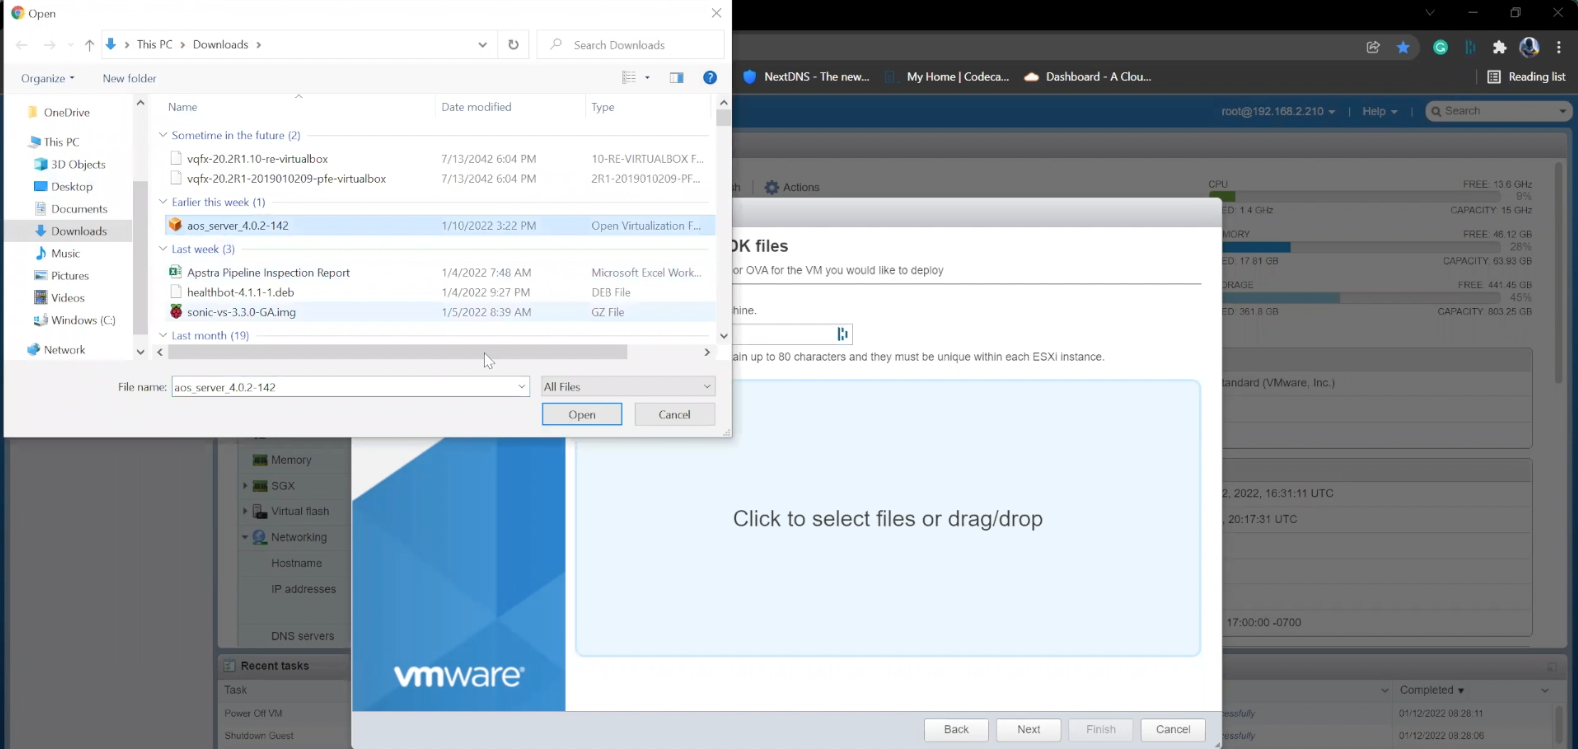
- Then%20we%20will%20drag%20and%20drop%20the%20OVF%20file
- Choose the OVF file
- Click Next
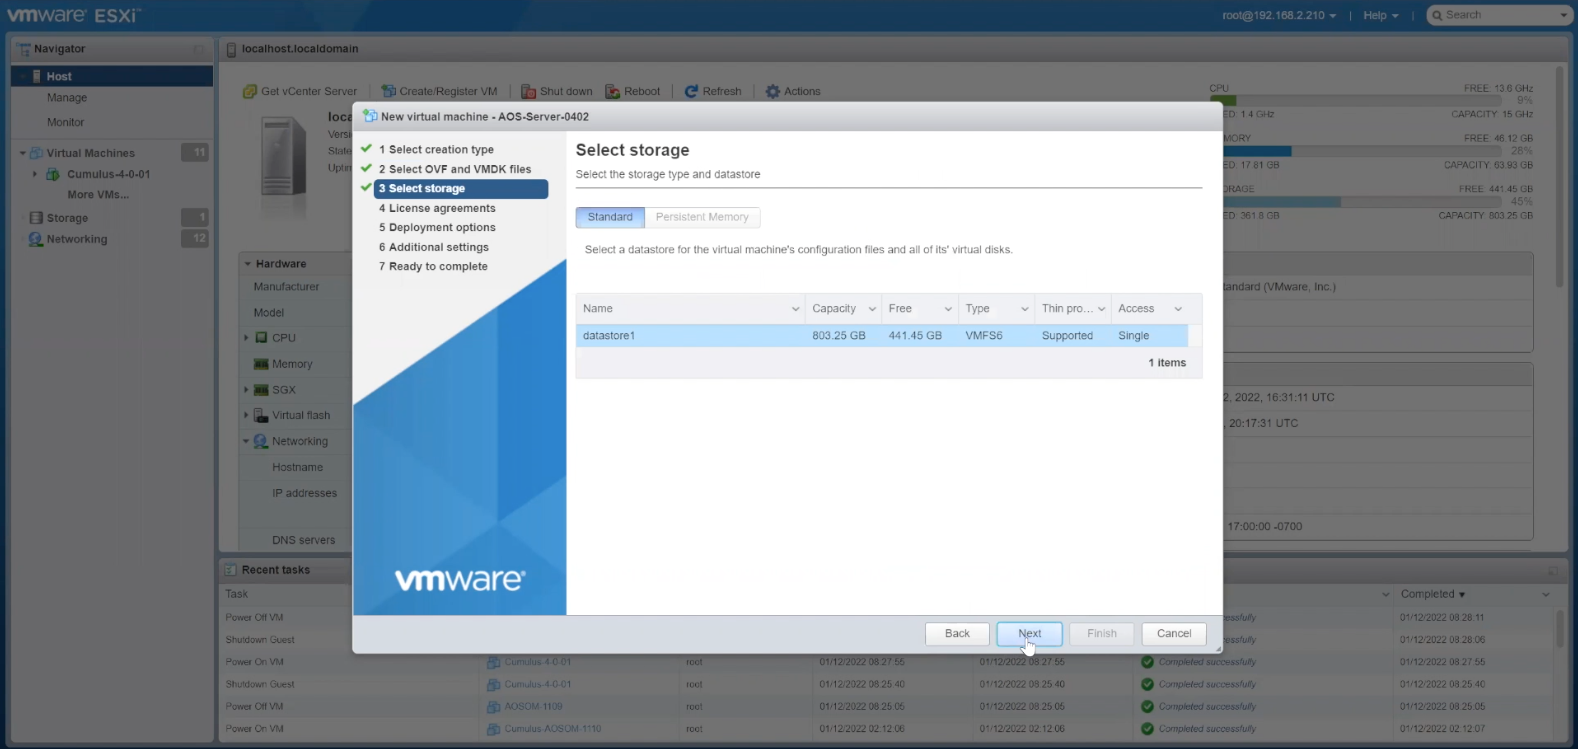
- Select the storage type and datastore
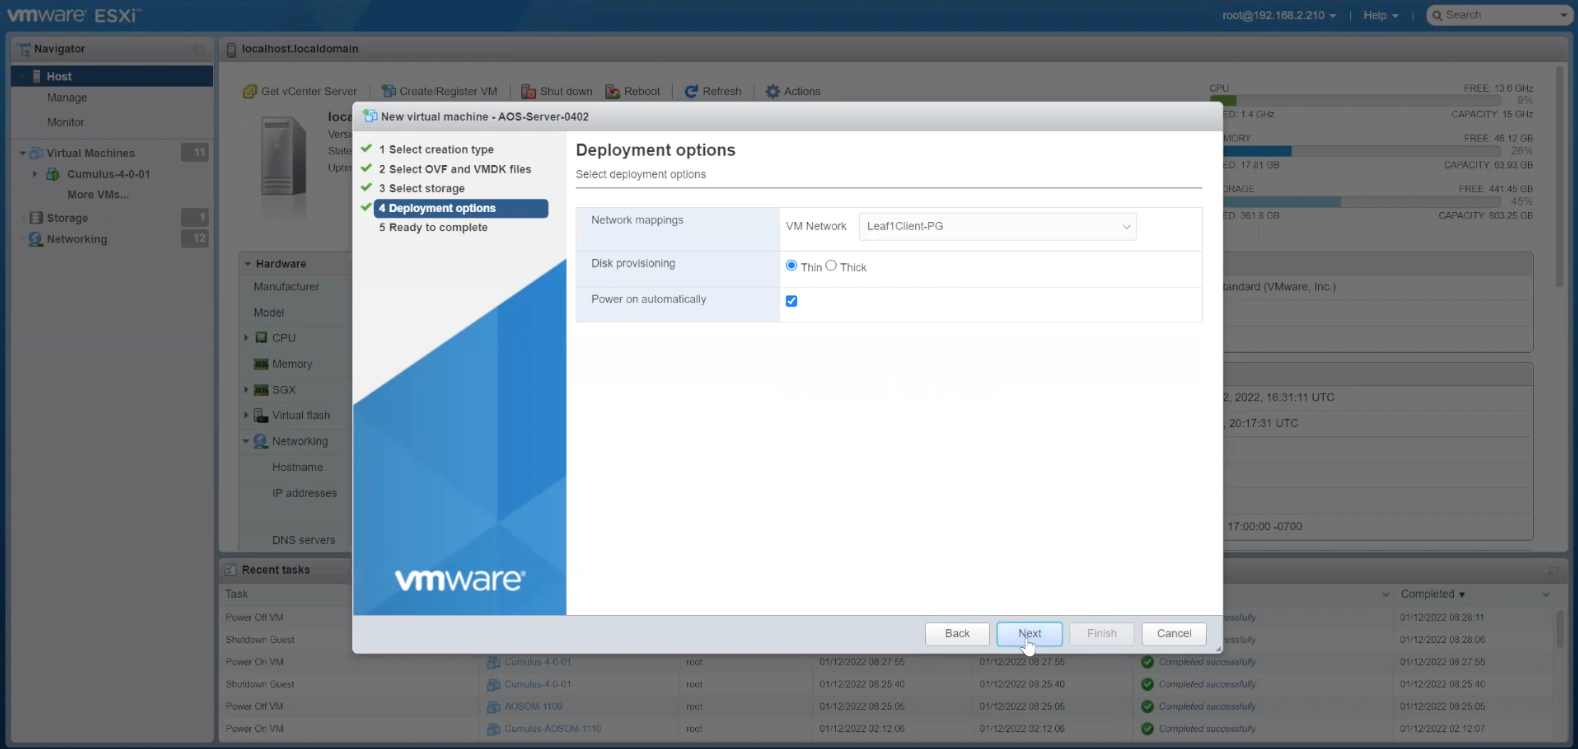
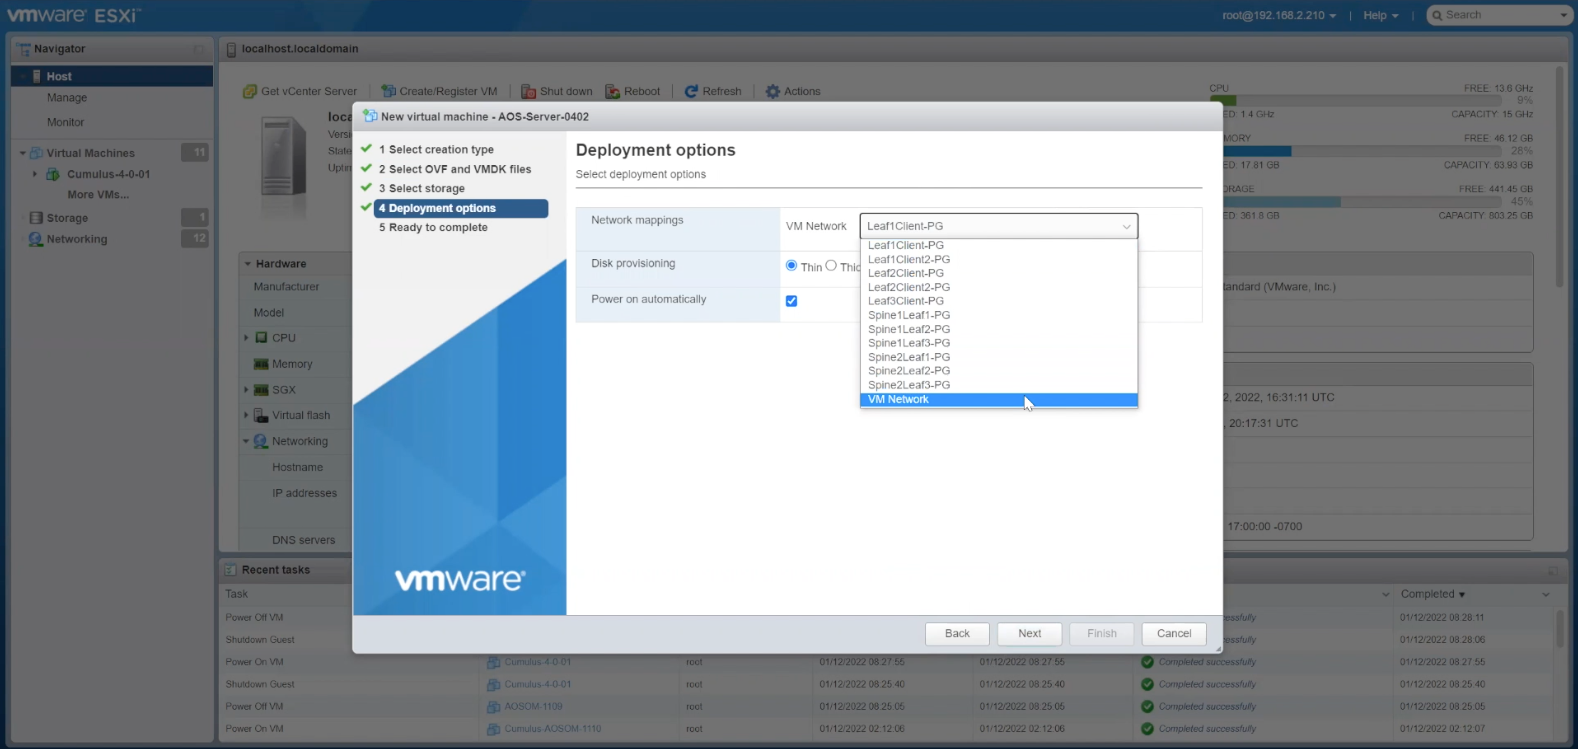
- Click to choose the VM Network
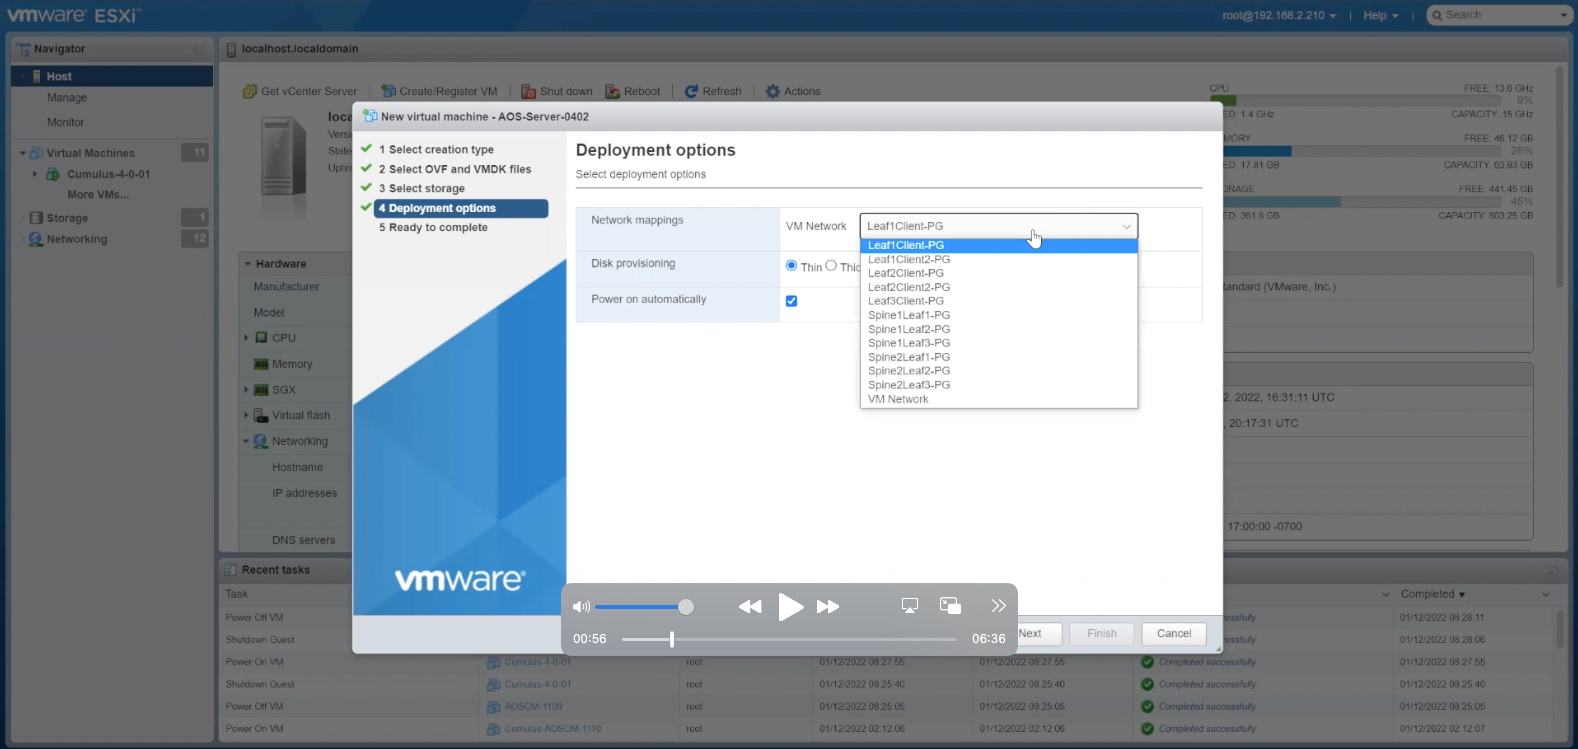
- Choose the VM Network from the drop down menu
- Confirm the VM Network option and the proceed to the next step
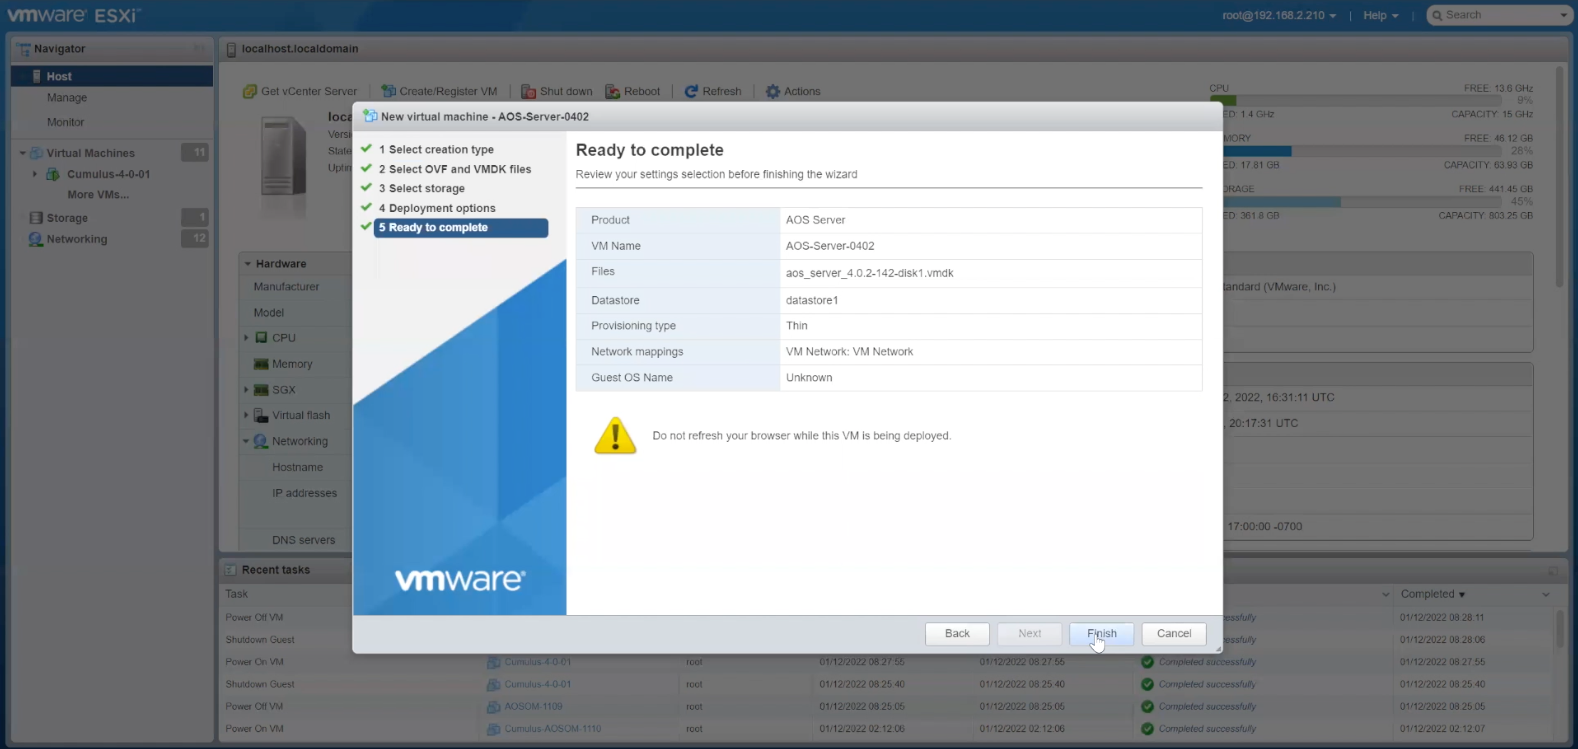
- Review the selection and then proceed to finish the set up
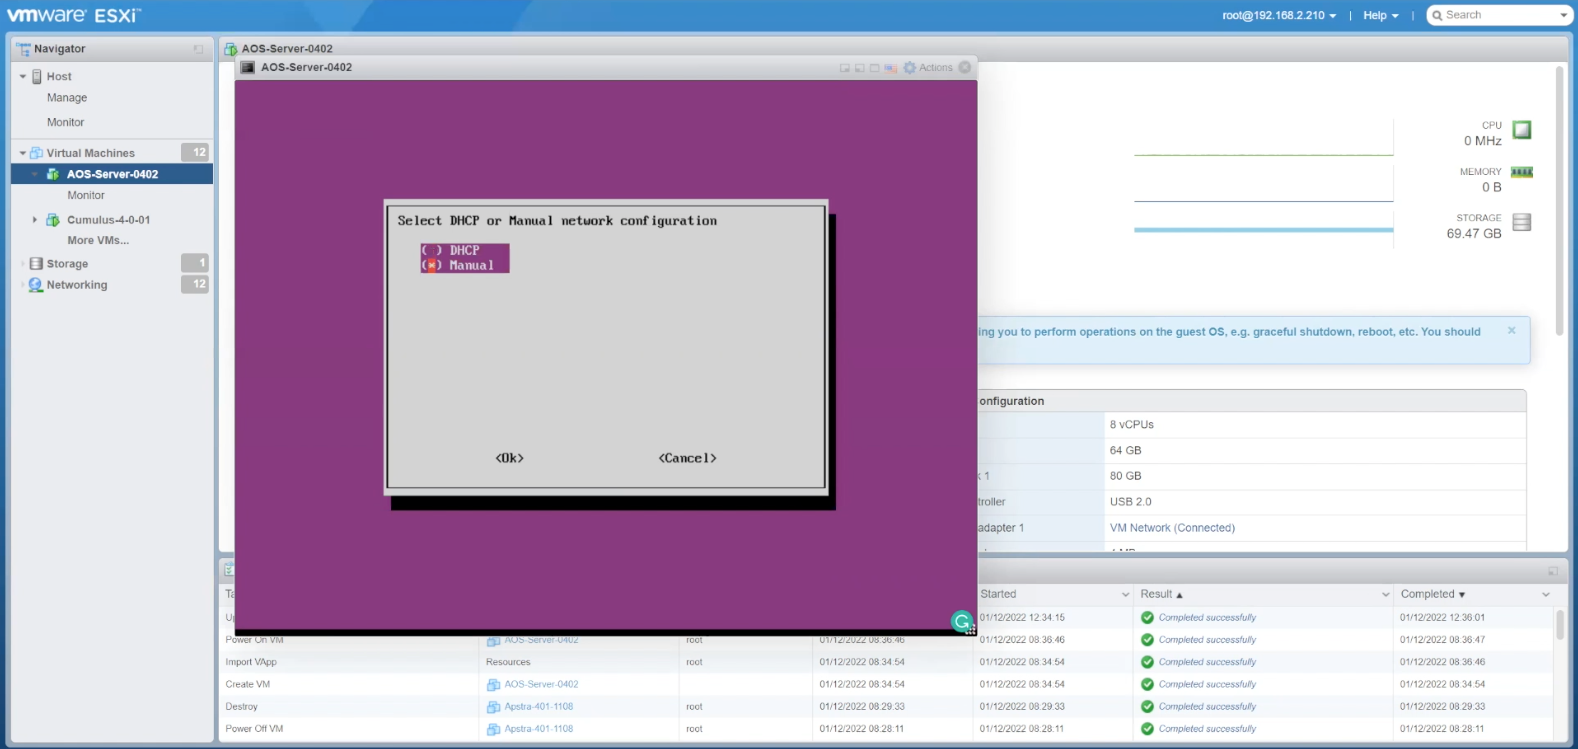
- %3Cp%20class%3D%22MsoNormal%22%20style%3D%22margin%3A%200in%3B%22%3ENext%20we%20need%20to%20assign%20network%20resources%20which%20can%20be%20set%20up%20with%26nbsp%3BDHCP%2C%20but%20in%20this%20example%2C%20we%20will%20pick%20an%20IP%20address%20for%20this%20device.%3C/p%3E
- Select the Network option
- Click OK
- Enter the Gateway IP address and proceed
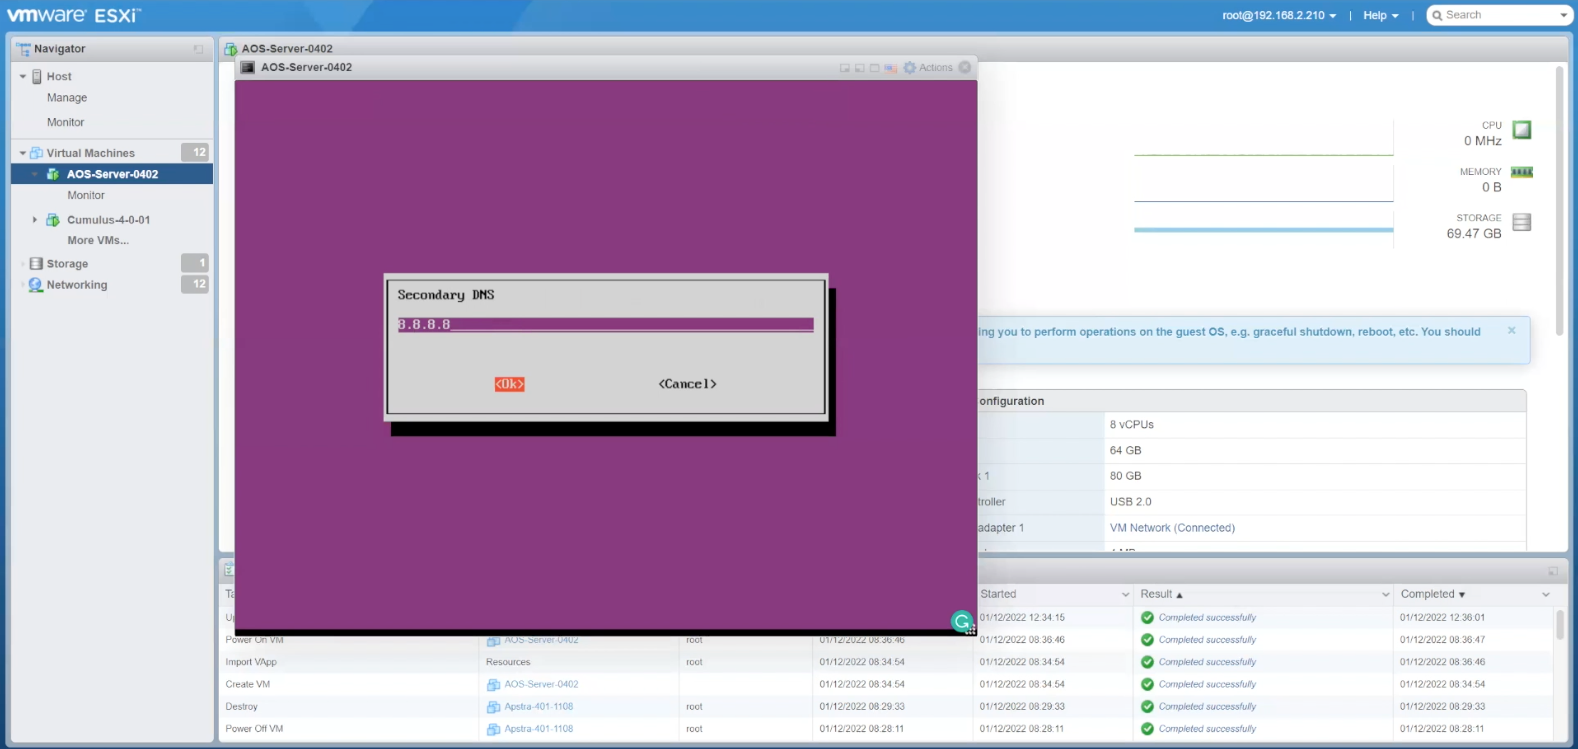
- Add the secondary DNS and then proceed
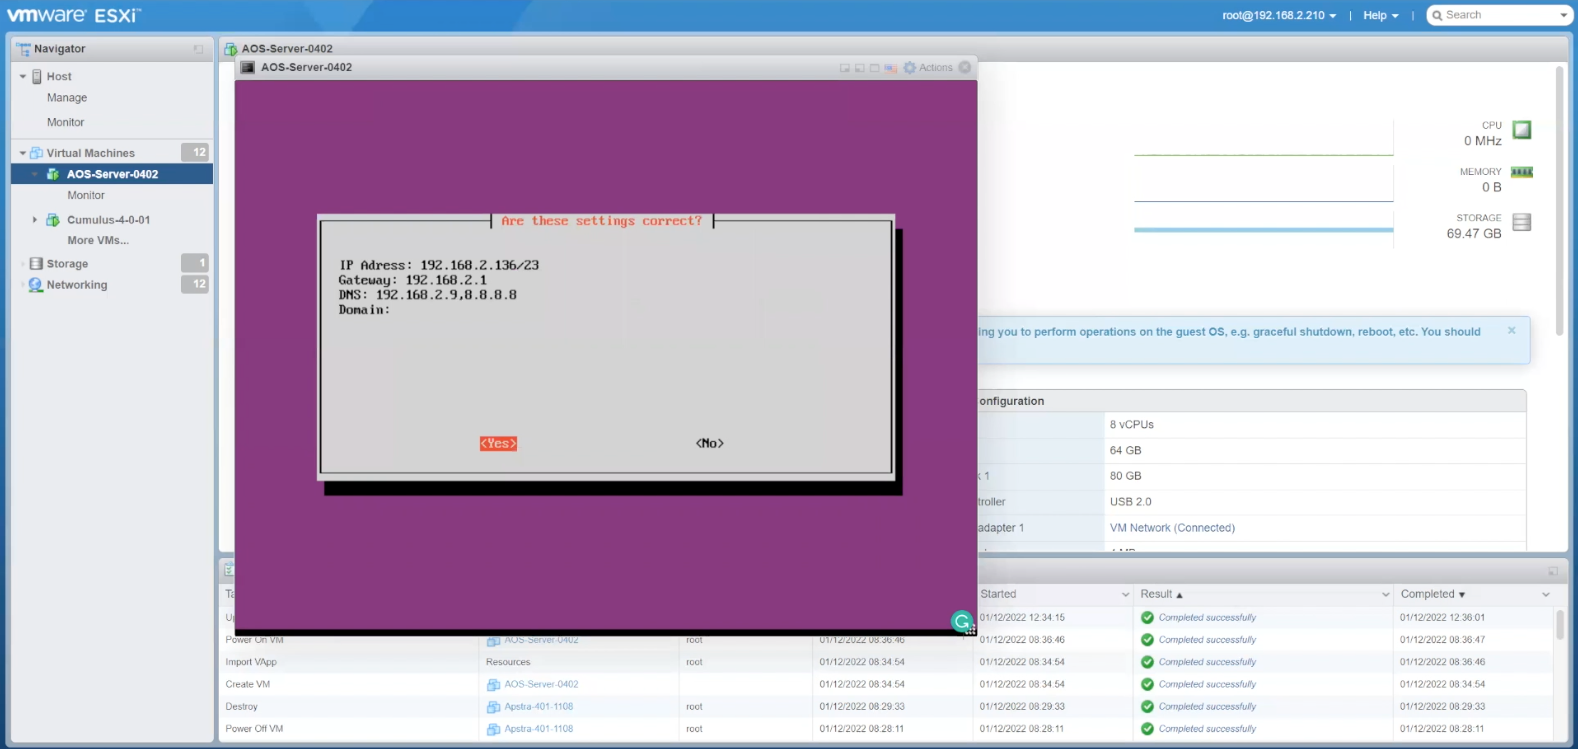
- Confirm the settings
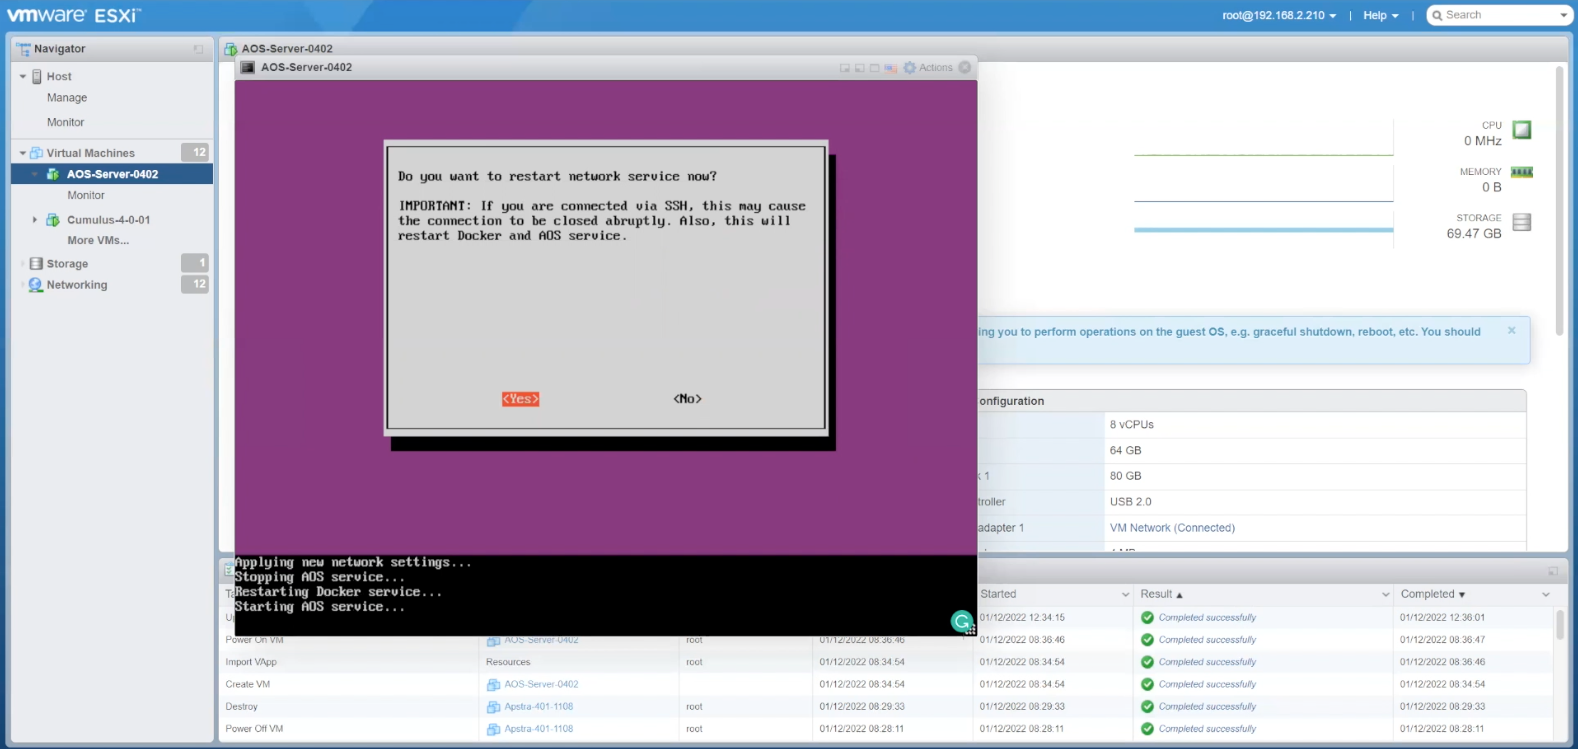
- Restart the network service now
- Click OK to proceed to the next step
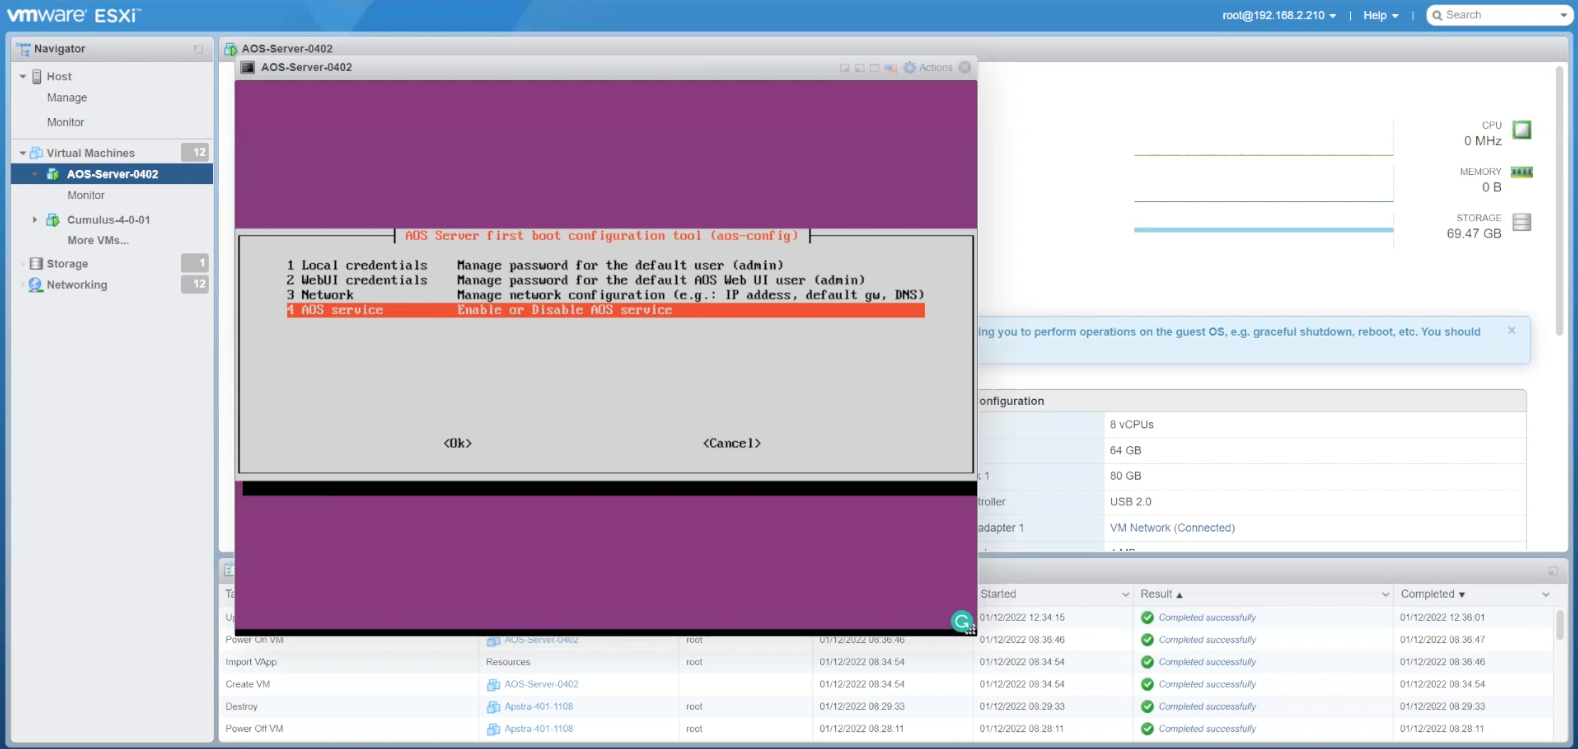
- We are now ready to turn on the Apstra service
- Confirm the AOS status as Start
- End
Steps
- %3Cp%3EIn%20this%20short%20walkthrough%2C%20we%5C%27re%20going%20to%20deploy%20Apstra%20starting%20with%20a%20VMware%20image%20or%20OVA%20.%20Here%20we%20have%20our%20VMware%20environment%20and%20we%5C%27re%20going%20to%20deploy%20a%20virtual%20machine%20from%20an%20OVA.%3C/p%3E
- Click%20the%20option%20to%20deploy%20a%20VM%20from%20an%20OVA%20file
- Click next to deploy the VM
- Enter a name for the Virtual machine
- Then%20we%20will%20drag%20and%20drop%20the%20OVF%20file
- Choose the OVF file
- Click Next
- Select the storage type and datastore
- Click to choose the VM Network
- Choose the VM Network from the drop down menu
- Confirm the VM Network option and the proceed to the next step
- Review the selection and then proceed to finish the set up
- %3Cp%20class%3D%22MsoNormal%22%20style%3D%22margin%3A%200in%3B%22%3ENext%20we%20need%20to%20assign%20network%20resources%20which%20can%20be%20set%20up%20with%26nbsp%3BDHCP%2C%20but%20in%20this%20example%2C%20we%20will%20pick%20an%20IP%20address%20for%20this%20device.%3C/p%3E
- Select the Network option
- Click OK
- Enter the Gateway IP address and proceed
- Add the secondary DNS and then proceed
- Confirm the settings
- Restart the network service now
- Click OK to proceed to the next step
- We are now ready to turn on the Apstra service
- Confirm the AOS status as Start
- End
