
X
Click here to view all steps
Don't show me again

Steps
- Let%20us%20begin%20by%20creating%20a%20Freeform%20Blueprint
- Click Edit to create a new Blueprint
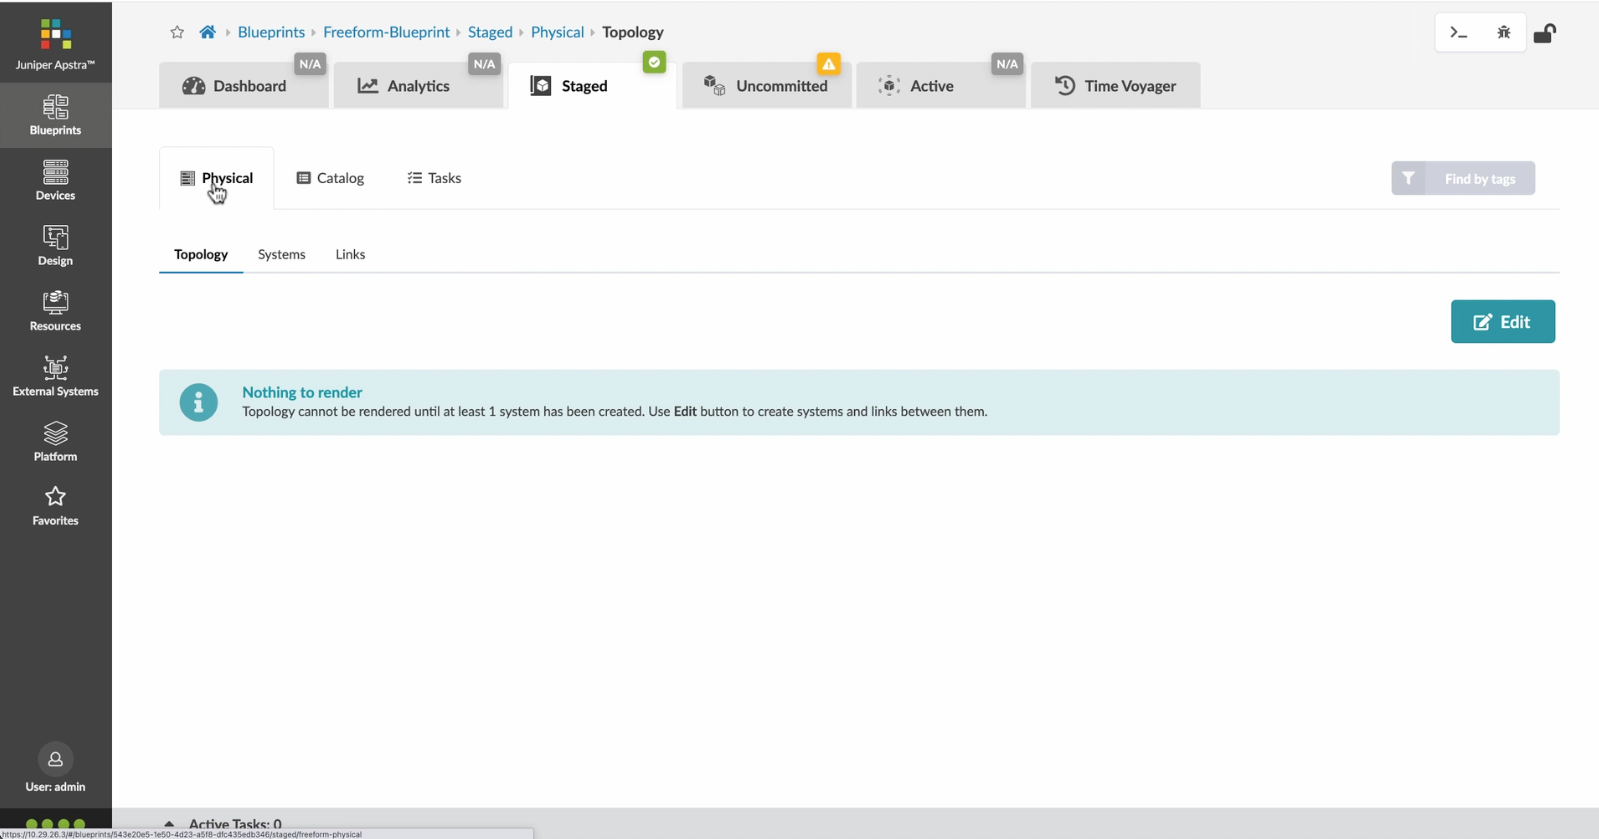
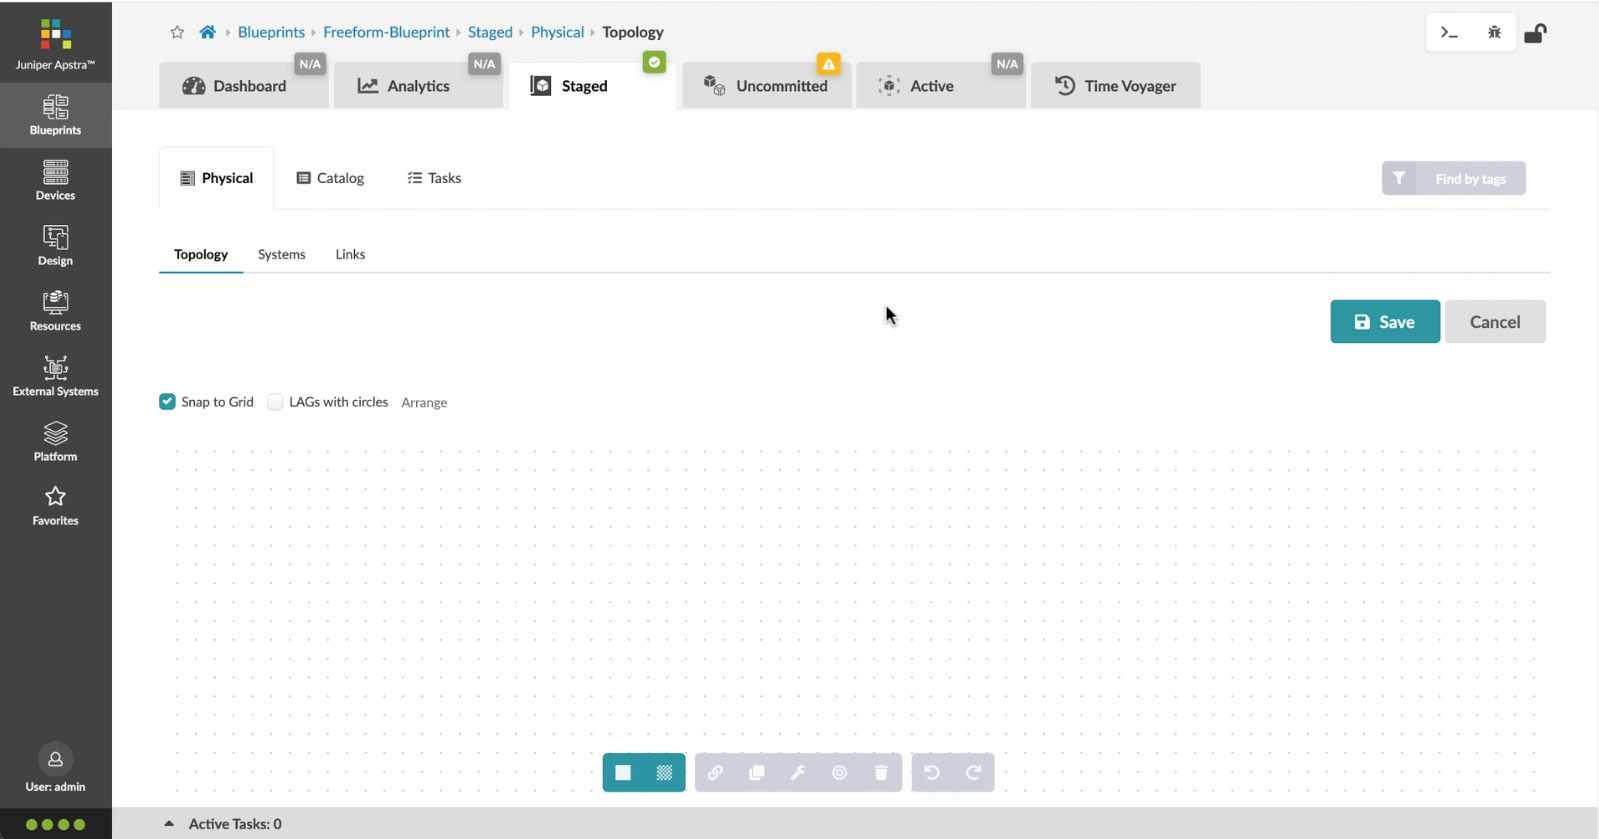
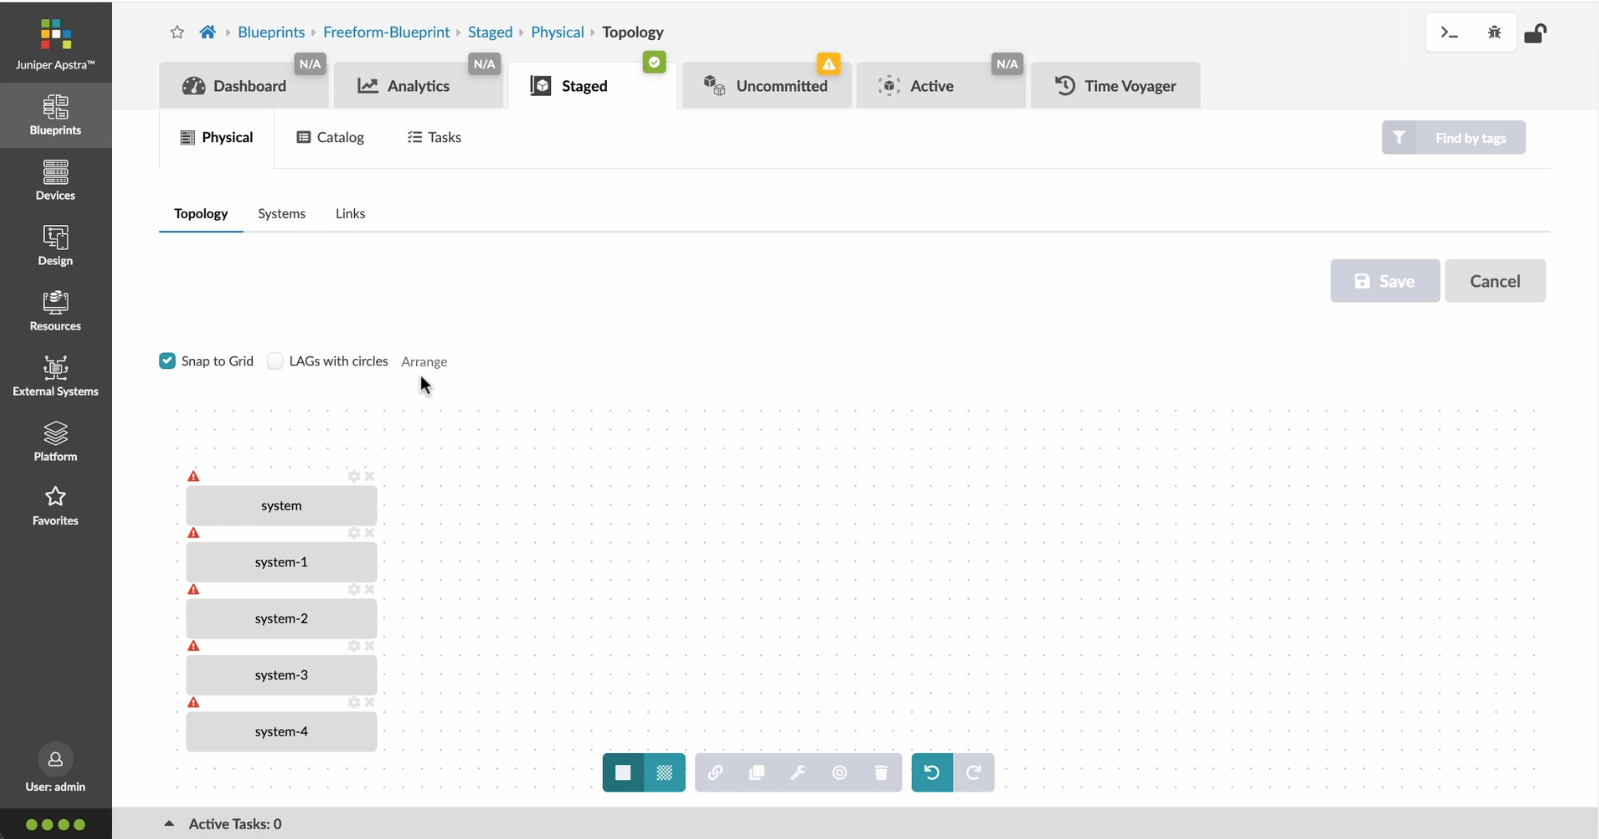
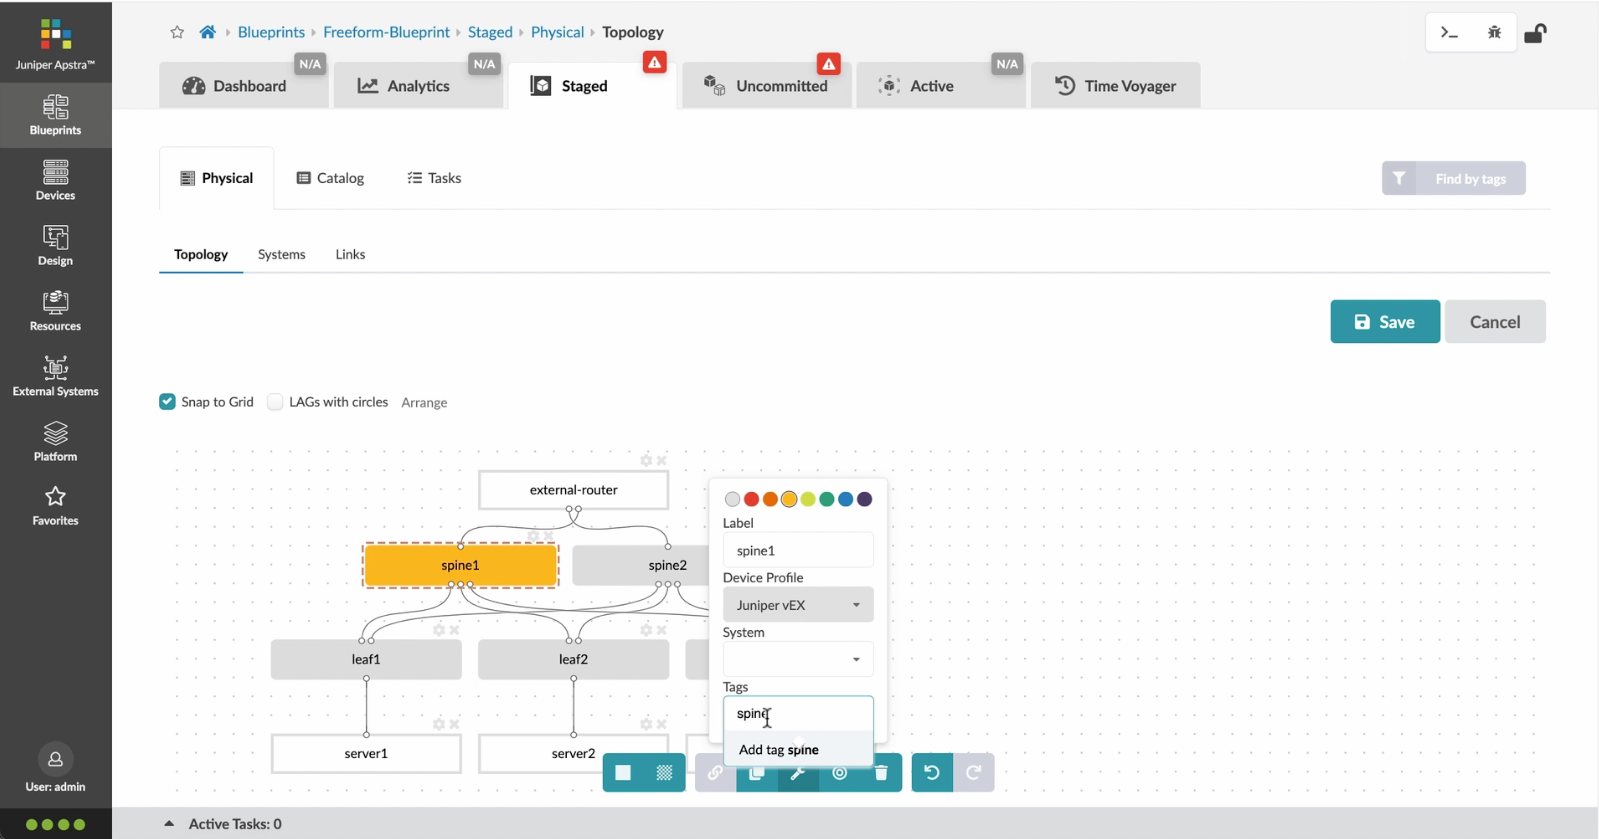
- %3Cp%3EWe%20will%20use%20the%20canvas%20to%20add%20systems%20to%20the%20topology.%20These%20systems%20can%20be%20internal%20systems%20which%20are%20managed%20by%20Apstra%20or%20external%20systems%20which%20are%20not%20managed%20by%20Apstra.%3C/p%3E
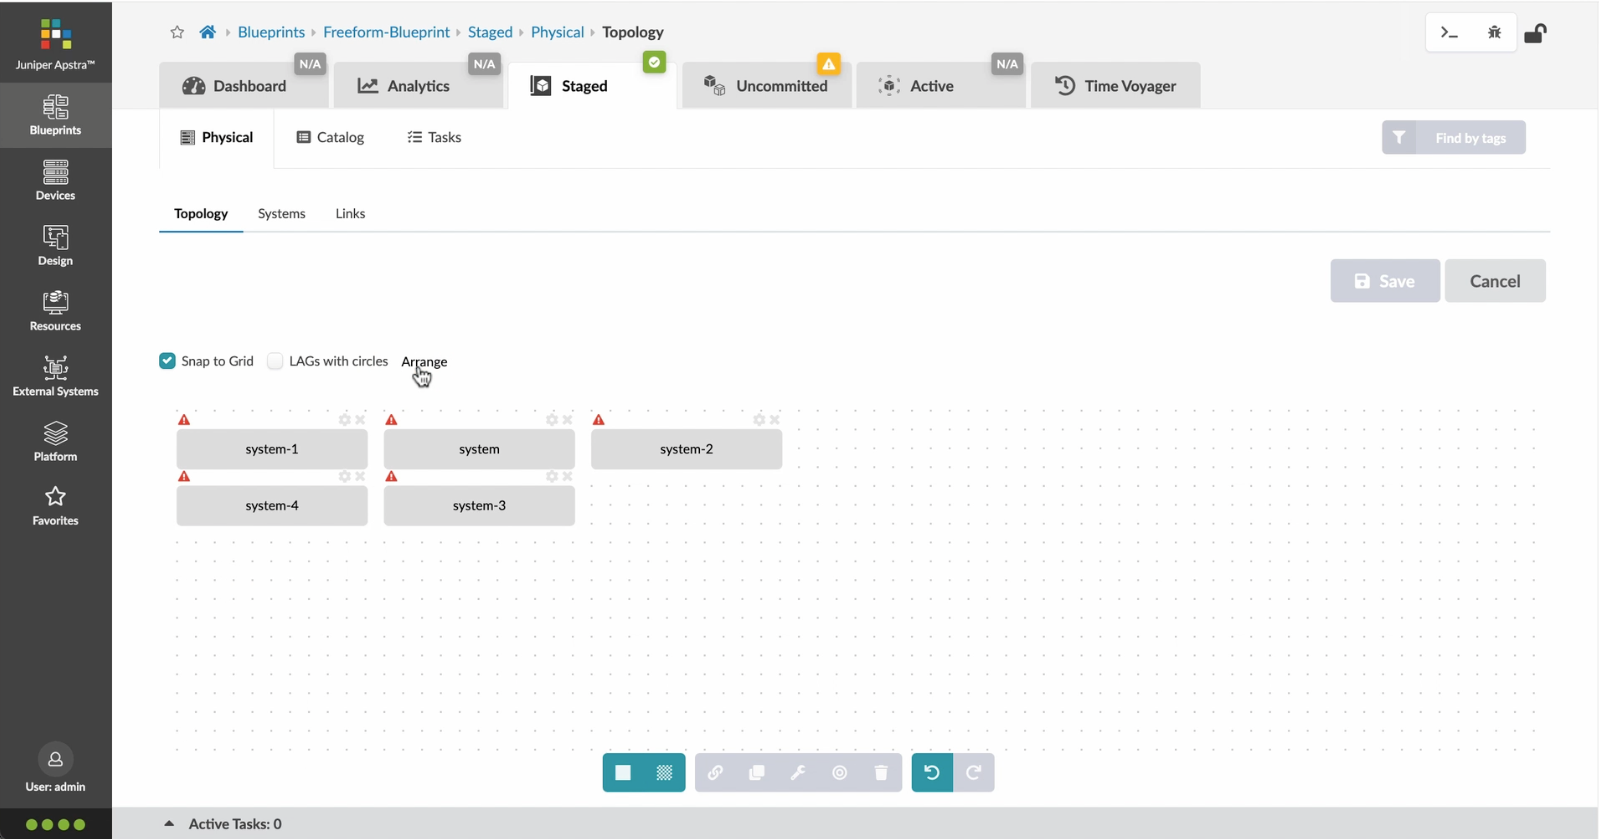
- Click%20to%20arrange%20the%20systems%20on%20the%20canvas
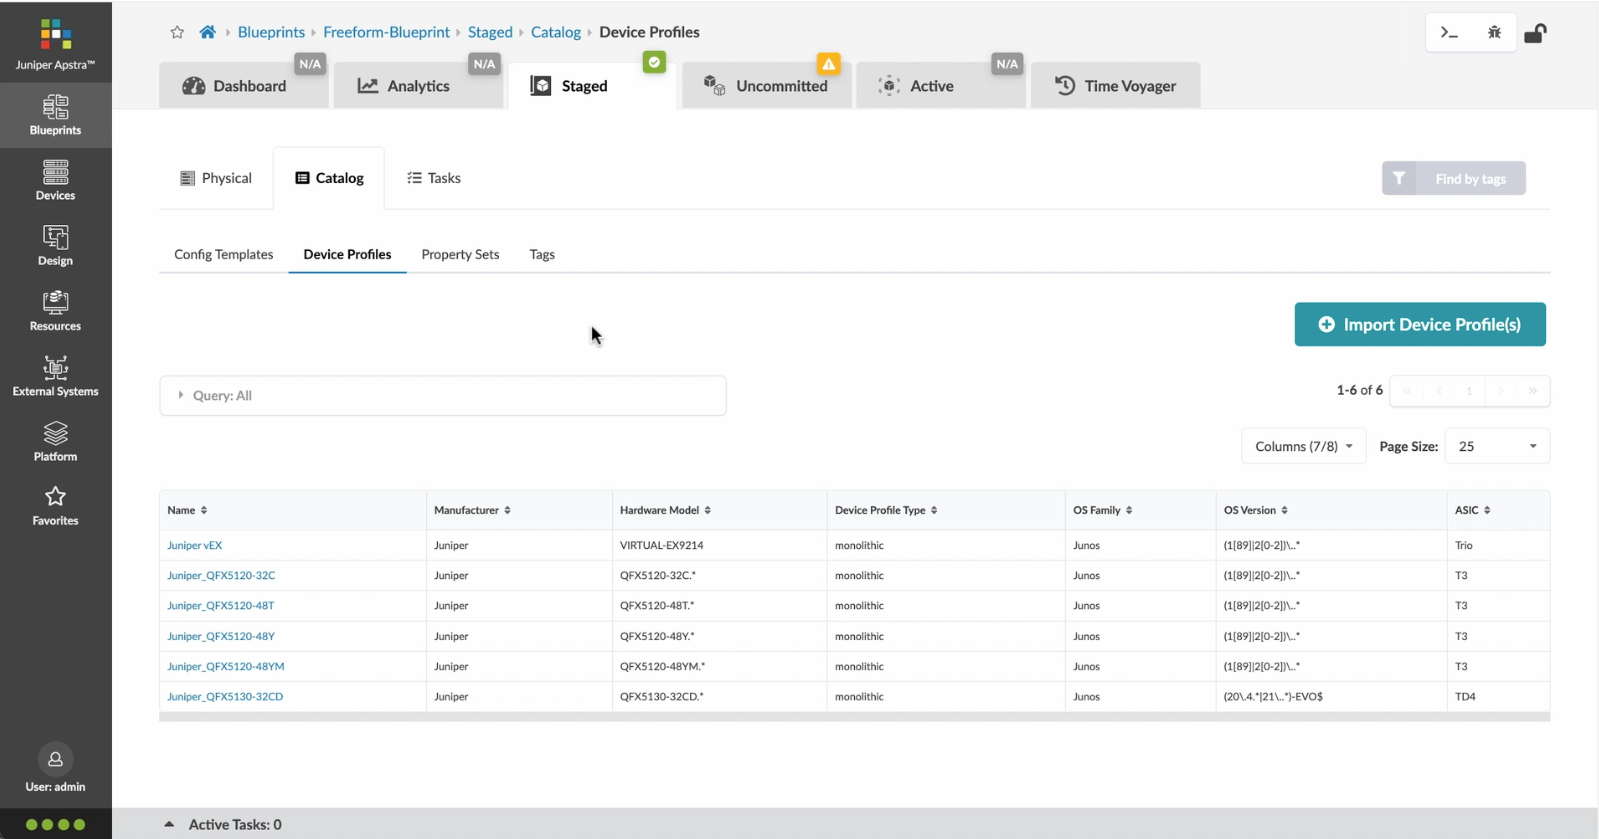
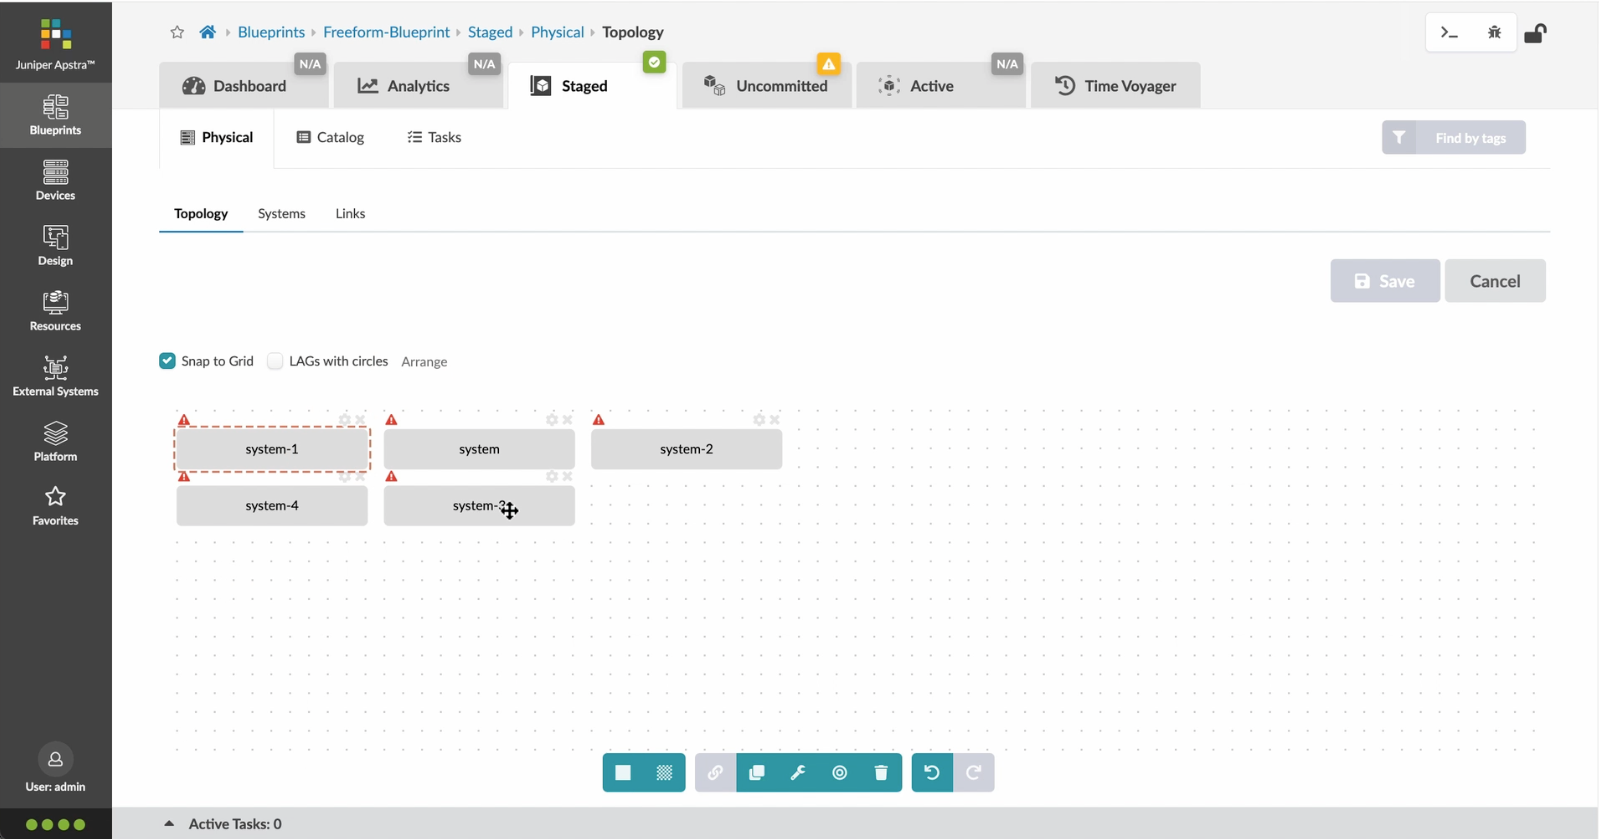
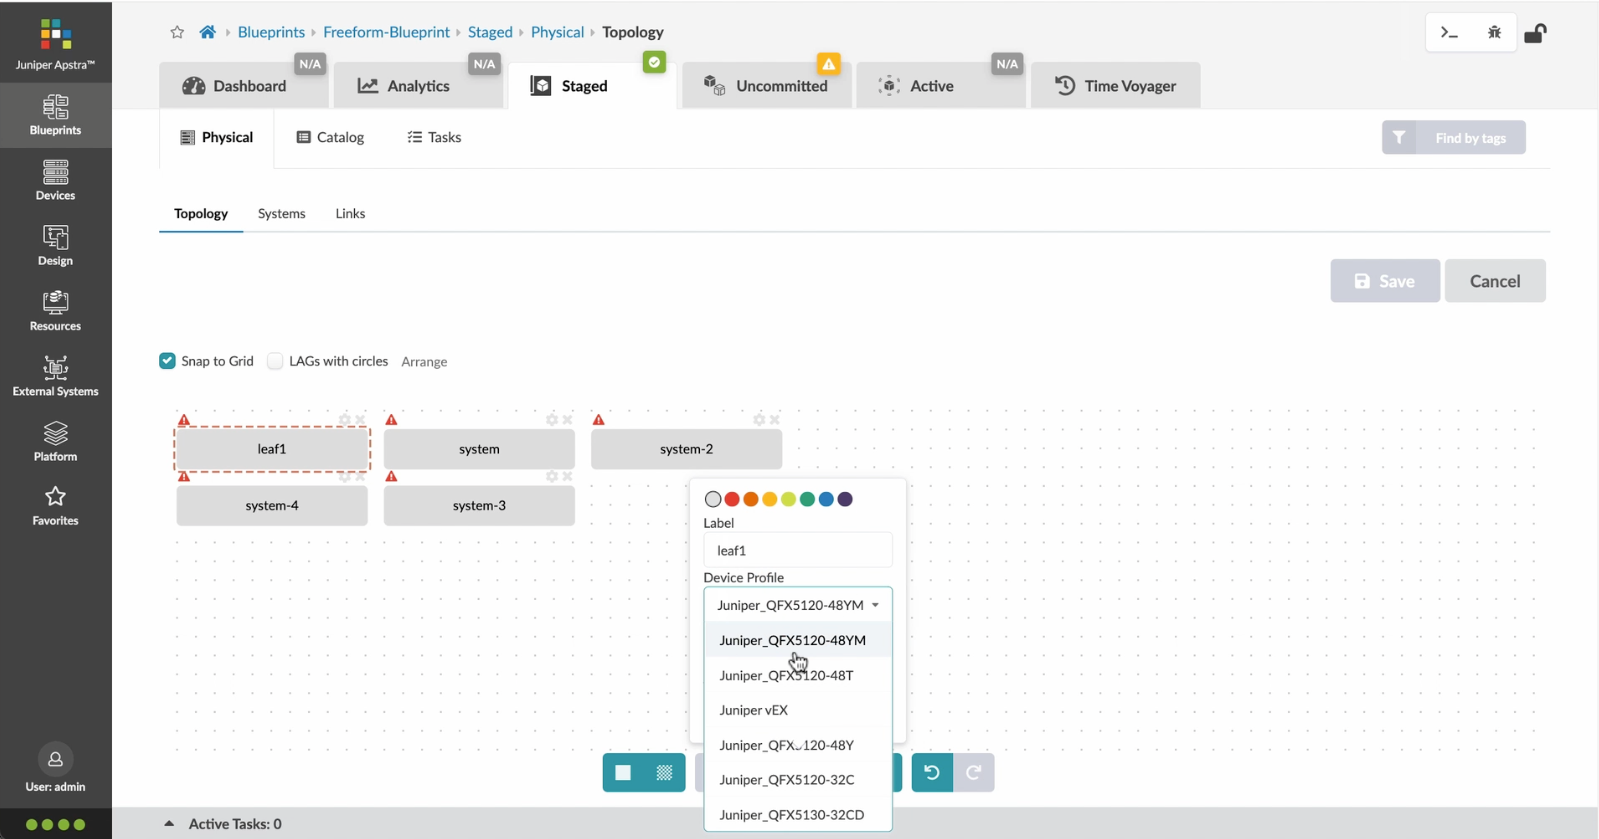
- We%20can%20choose%20a%20device%20profile%20to%20model%20the%20hardware%20characteristics
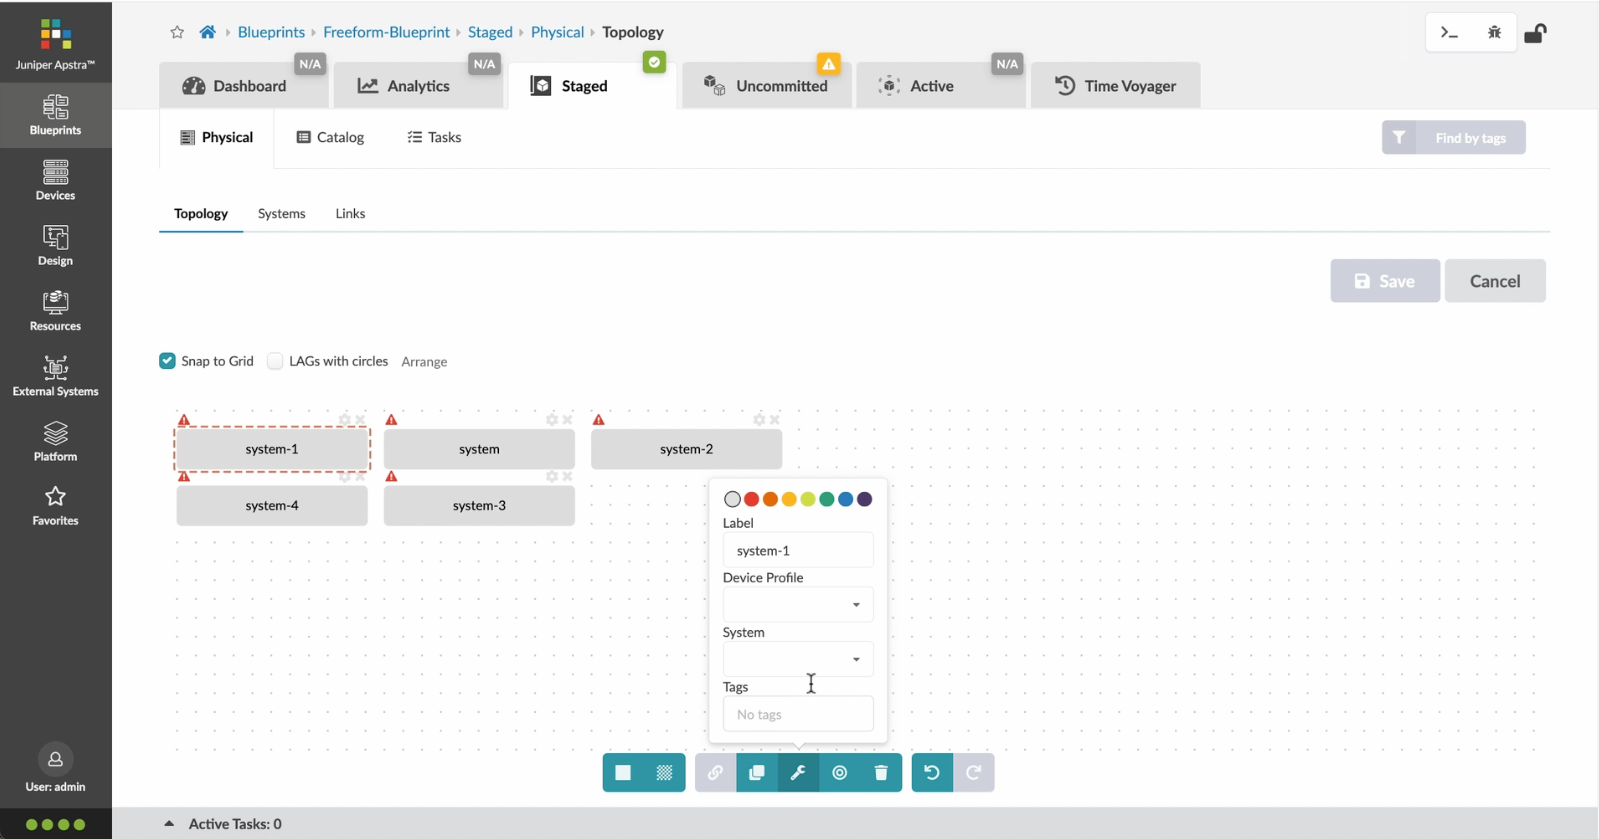
- Click to start modelling the system
- Choose%20a%20device%20profile%20from%20the%20drop%20down%20menu
- Choose the desired Device Profile
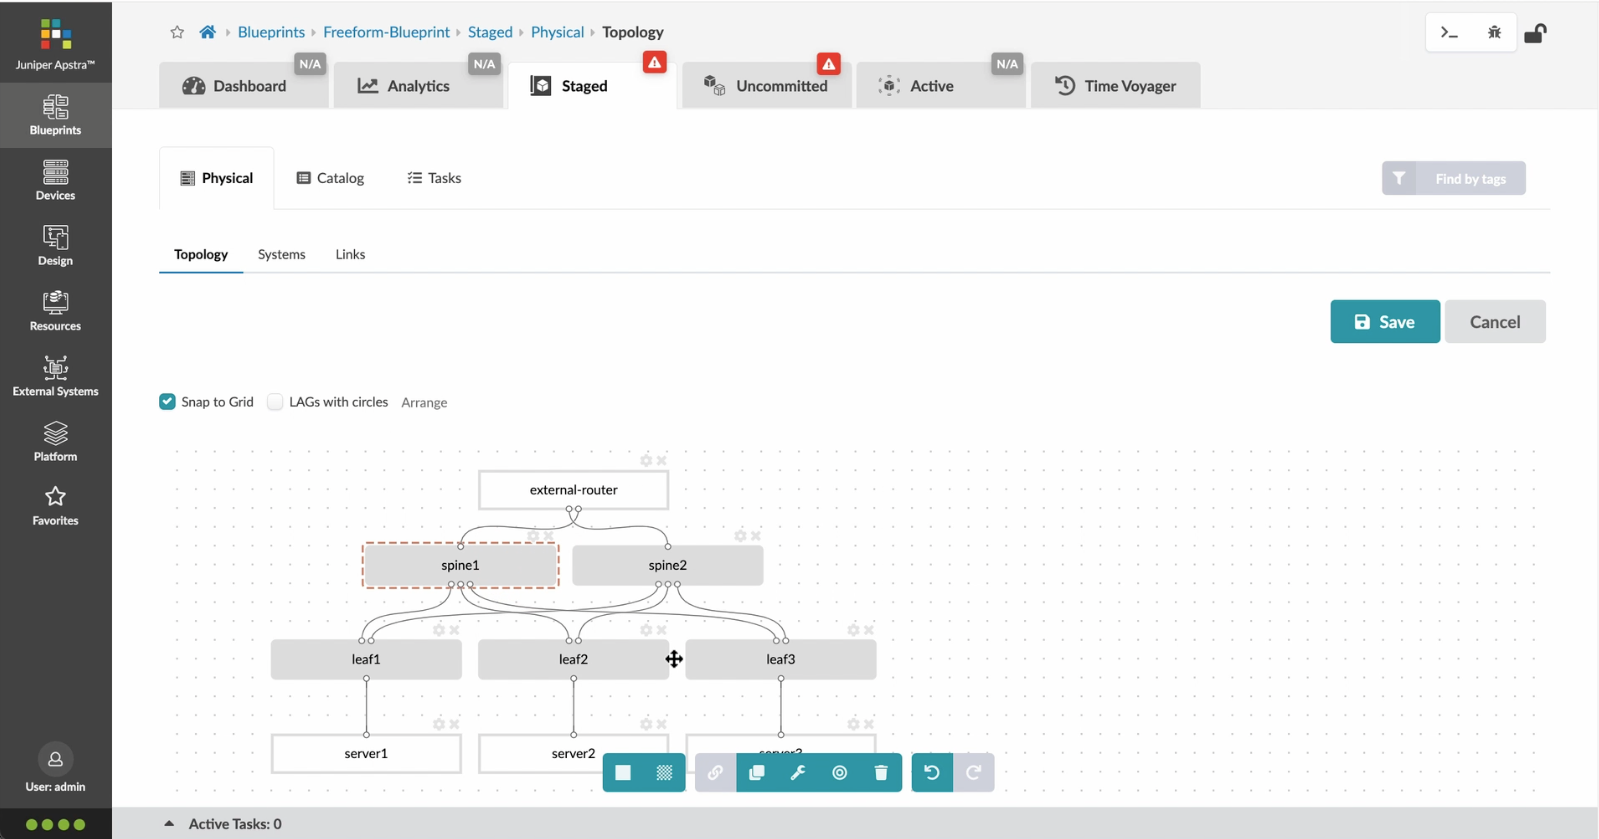
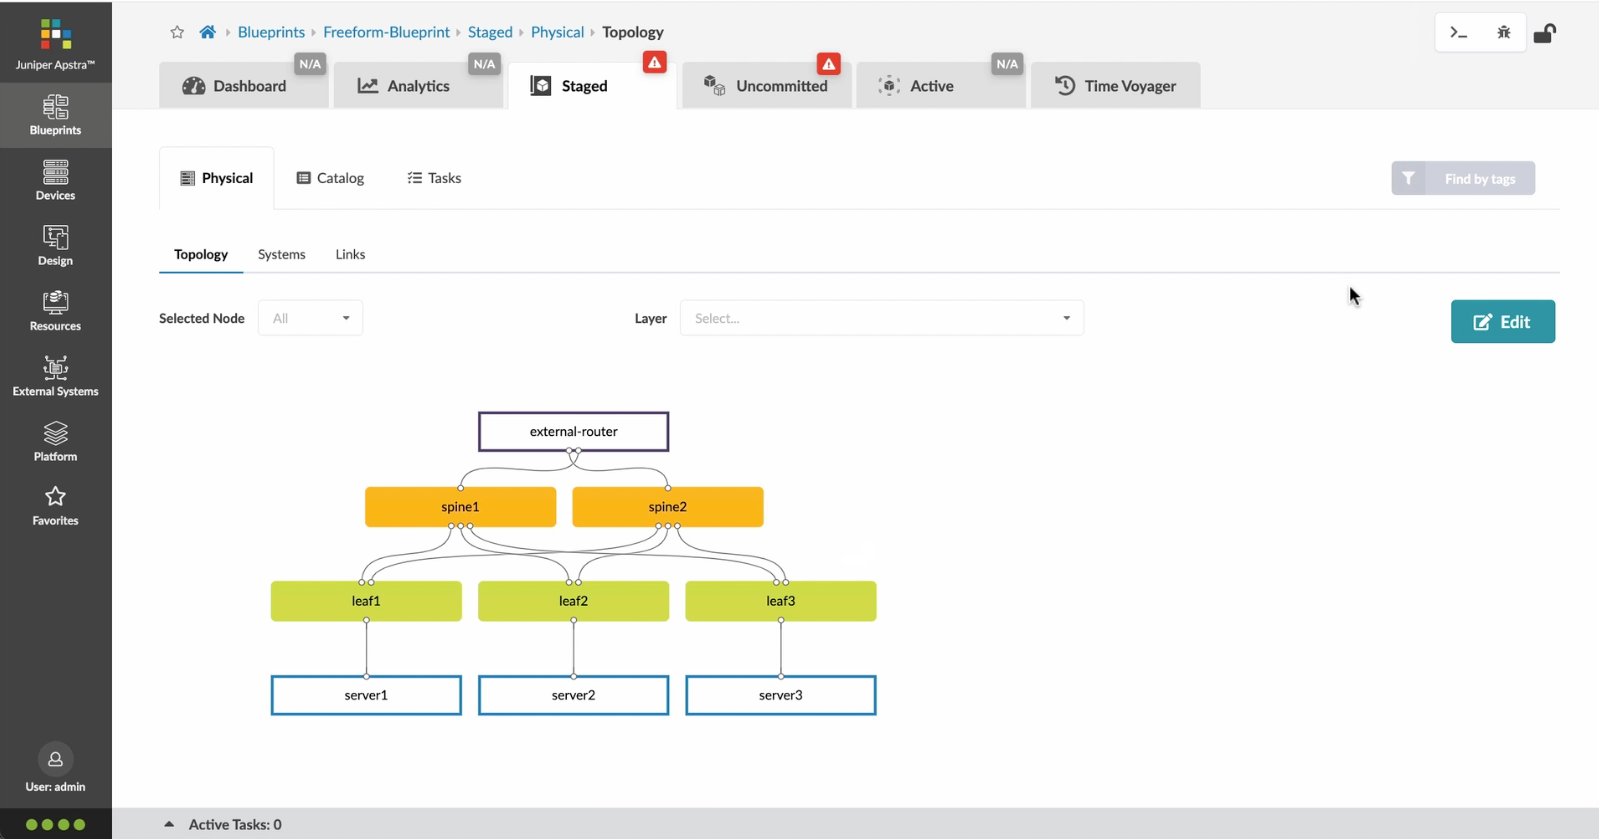
- Complete desining by adding links between the systems as desired
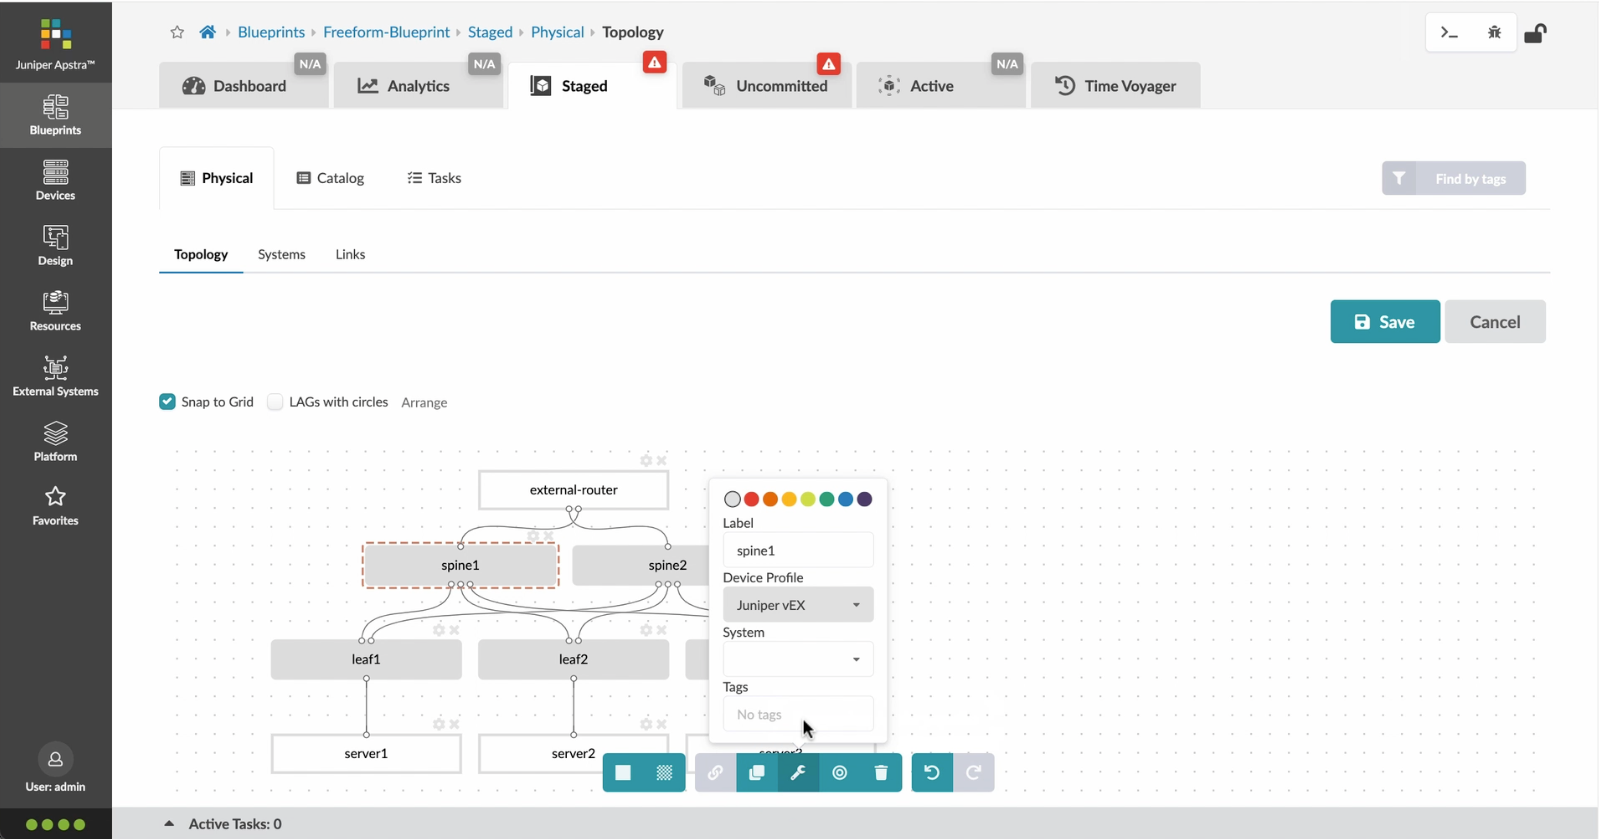
- Enrich the topology
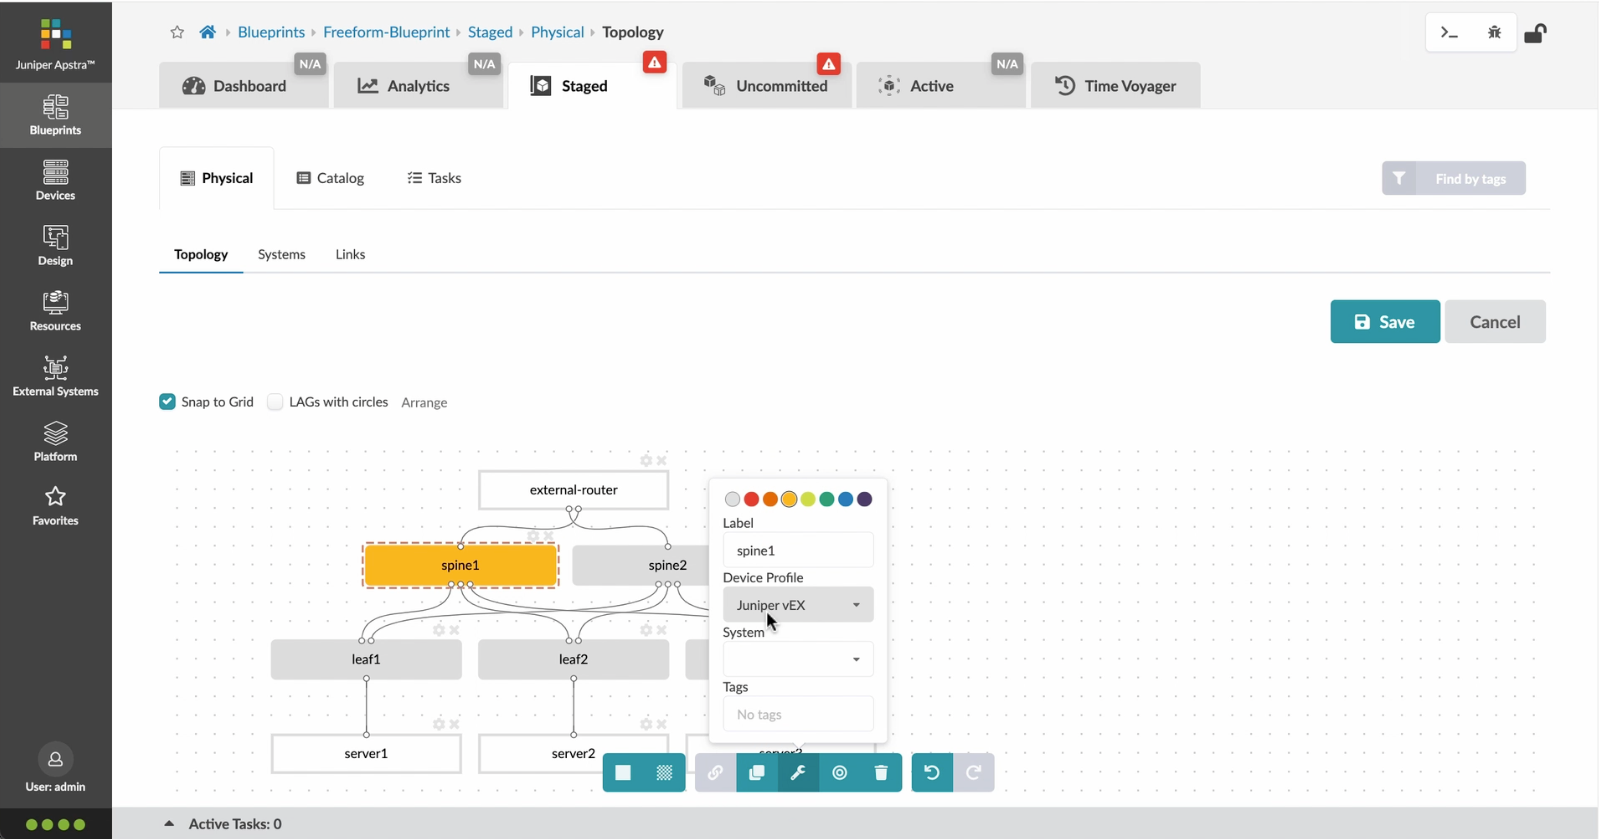
- Click to choose the desired color
- Click to assign a tag for easy identification
- Choose a tag
- Topology viewing options
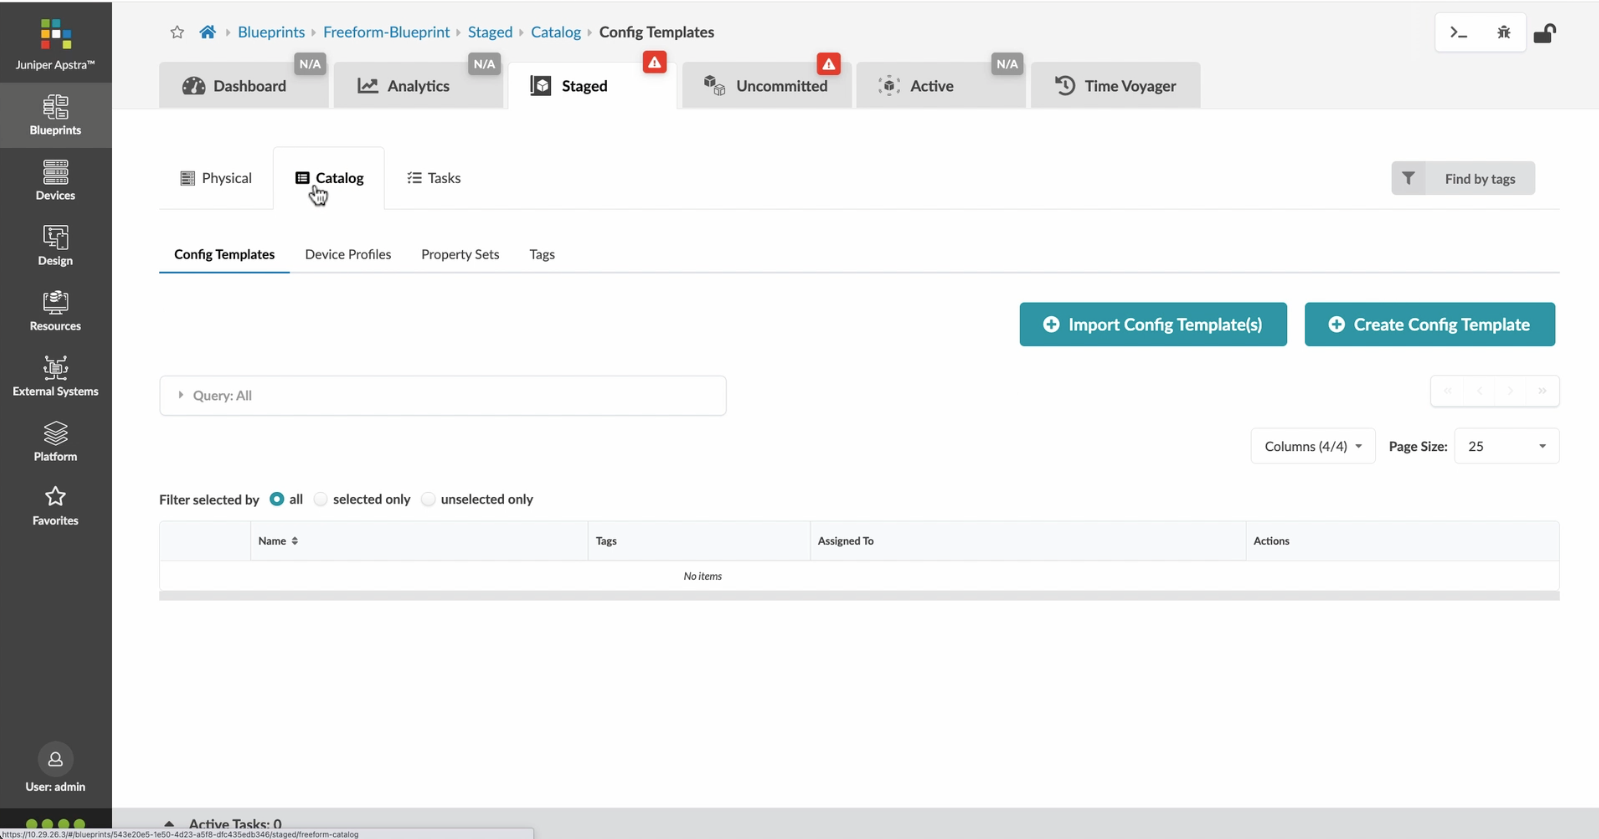
- %3Cp%3EOnce%20we%20have%20finished%20the%20topology%2C%20we%20can%20create%20a%20config%20template%20which%20can%20later%20be%20assigned%20to%20each%20system%20for%20deployment.%20Config%20templates%20can%20be%20typed%20in%20the%20GUI%2C%20copy%20and%20pasted%26nbsp%3B%20from%20another%20text%20editor%20or%20imported%20from%20a%20JSON%20file.%3C/p%3E
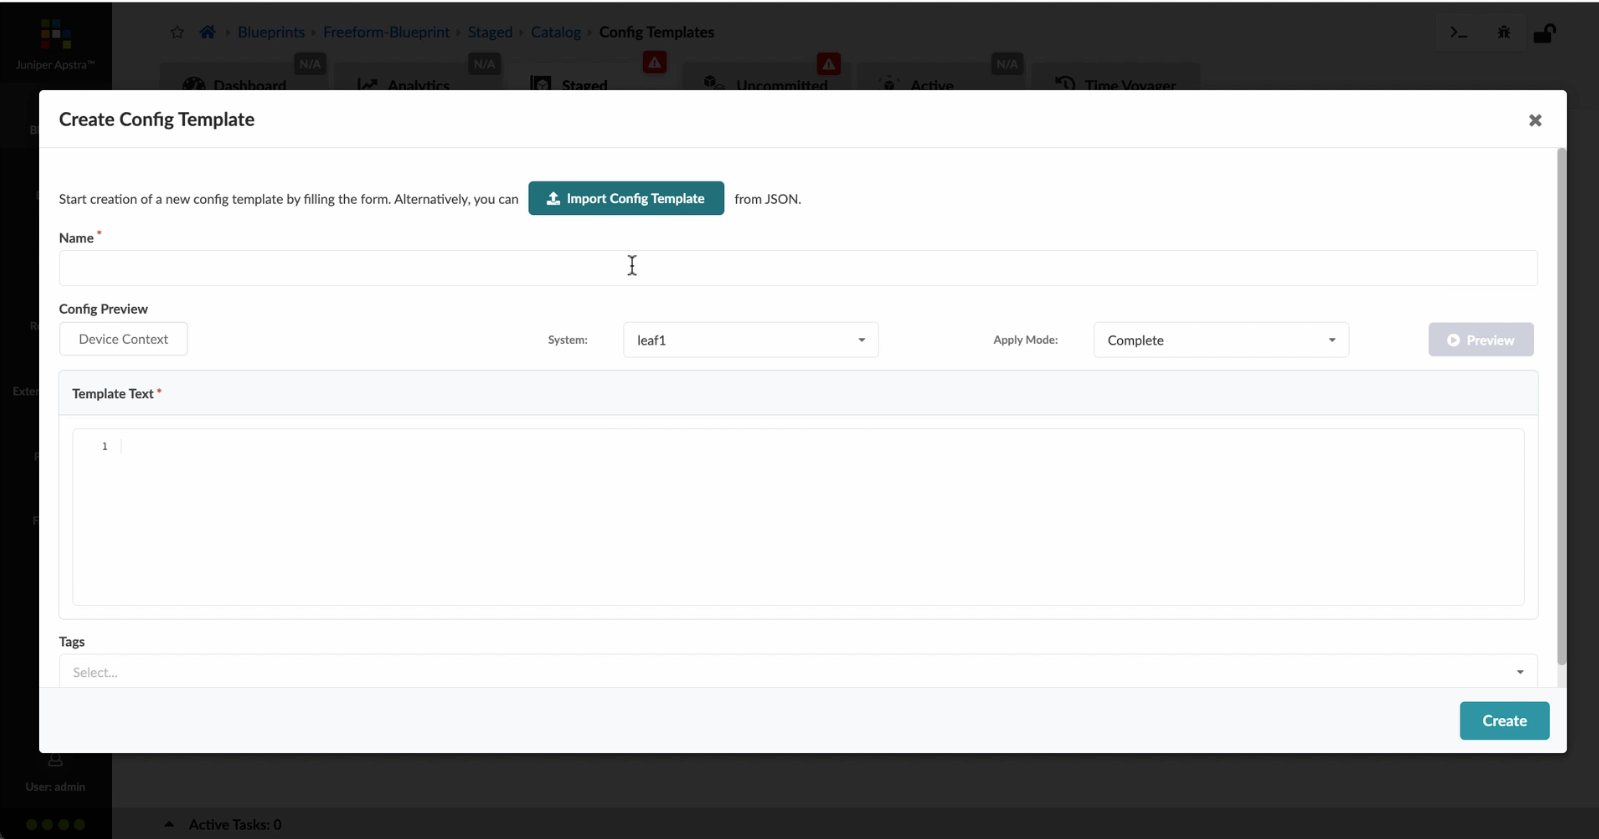
- Click to create a config template
- Add a name for the config template
- %3Cp%3EConfig%20templates%20can%20be%20typed%20in%20the%20GUI%2C%20copy%20and%20pasted%20from%20another%20text%20editor%20or%20imported%20from%20a%20JSON%20file.%3C/p%3E
- Copy the template text
- Paste the configuration
- The configuration template is now saved
- Support for Jinja templates
- Click on Junos interface Jinja config
- Click on property sets
- Click on the desired property set as shown
- View the Property set details
- Notice the configuration editor
- Close the editor
- %3Cp%3EBefore%20deploying%20the%20blueprint%2C%20we%20will%20bring%20all%20the%20devices%20under%20Apstra%20management.%20This%20is%20done%20easily%20by%20Apstra%5C%27s%20existing%20set%20of%20device%20management%20capabilities%20like%20the%20GUI%20based%20agent%20installation%20or%20the%20Asptra%20Zero%20Touch%20Provisioning%20of%20the%20server.%20We%20can%20also%20use%20the%20GUI%20to%20upgrade%20device%20OS%20versions.%3C/p%3E
- Click on Managed Devices
- Choose the device we wish to upgrade the OS version
- Click to choose the OS version
- We will choose the OS image from the drop down menu
- Choose the desired OS image
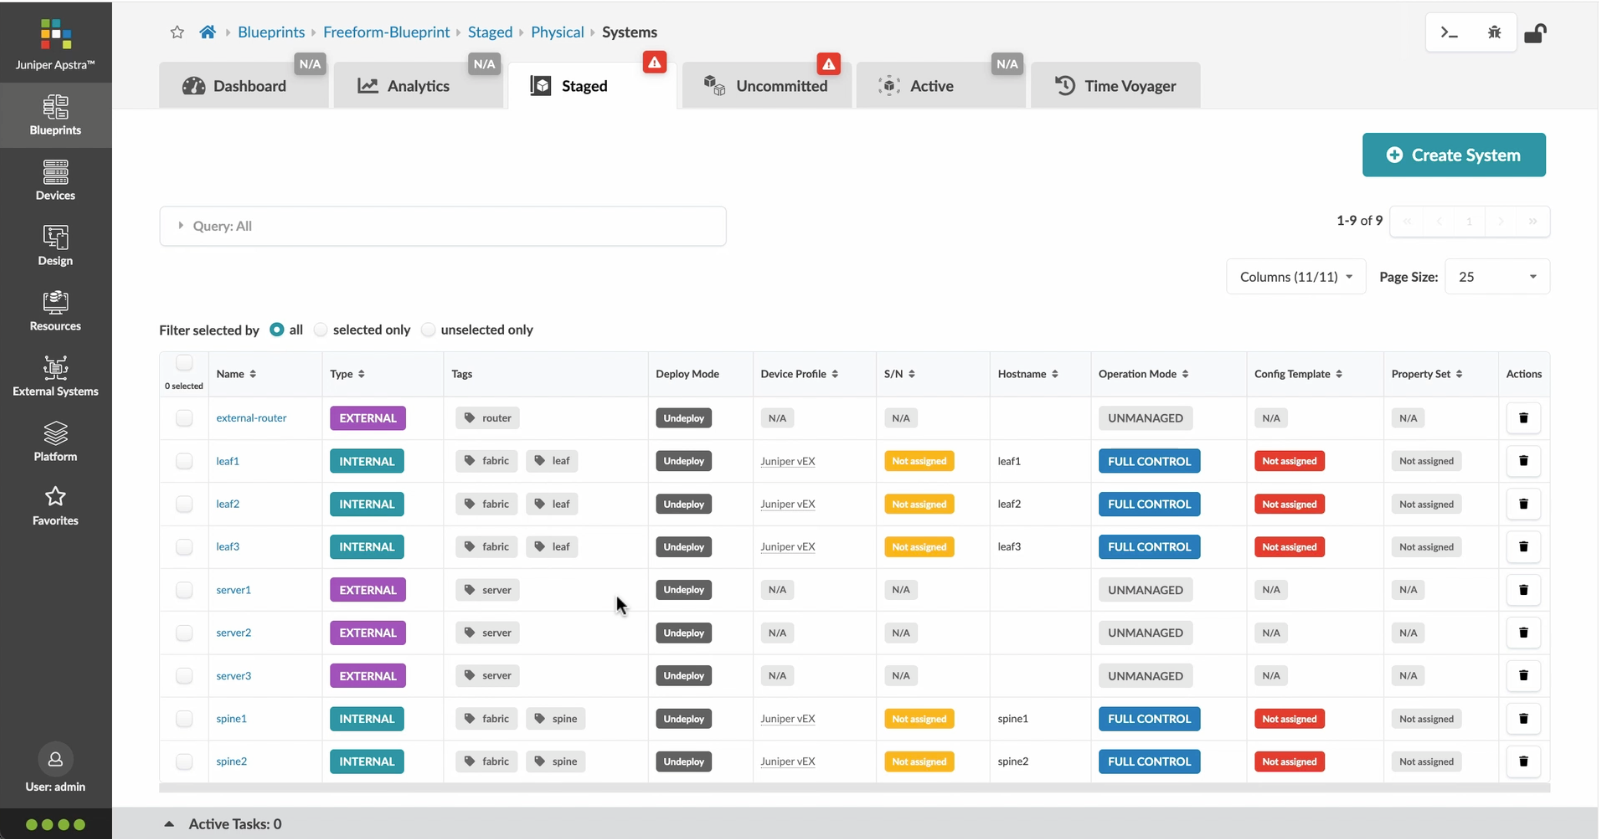
- Associating the devices to the systems and topology
- Click commit to deploy the configuration to the devices
- Click Commit
- Monitoring the deployment status
- Click on config to monitor the configuration deviation
- Notice the actual config deviation information in the two panels
- %3Cp%20class%3D%22MsoNormal%22%20style%3D%22margin%3A%200in%3B%20font-size%3A%2012pt%3B%20font-family%3A%20Calibri%2C%20sans-serif%3B%22%3E%3Cspan%20style%3D%22font-size%3A%2014px%3B%22%3EApstra%20self%20documents%2C%20so%20every%20time%20we%20commit%20the%20blueprint%2C%20a%20snapshot%20of%20the%20network%20is%20saved%20as%20a%20blueprint%20revision.%3C/span%3E%3C/p%3E%0A%3Cp%20class%3D%22MsoNormal%22%20style%3D%22margin%3A%200in%3B%20font-size%3A%2012pt%3B%20font-family%3A%20Calibri%2C%20sans-serif%3B%22%3E%3Cbr%3E%3C/p%3E%0A%3Cp%20class%3D%22MsoNormal%22%20style%3D%22margin%3A%200in%3B%20font-size%3A%2012pt%3B%20font-family%3A%20Calibri%2C%20sans-serif%3B%22%3E%3Cspan%20style%3D%22font-size%3A%2014px%3B%22%3ETo%20roll%20back%20the%20configuration%20of%20the%20entire%20network%20to%20a%20previously%20saved%20state%2C%20Simply%20select%20a%20revision%20and%20click%20on%20rollback%20.%3C/span%3E%3C/p%3E
- Confirm the rollback action
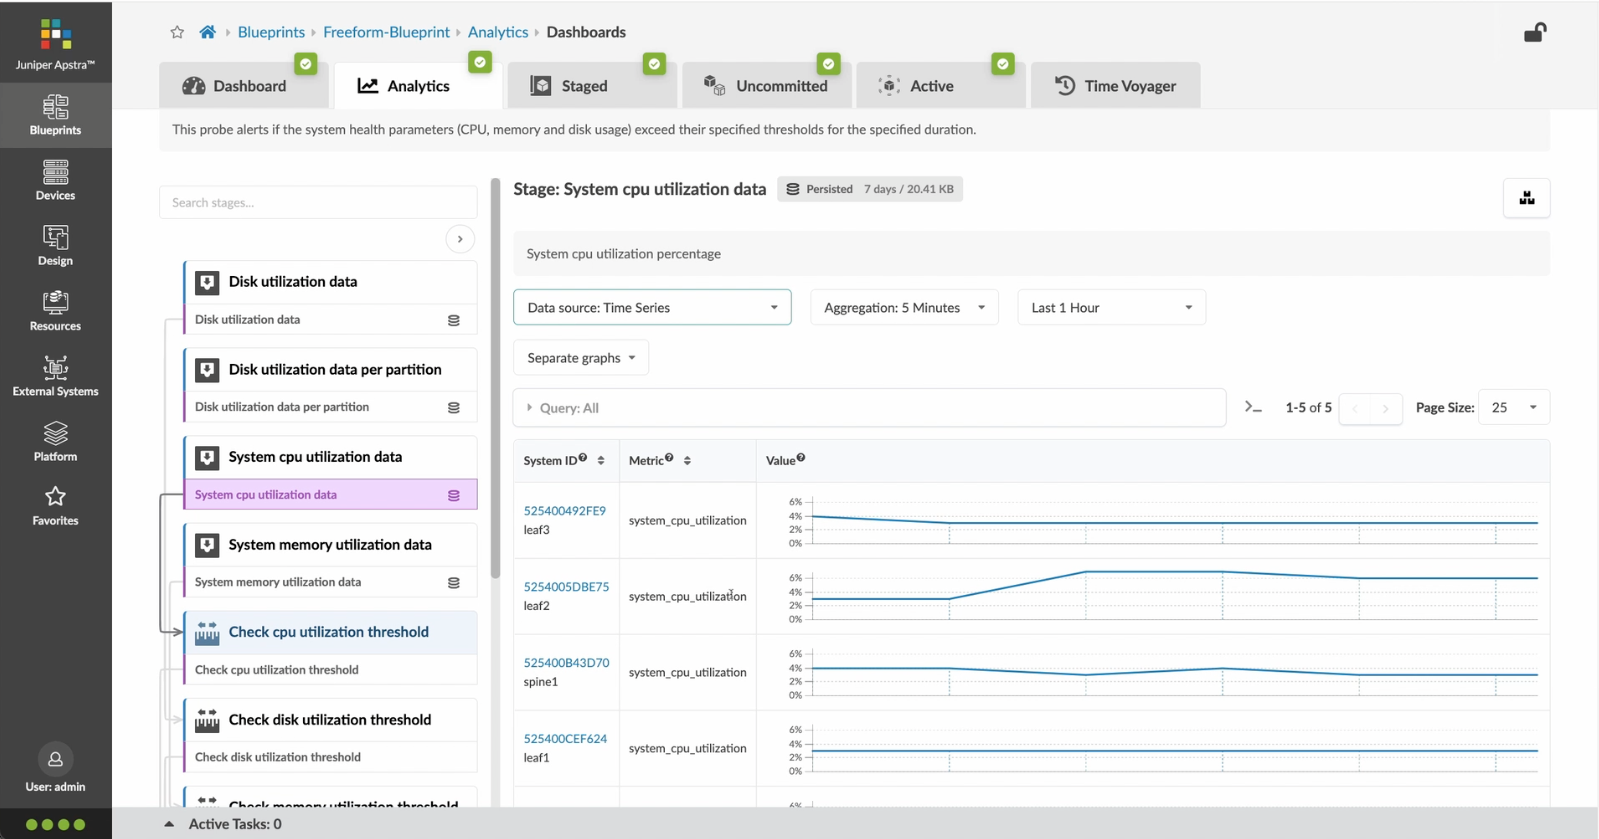
- VIew the health and network performance dashboard
- %3Cp%3EAlerts%20are%20generated%20when%20Apstra%20detects%20anomalous%20behavior%20of%20the%20network.%20We%20can%20also%20drill%20down%20into%20each%20dashboard%20for%20both%20real%20time%20and%20historical%20views%20of%20the%20raw%20data.%3C/p%3E
- Click to choose the Data source as an example
- Thank you
Steps
- Let%20us%20begin%20by%20creating%20a%20Freeform%20Blueprint
- Click Edit to create a new Blueprint
- %3Cp%3EWe%20will%20use%20the%20canvas%20to%20add%20systems%20to%20the%20topology.%20These%20systems%20can%20be%20internal%20systems%20which%20are%20managed%20by%20Apstra%20or%20external%20systems%20which%20are%20not%20managed%20by%20Apstra.%3C/p%3E
- Click%20to%20arrange%20the%20systems%20on%20the%20canvas
- We%20can%20choose%20a%20device%20profile%20to%20model%20the%20hardware%20characteristics
- Click to start modelling the system
- Choose%20a%20device%20profile%20from%20the%20drop%20down%20menu
- Choose the desired Device Profile
- Complete desining by adding links between the systems as desired
- Enrich the topology
- Click to choose the desired color
- Click to assign a tag for easy identification
- Choose a tag
- Topology viewing options
- %3Cp%3EOnce%20we%20have%20finished%20the%20topology%2C%20we%20can%20create%20a%20config%20template%20which%20can%20later%20be%20assigned%20to%20each%20system%20for%20deployment.%20Config%20templates%20can%20be%20typed%20in%20the%20GUI%2C%20copy%20and%20pasted%26nbsp%3B%20from%20another%20text%20editor%20or%20imported%20from%20a%20JSON%20file.%3C/p%3E
- Click to create a config template
- Add a name for the config template
- %3Cp%3EConfig%20templates%20can%20be%20typed%20in%20the%20GUI%2C%20copy%20and%20pasted%20from%20another%20text%20editor%20or%20imported%20from%20a%20JSON%20file.%3C/p%3E
- Copy the template text
- Paste the configuration
- The configuration template is now saved
- Support for Jinja templates
- Click on Junos interface Jinja config
- Click on property sets
- Click on the desired property set as shown
- View the Property set details
- Notice the configuration editor
- Close the editor
- %3Cp%3EBefore%20deploying%20the%20blueprint%2C%20we%20will%20bring%20all%20the%20devices%20under%20Apstra%20management.%20This%20is%20done%20easily%20by%20Apstra%5C%27s%20existing%20set%20of%20device%20management%20capabilities%20like%20the%20GUI%20based%20agent%20installation%20or%20the%20Asptra%20Zero%20Touch%20Provisioning%20of%20the%20server.%20We%20can%20also%20use%20the%20GUI%20to%20upgrade%20device%20OS%20versions.%3C/p%3E
- Click on Managed Devices
- Choose the device we wish to upgrade the OS version
- Click to choose the OS version
- We will choose the OS image from the drop down menu
- Choose the desired OS image
- Associating the devices to the systems and topology
- Click commit to deploy the configuration to the devices
- Click Commit
- Monitoring the deployment status
- Click on config to monitor the configuration deviation
- Notice the actual config deviation information in the two panels
- %3Cp%20class%3D%22MsoNormal%22%20style%3D%22margin%3A%200in%3B%20font-size%3A%2012pt%3B%20font-family%3A%20Calibri%2C%20sans-serif%3B%22%3E%3Cspan%20style%3D%22font-size%3A%2014px%3B%22%3EApstra%20self%20documents%2C%20so%20every%20time%20we%20commit%20the%20blueprint%2C%20a%20snapshot%20of%20the%20network%20is%20saved%20as%20a%20blueprint%20revision.%3C/span%3E%3C/p%3E%0A%3Cp%20class%3D%22MsoNormal%22%20style%3D%22margin%3A%200in%3B%20font-size%3A%2012pt%3B%20font-family%3A%20Calibri%2C%20sans-serif%3B%22%3E%3Cbr%3E%3C/p%3E%0A%3Cp%20class%3D%22MsoNormal%22%20style%3D%22margin%3A%200in%3B%20font-size%3A%2012pt%3B%20font-family%3A%20Calibri%2C%20sans-serif%3B%22%3E%3Cspan%20style%3D%22font-size%3A%2014px%3B%22%3ETo%20roll%20back%20the%20configuration%20of%20the%20entire%20network%20to%20a%20previously%20saved%20state%2C%20Simply%20select%20a%20revision%20and%20click%20on%20rollback%20.%3C/span%3E%3C/p%3E
- Confirm the rollback action
- VIew the health and network performance dashboard
- %3Cp%3EAlerts%20are%20generated%20when%20Apstra%20detects%20anomalous%20behavior%20of%20the%20network.%20We%20can%20also%20drill%20down%20into%20each%20dashboard%20for%20both%20real%20time%20and%20historical%20views%20of%20the%20raw%20data.%3C/p%3E
- Click to choose the Data source as an example
- Thank you
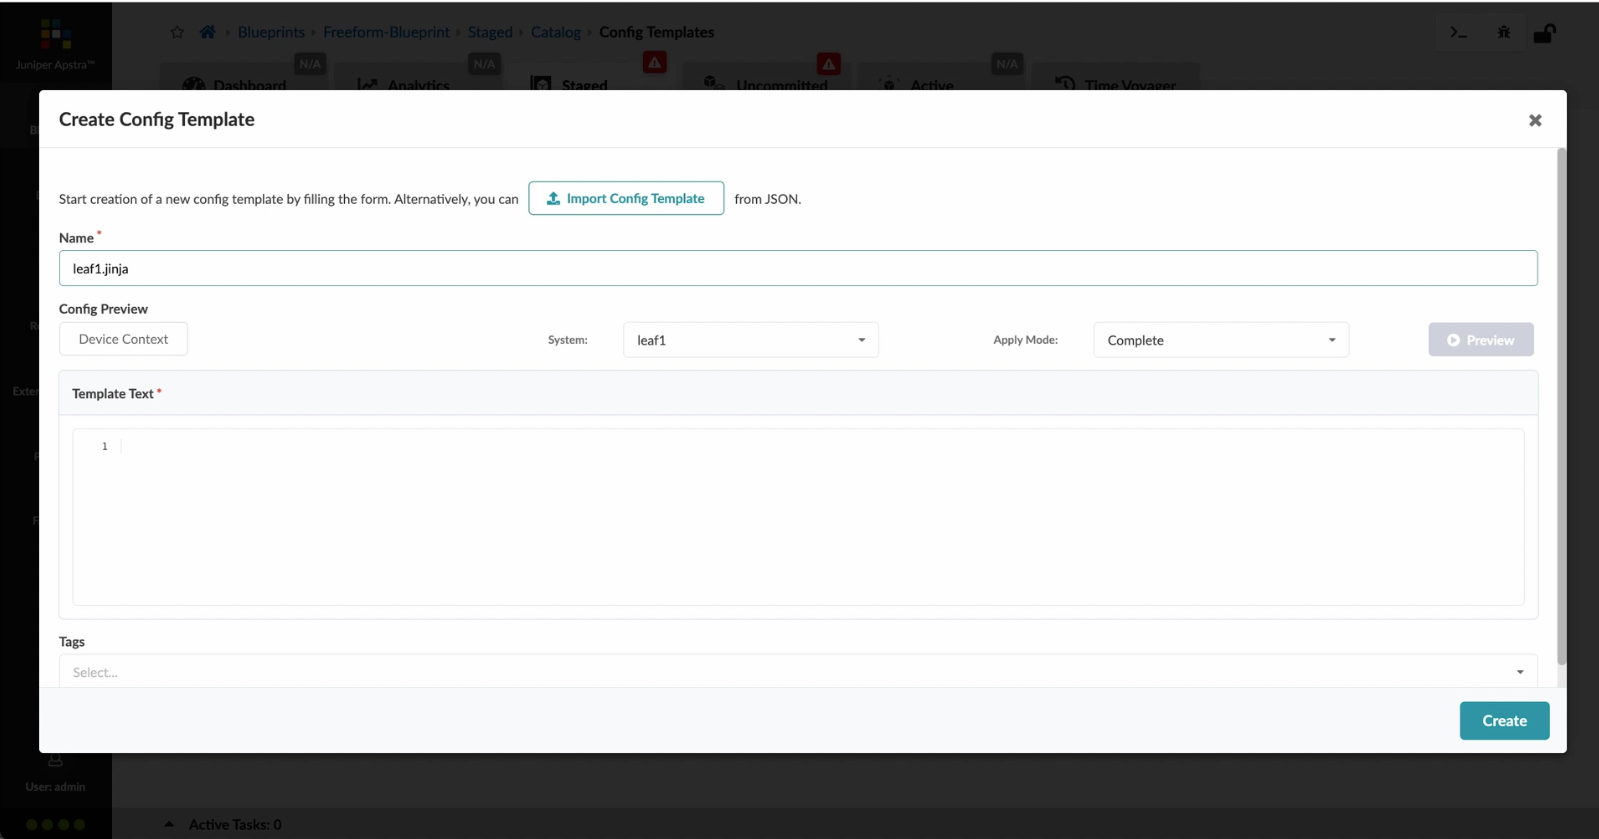
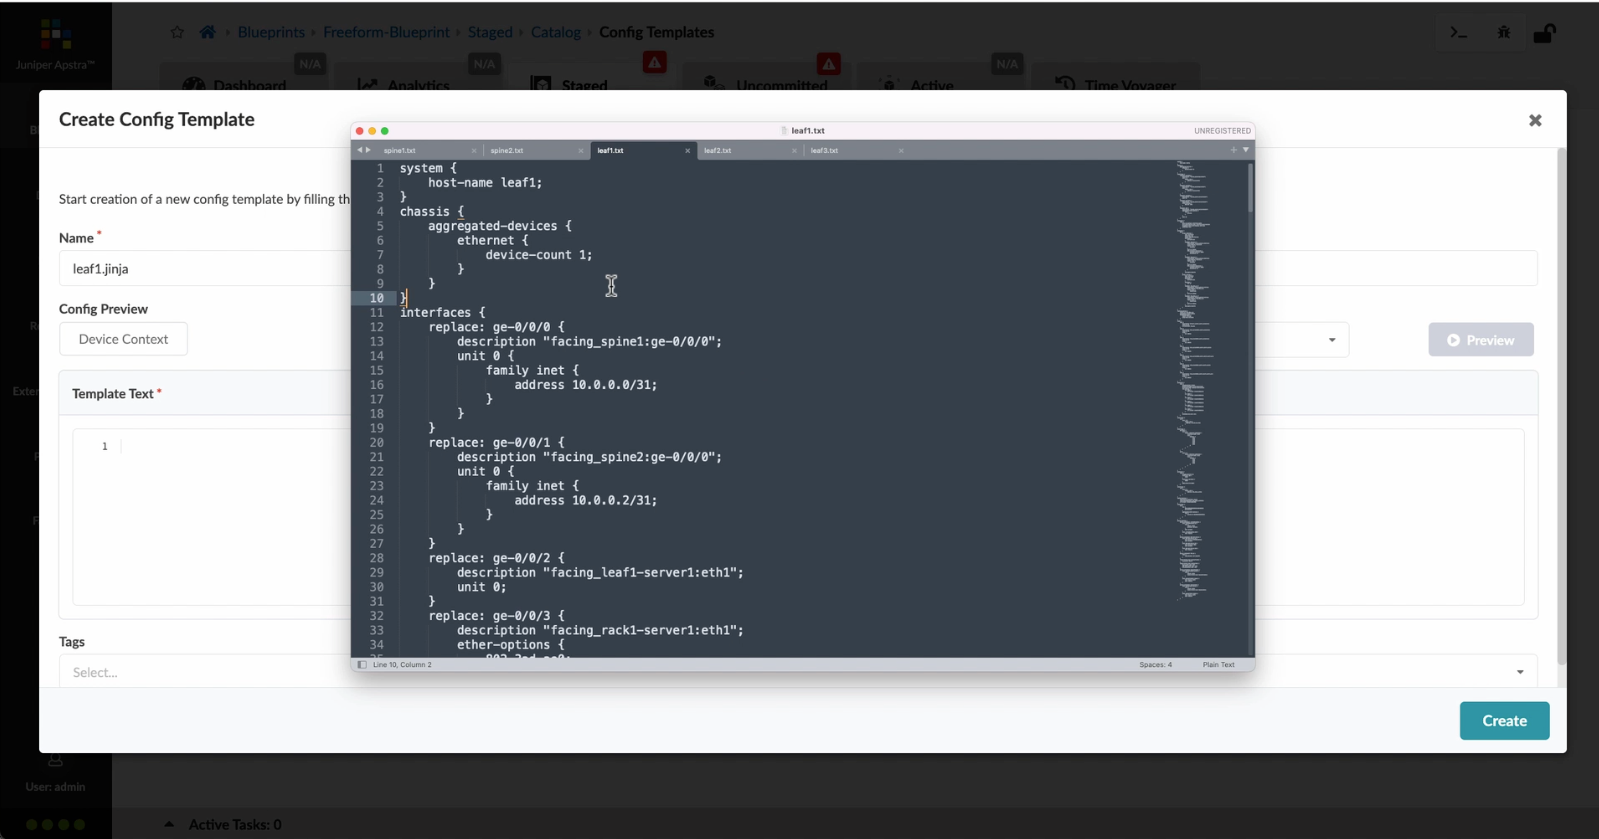
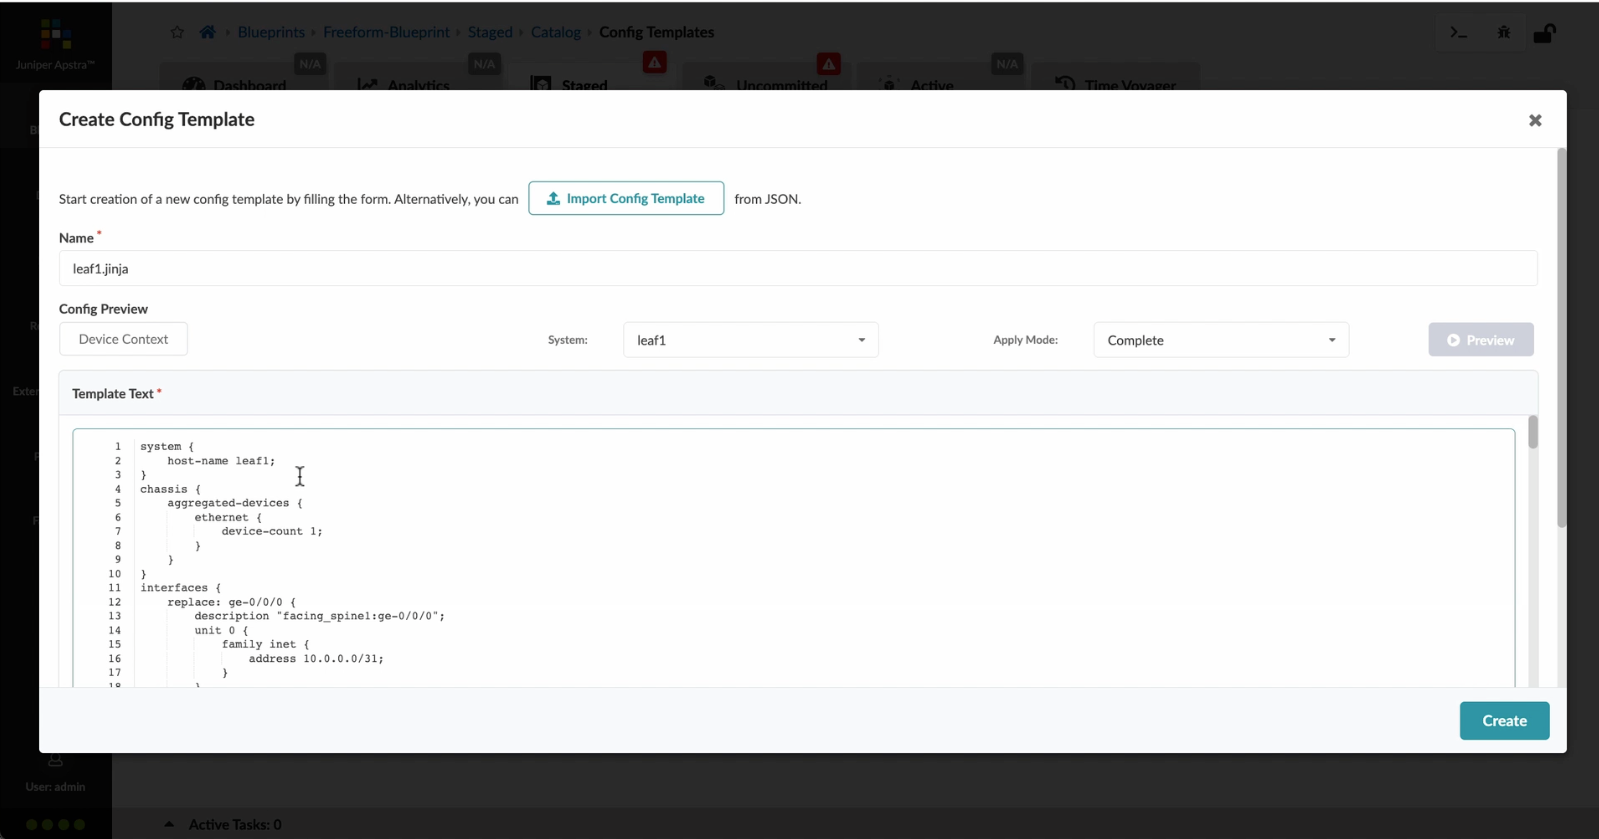
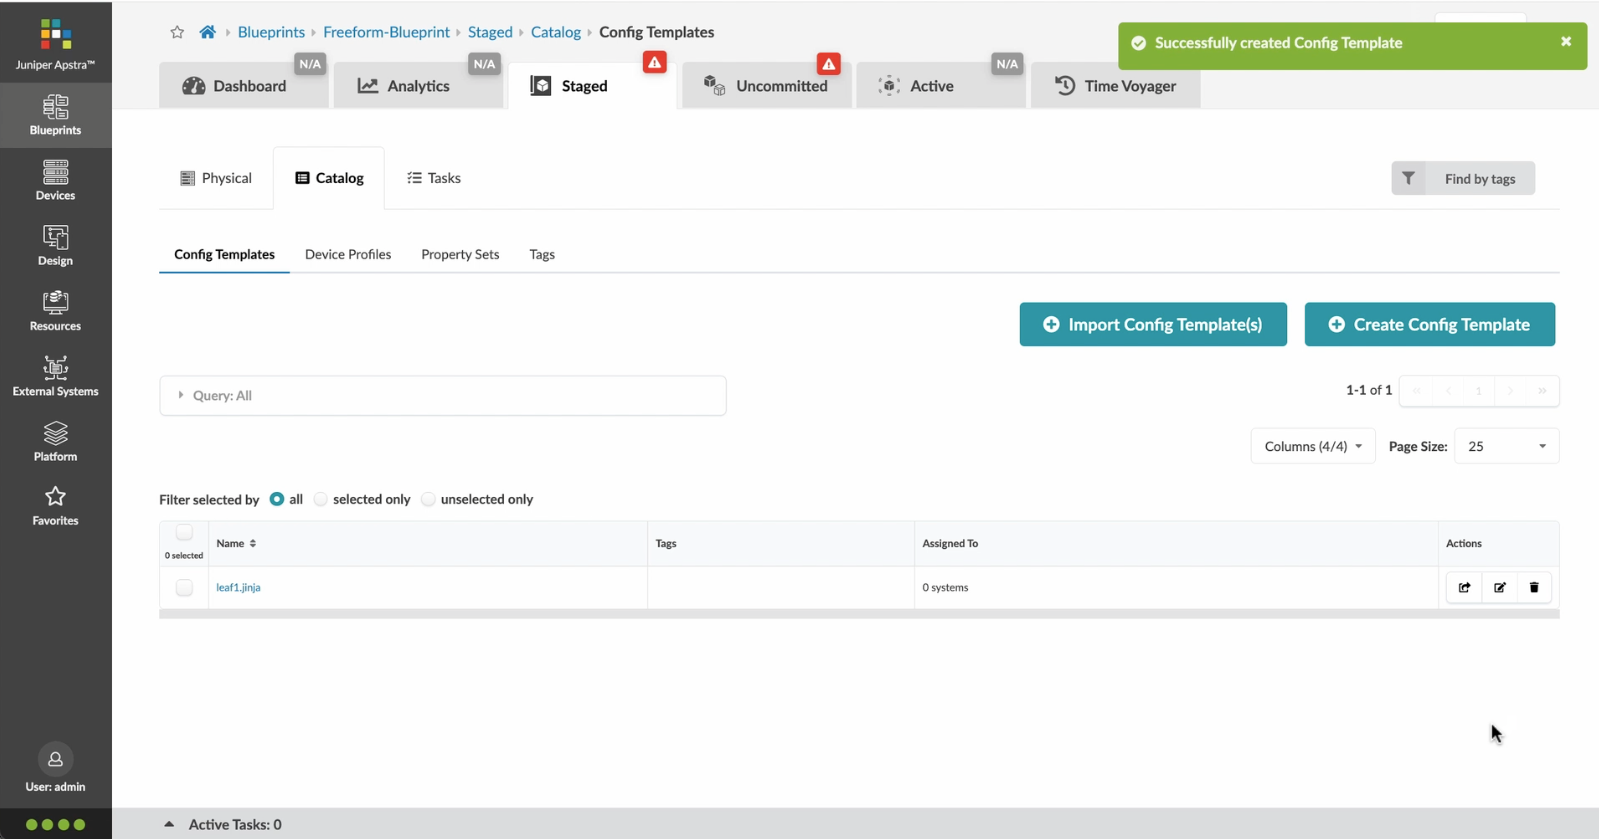
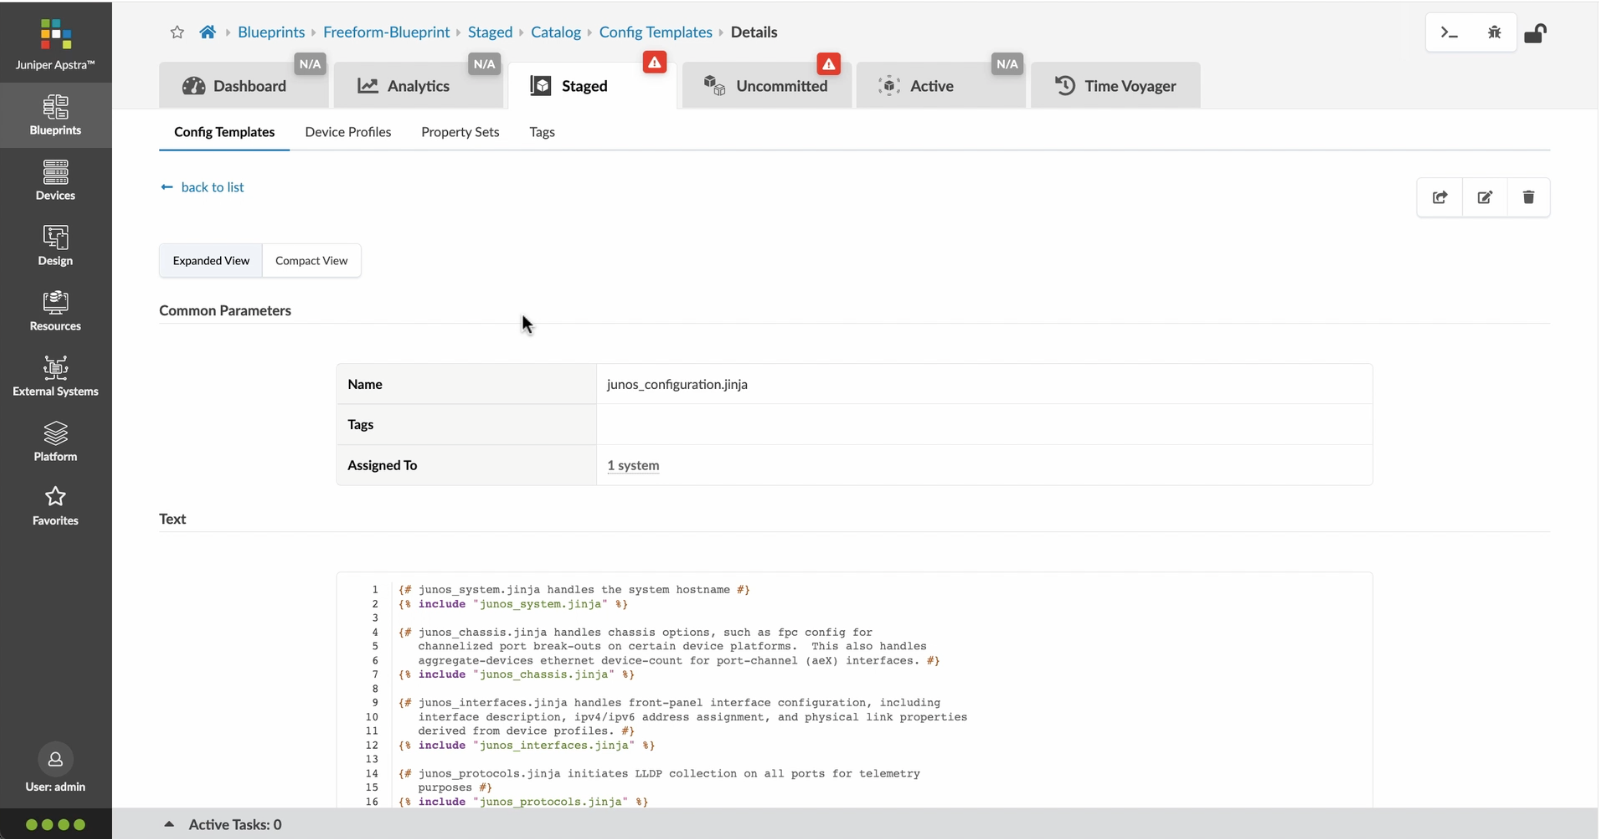
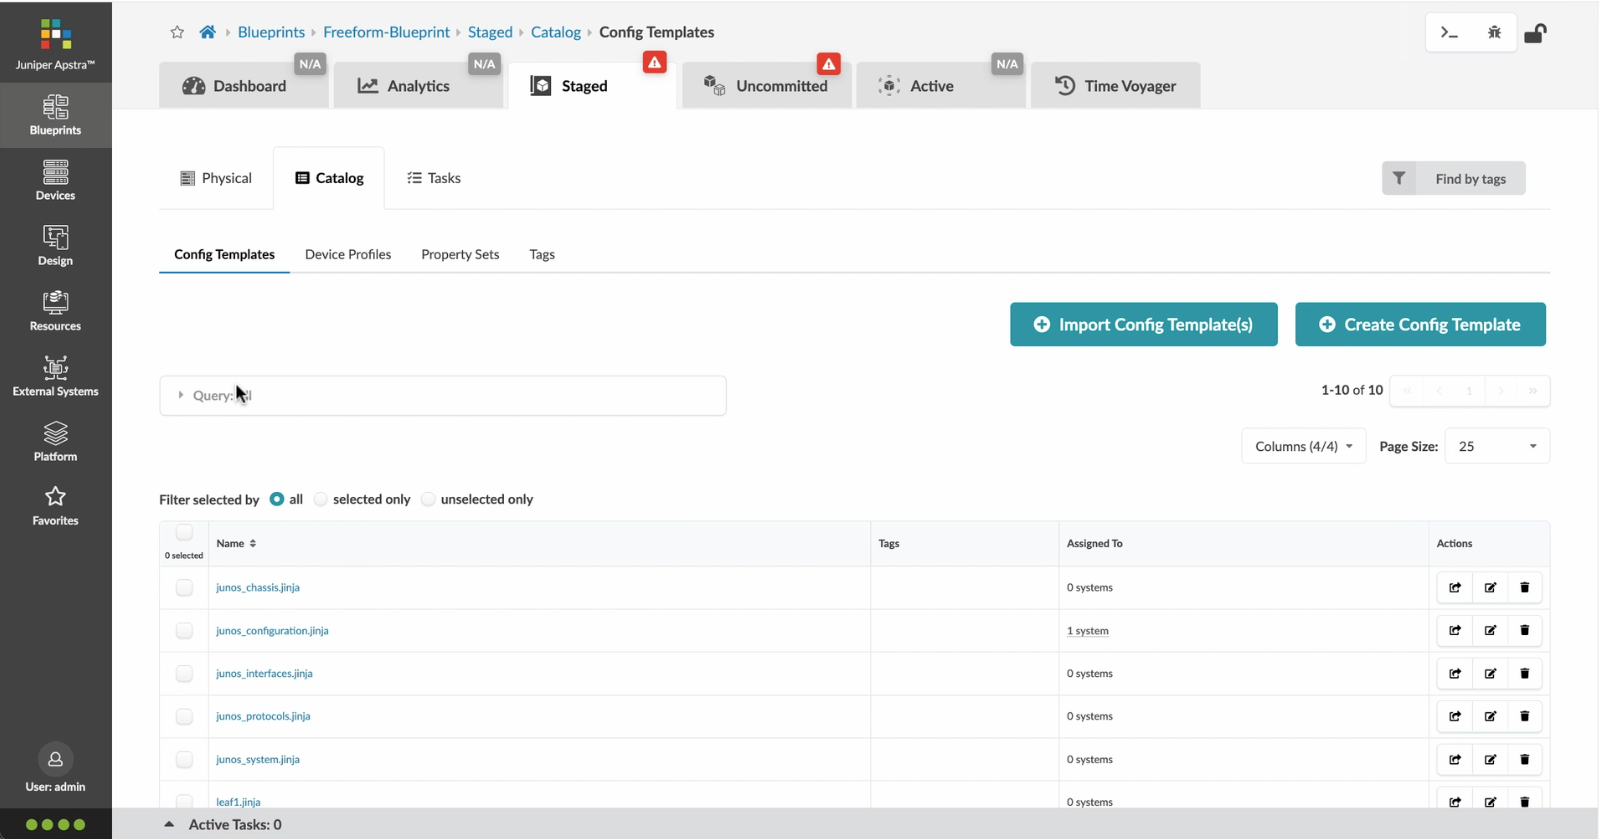
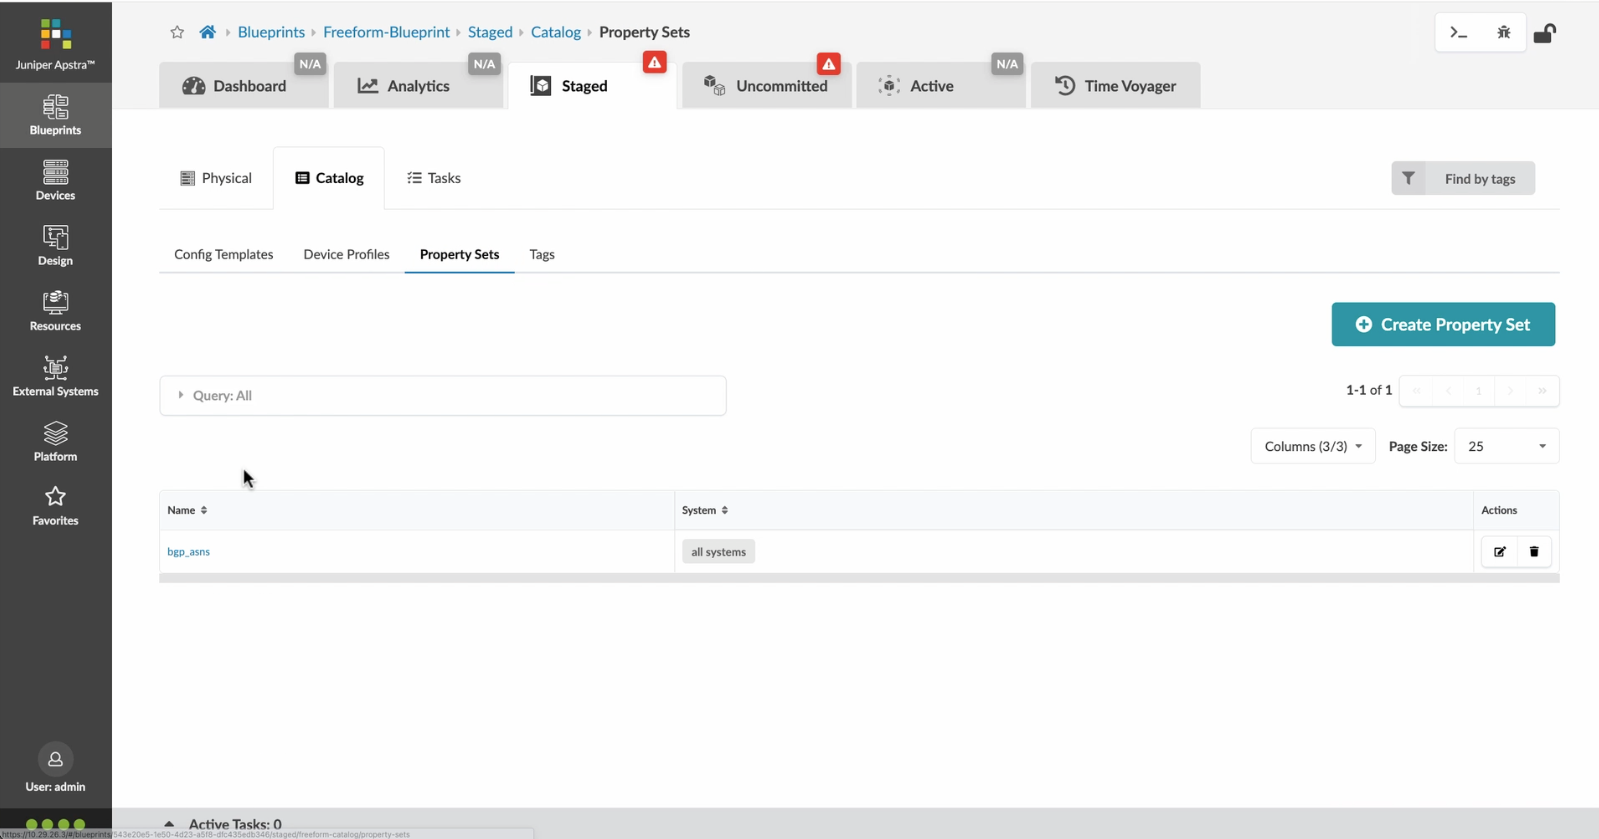
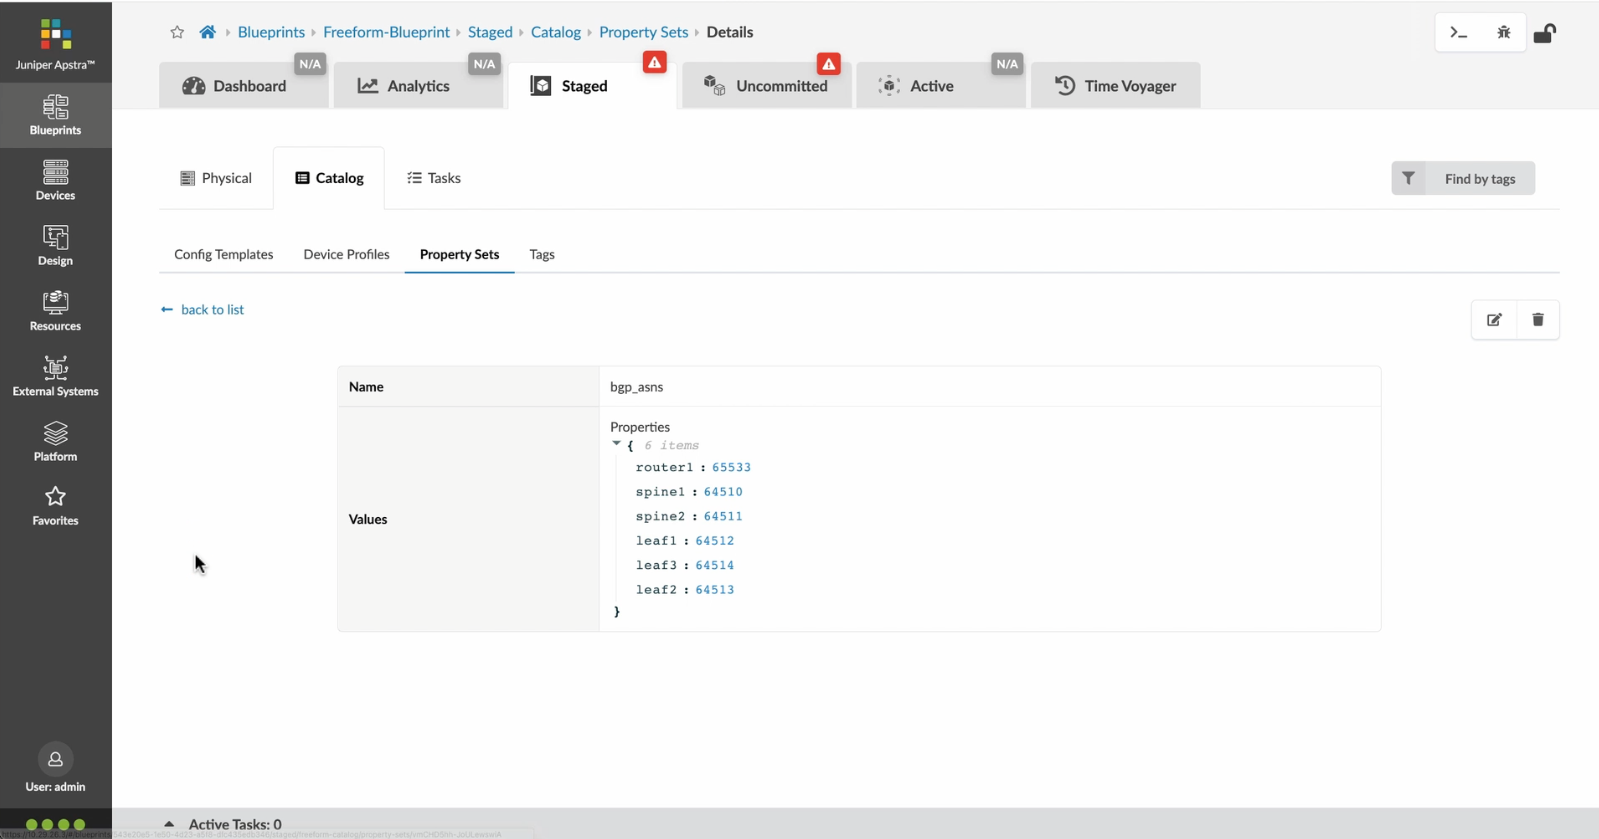
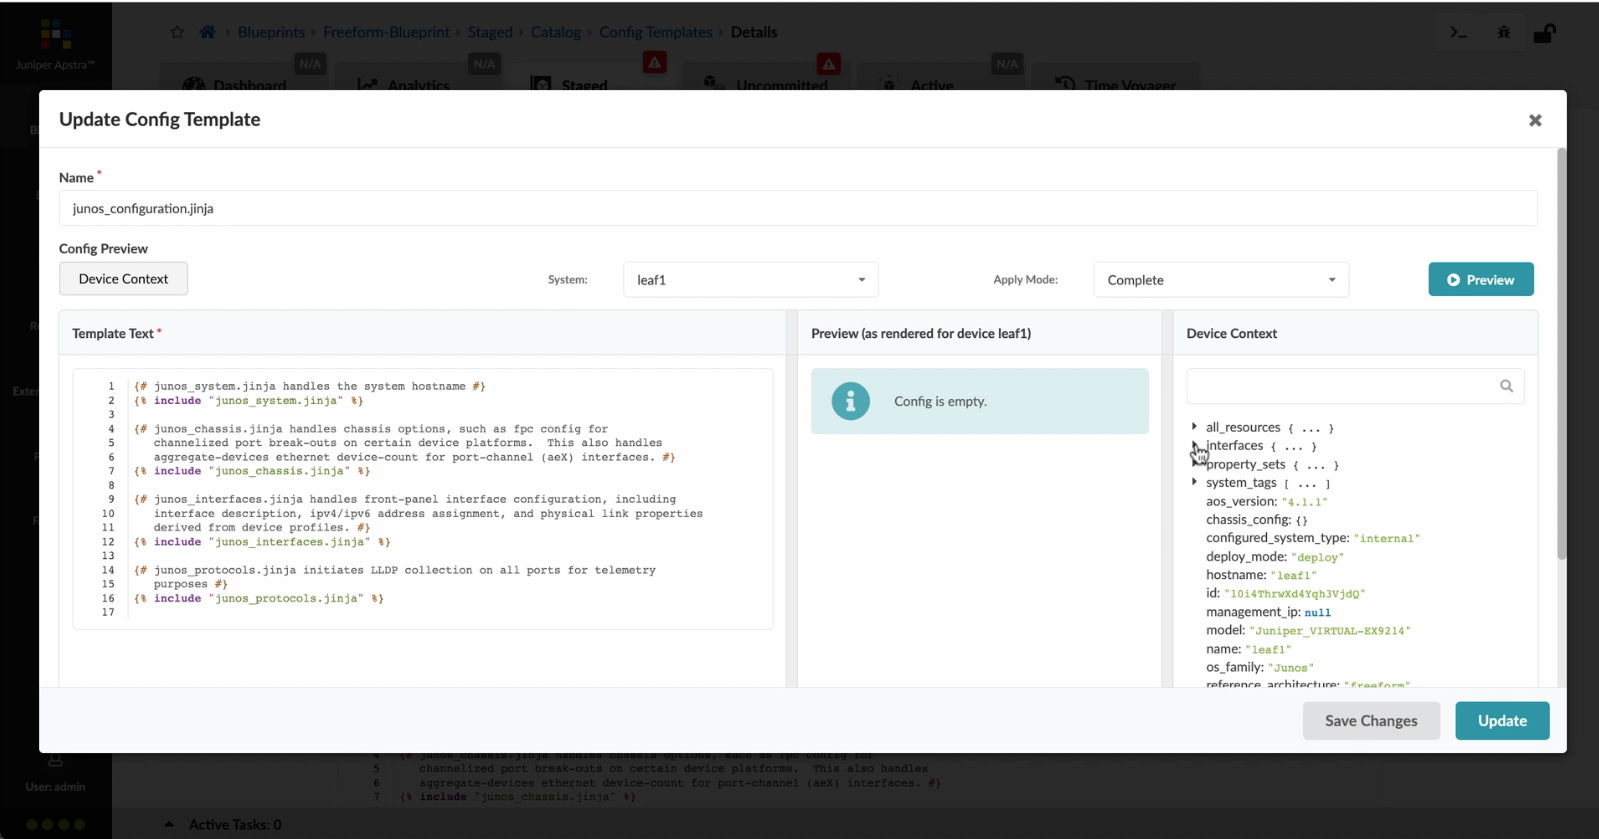
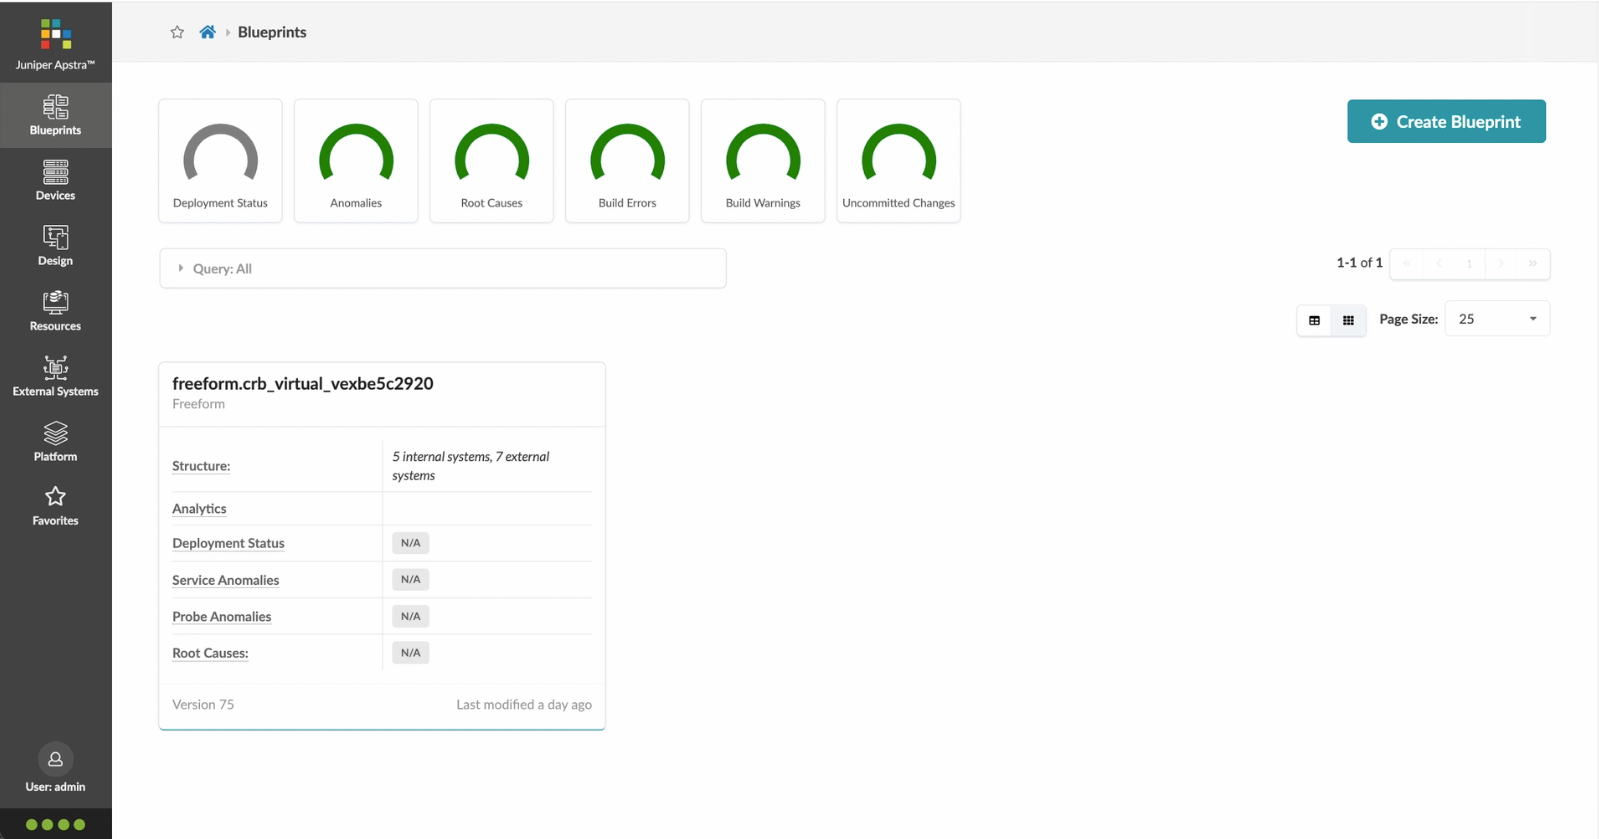
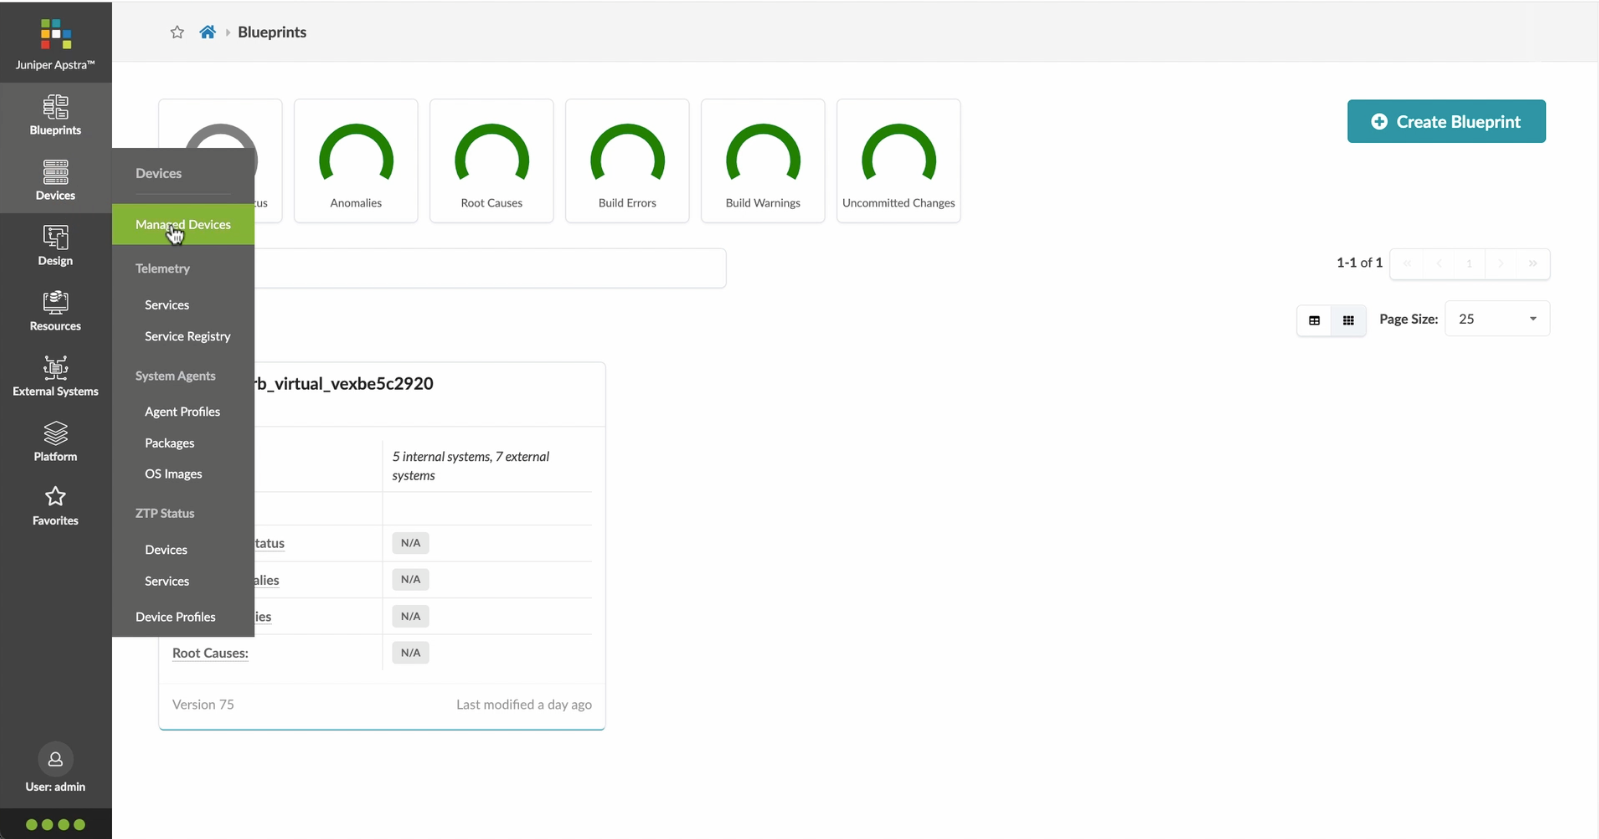
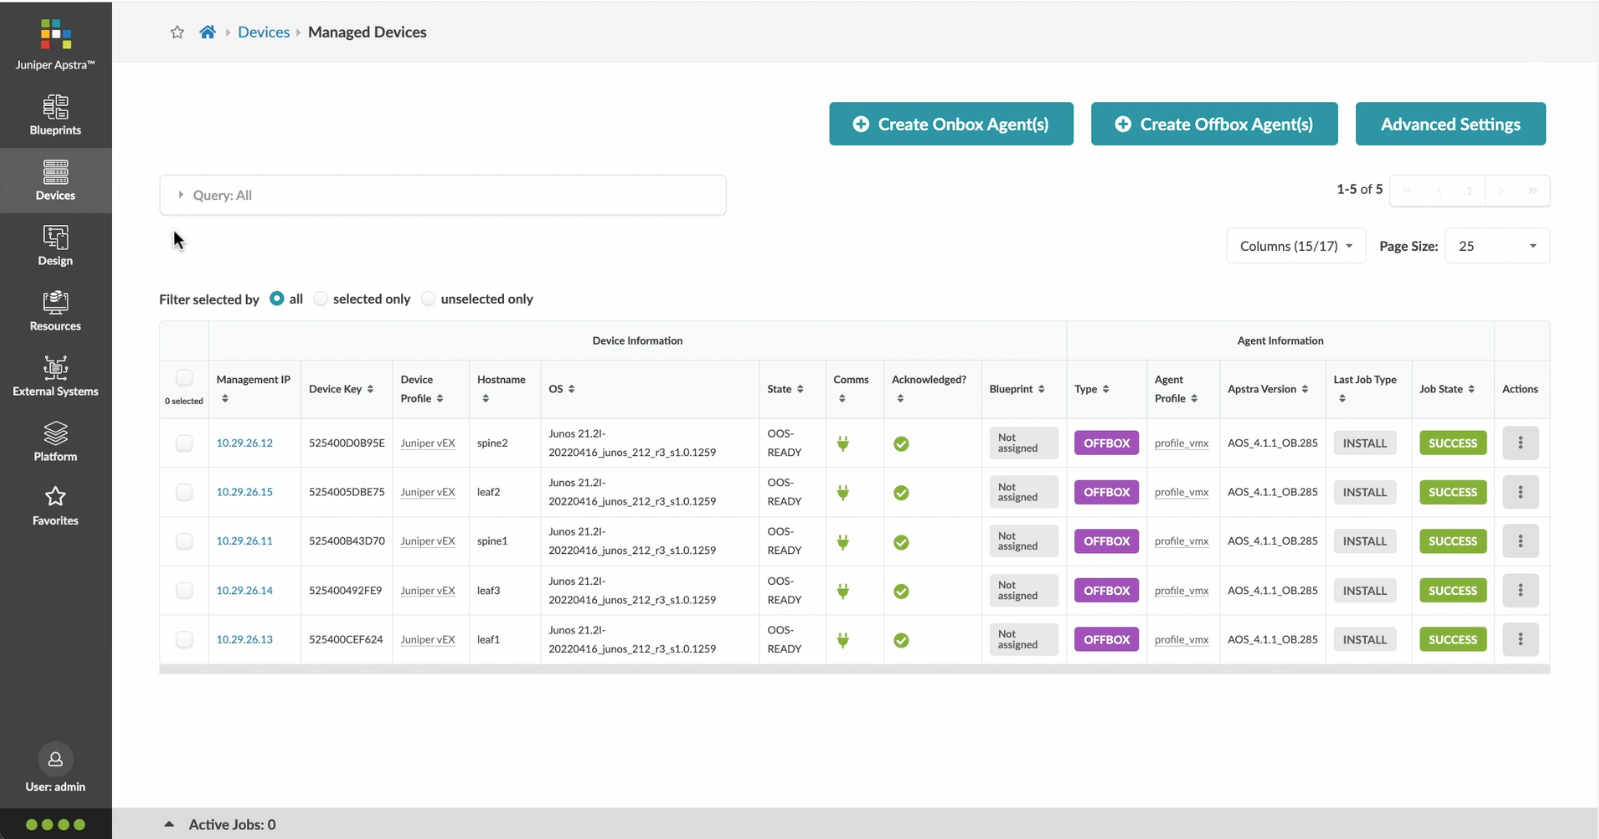
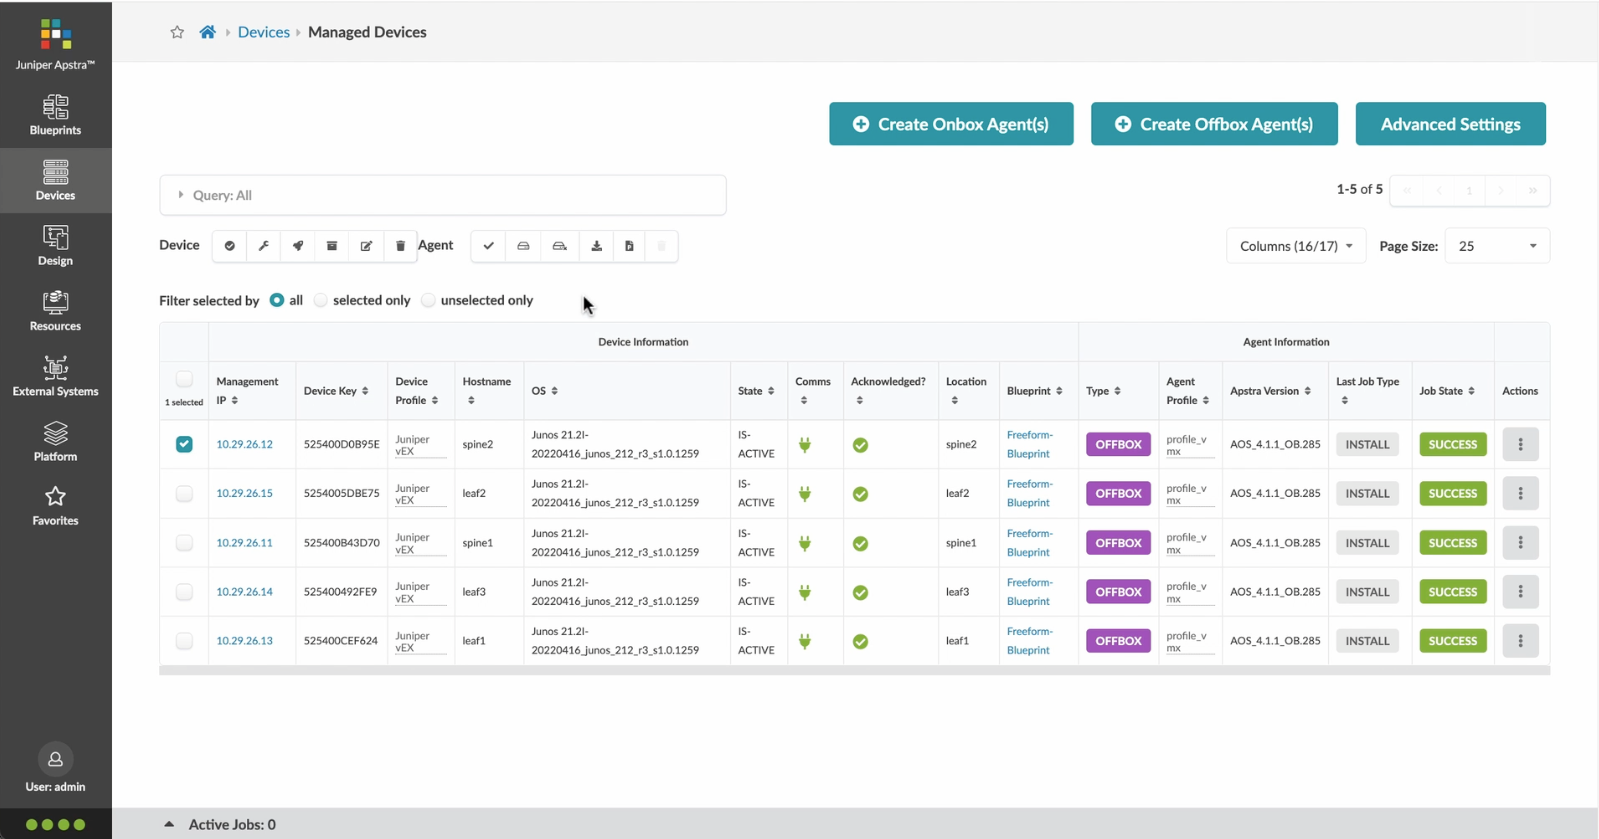
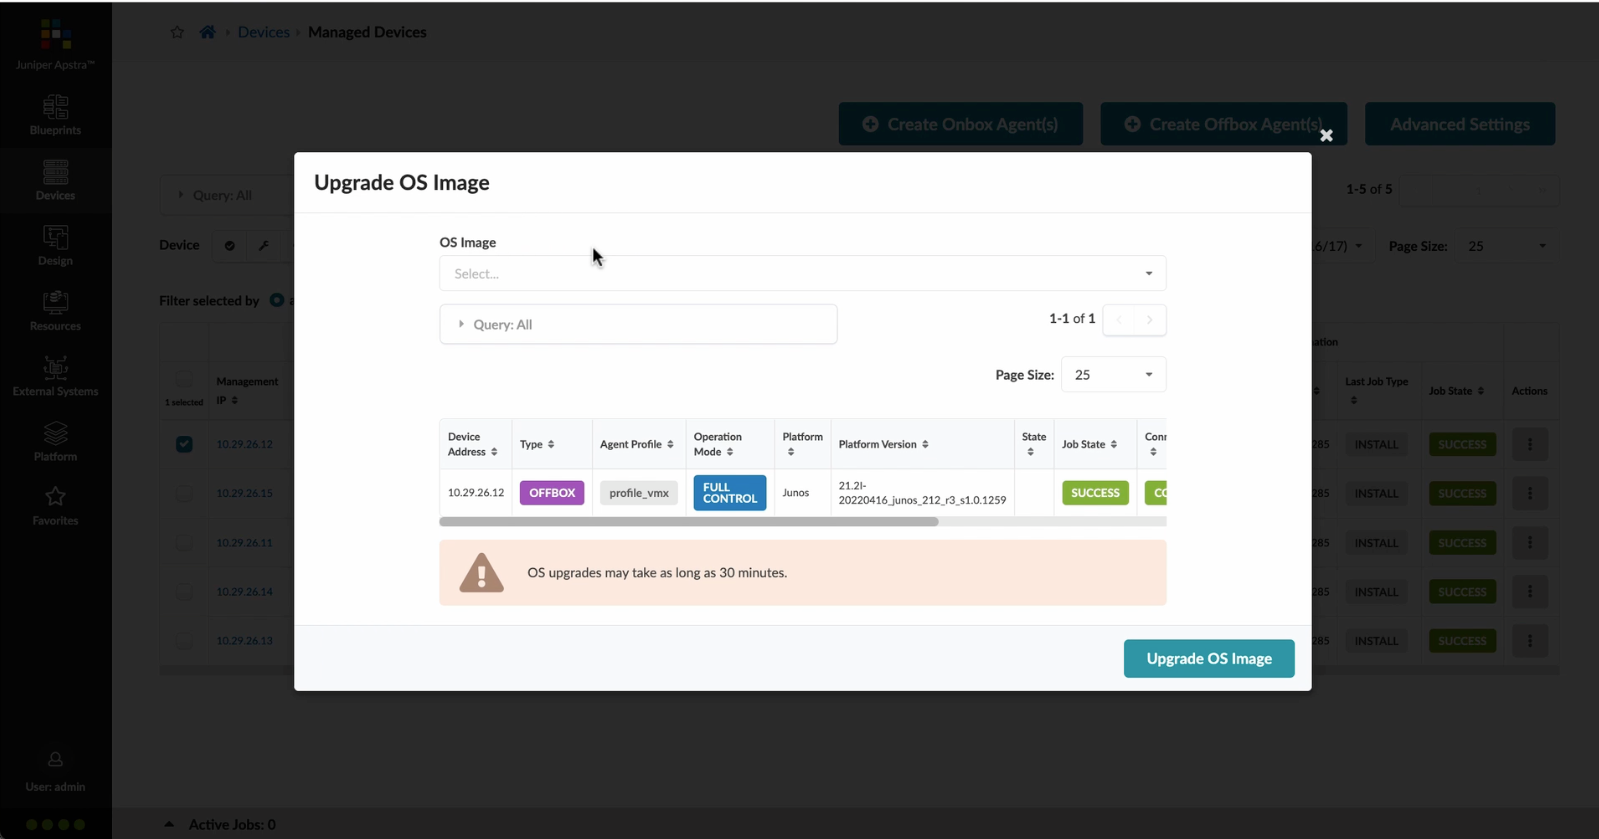
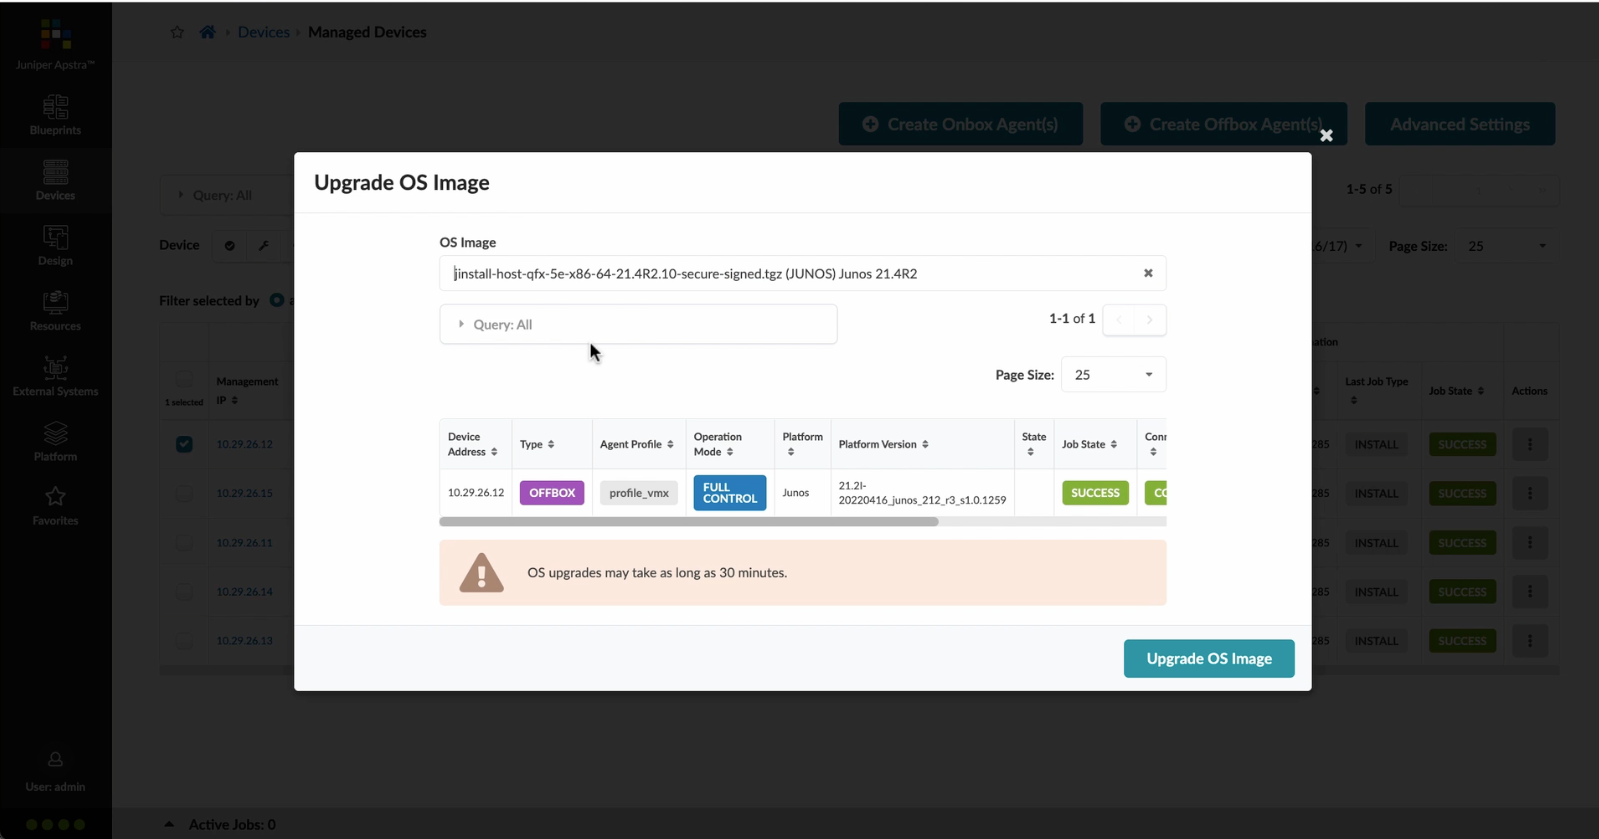
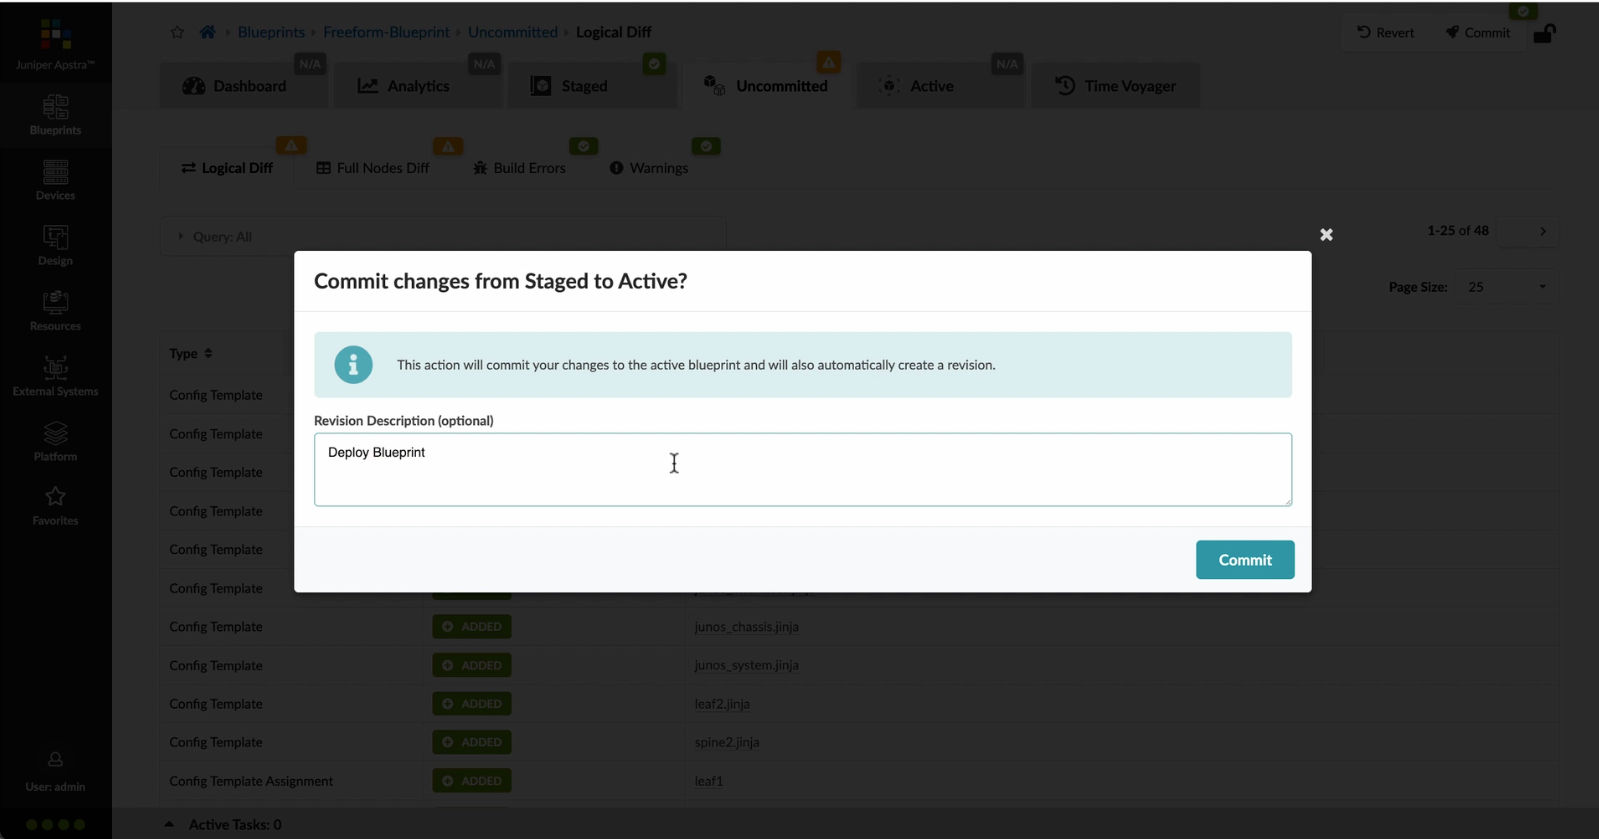
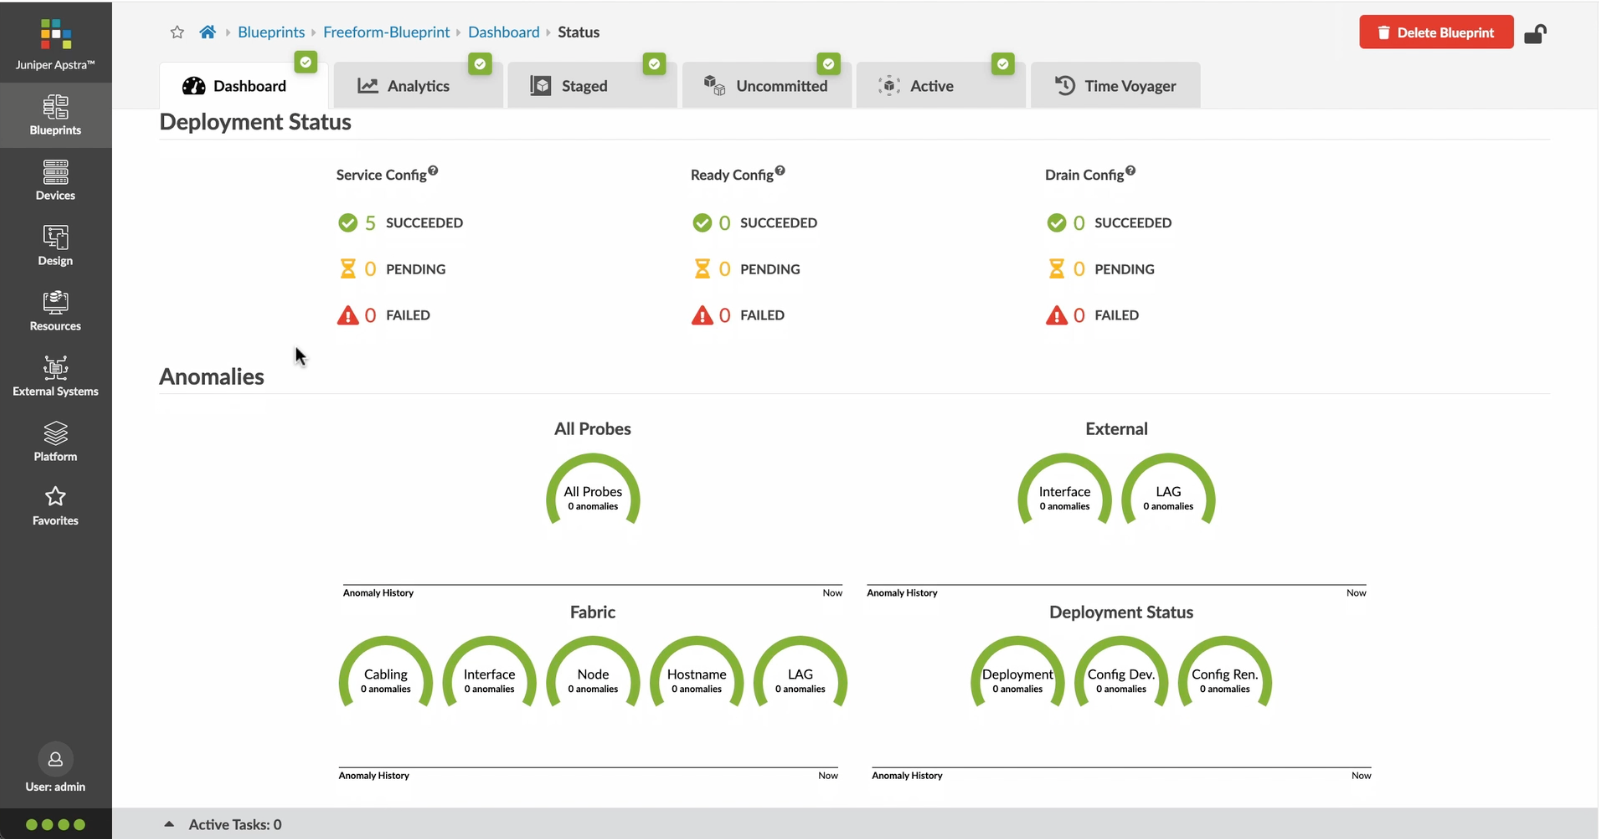
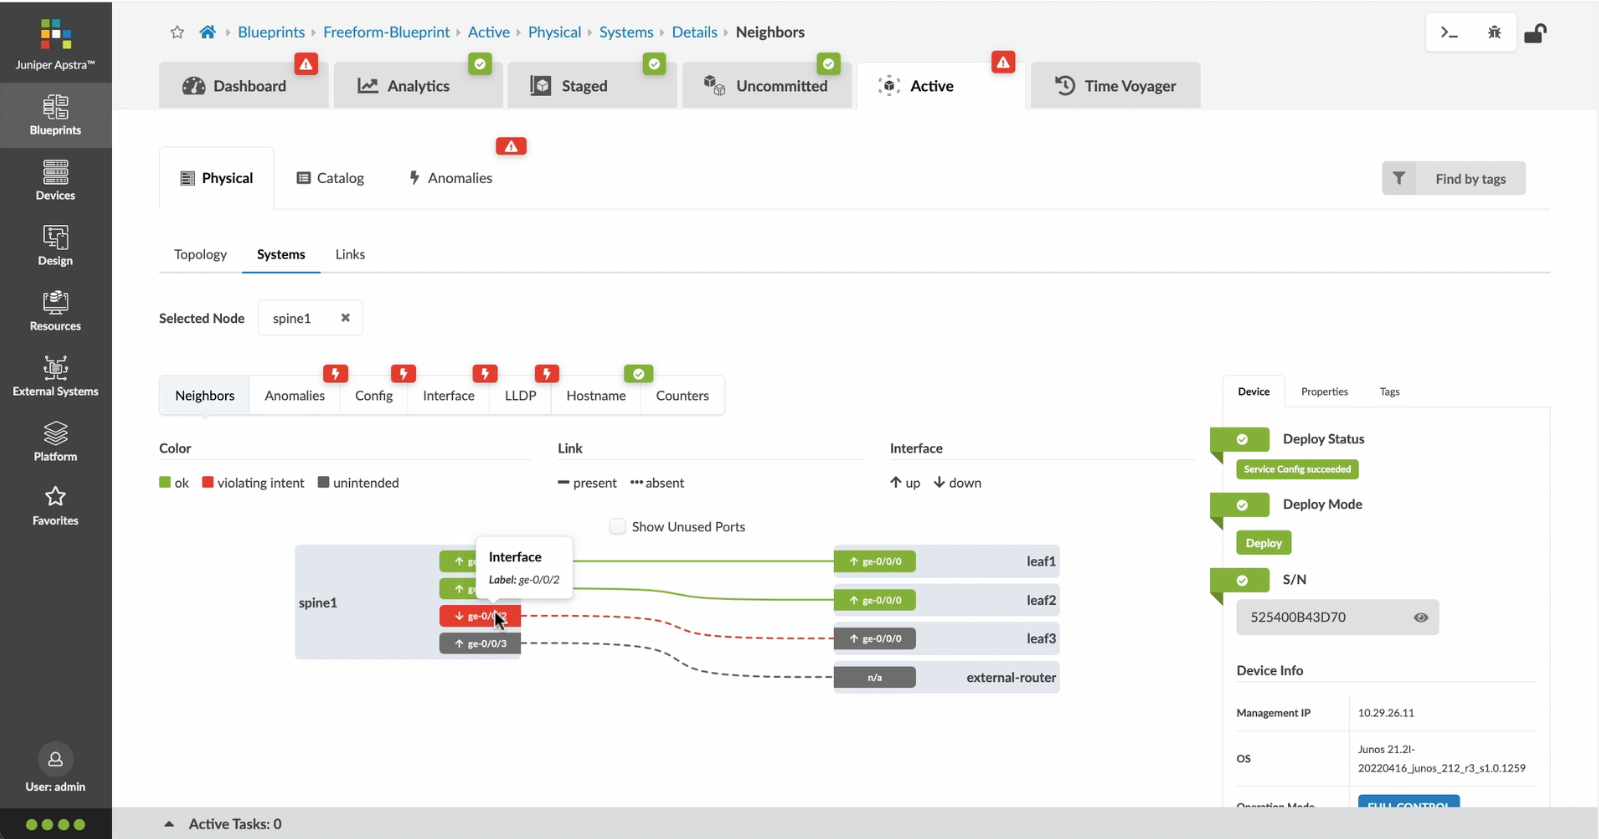
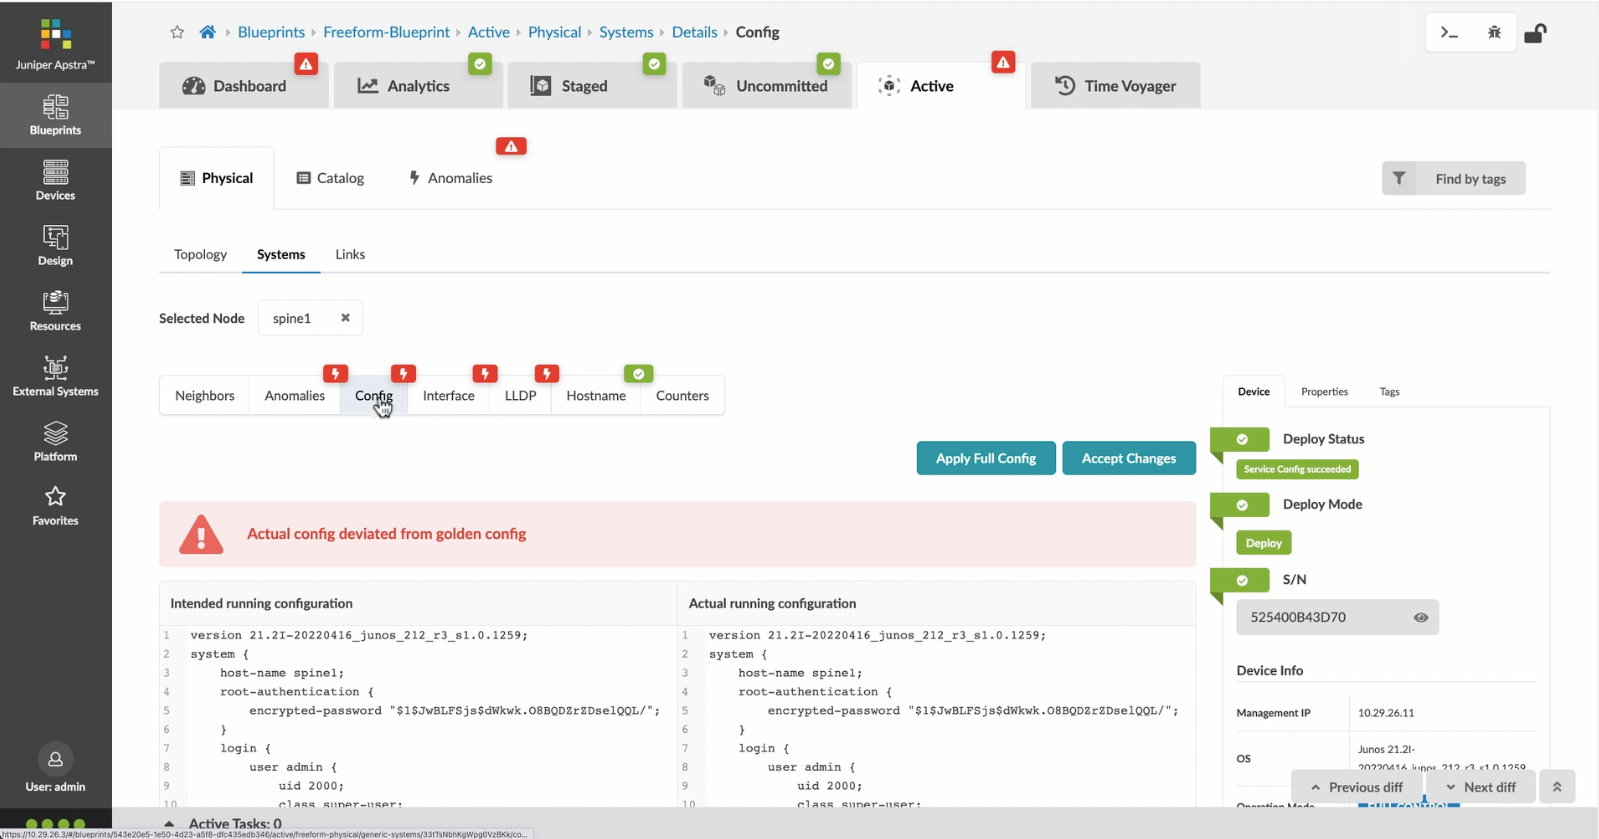
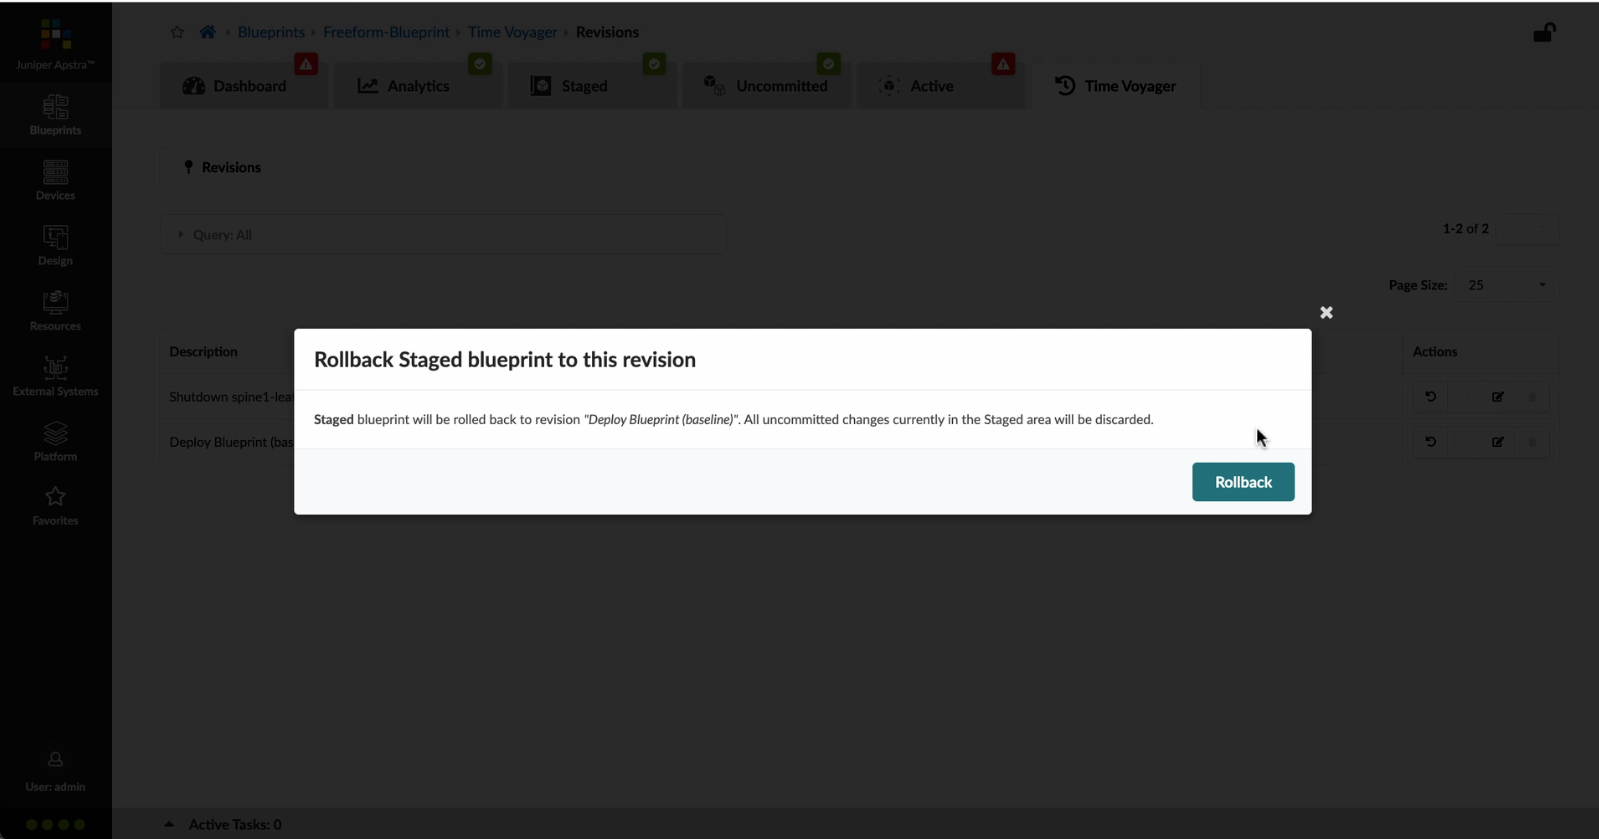
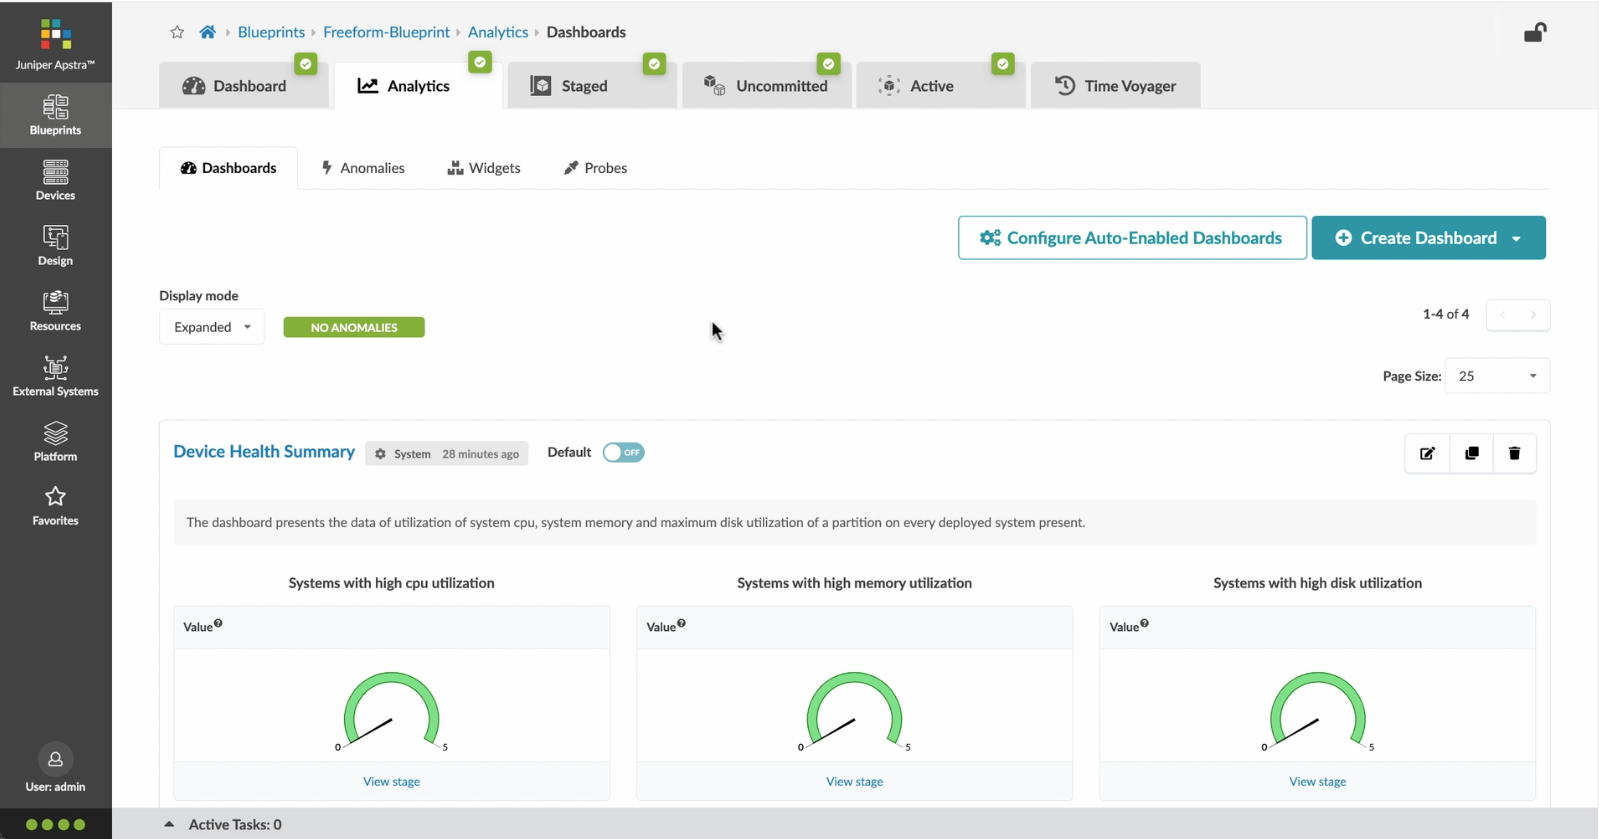
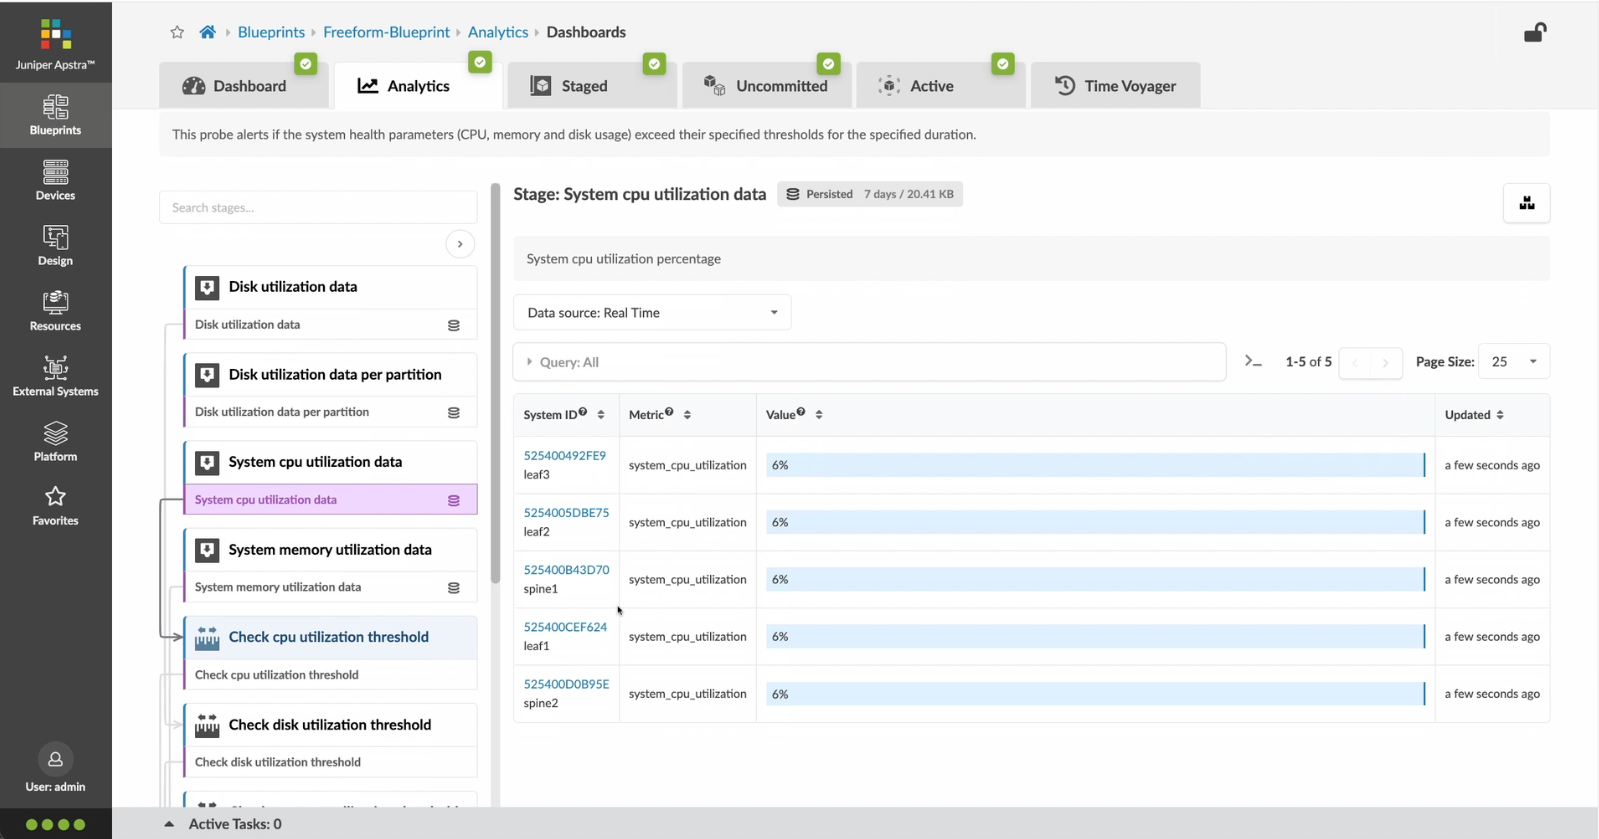
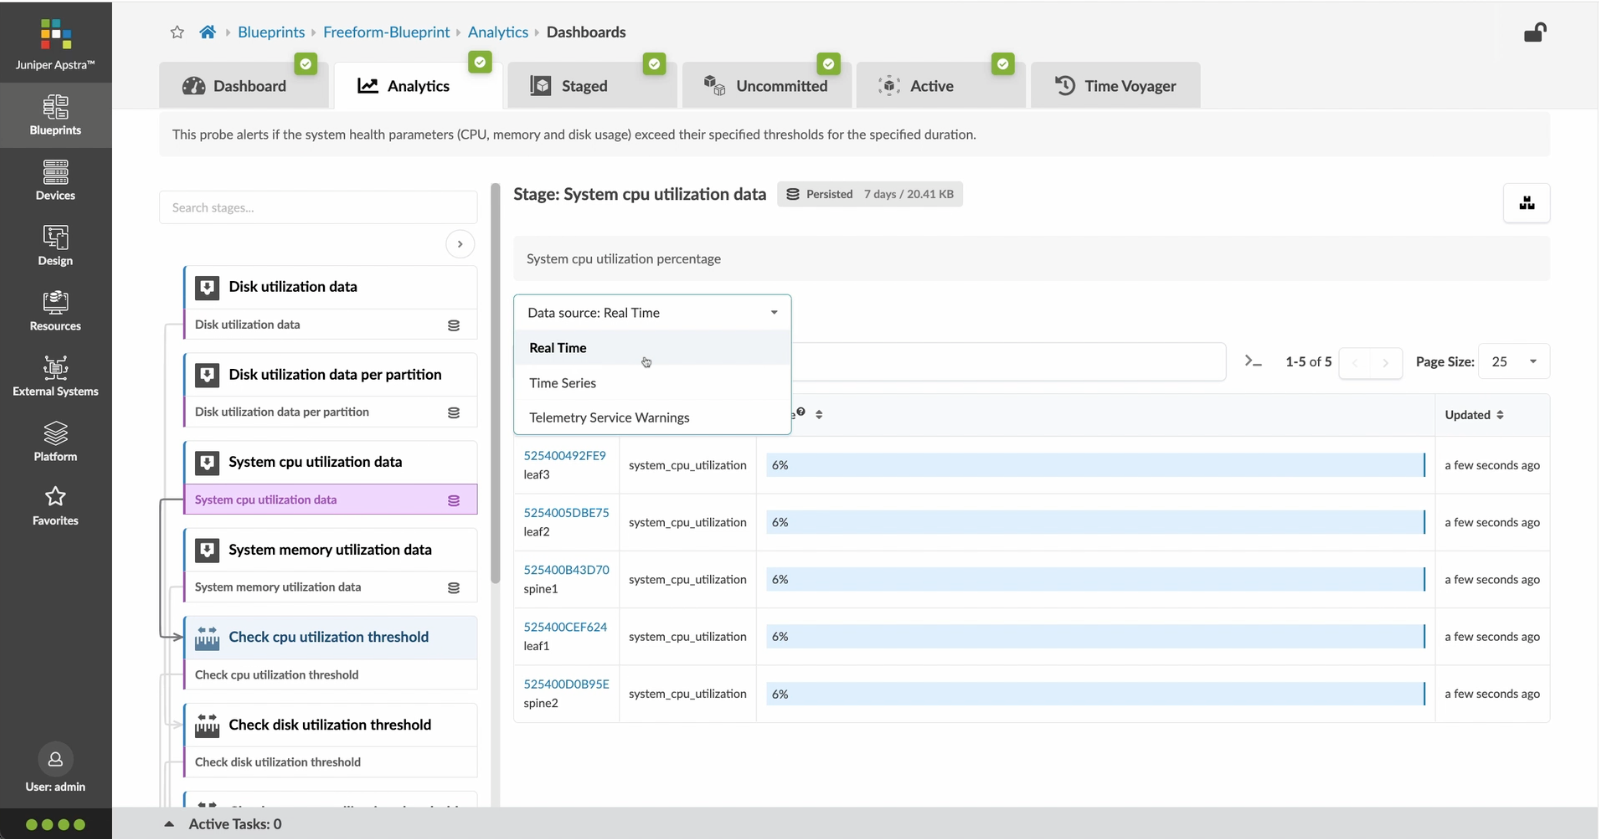